


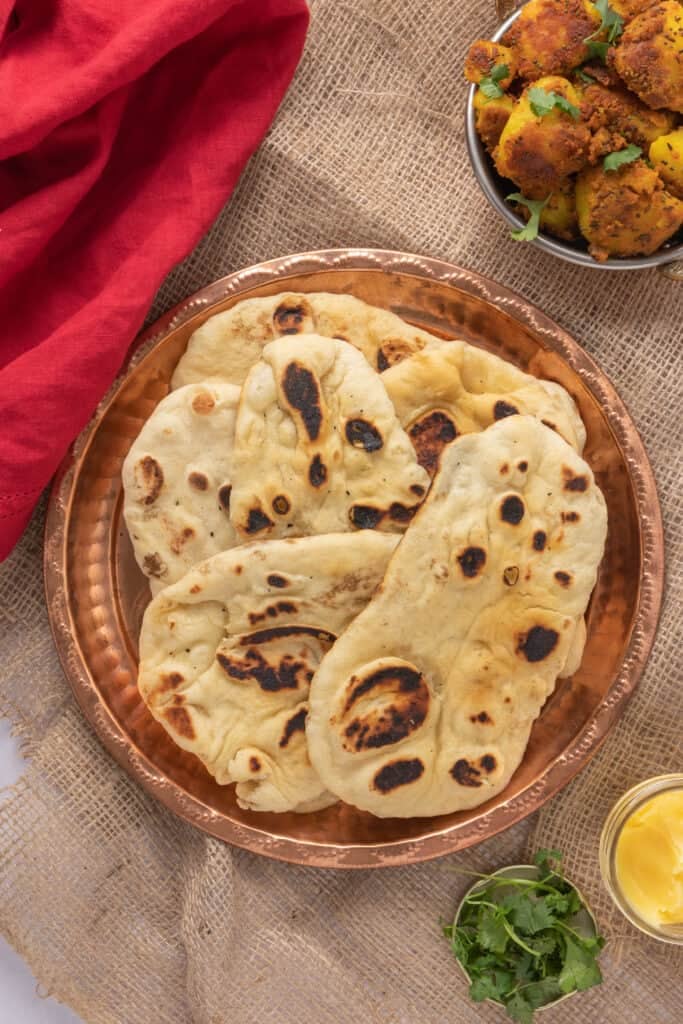
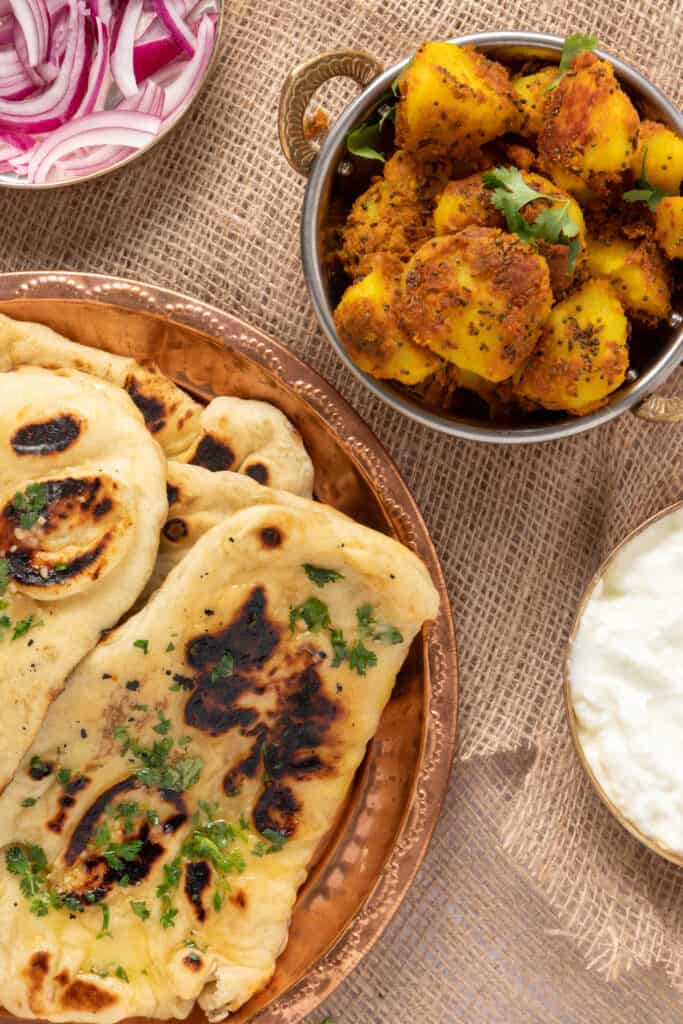
There's nothing better than homemade naan and a warm bowl of curry during Fall season. There are many variations for making this at home, but I wanted to share my easy but authentic, traditional naan recipe with all of you so you can make it at home as well!
This post contains helpful tips and tricks! If you're in a rush, please use the "Jump to Recipe" below!
📖 What is naan?
Naan is a traditional Indian flatbread that is baked inside a "tandoor" oven. Tandoors are hot clay oven, that uses charcoal or wood fire to develop heat up to 900F. In fact, it's often stuck to the inside of the oven on the sides, which then creates air pockets and bakes them to fluffy perfection. Tandoori naan gets its name from that oven, as do many other curries.
What's the difference between naan and roti? Naan needs some type of yeast or fermentation (to rise). Rotis are typically made with whole wheat flour (atta) and don't need to rise. So they're not fluffy but just as easy to make.
What's the difference between naan and pita? Pita is close to naan but doesn't use enriched ingredients - just flour, water, yeast and salt!
💭 Why you'll love this recipe
This easy recipe ensures fluffy delight, but I bet you'll love it for more than that.
- Authentic, traditional recipe: This is how my mom makes naan at home. So you know it's a time-tested recipe that's withstood several intercontinental moves.
- Uses cast iron to replicate traditional tandoors: I use a cast iron skillet to get the same char that you get from a traditional Indian "tandoor" or brick oven, but without the fuss.
- Freezes easy, comes together in 90 minutes: It's super easy to make the dough ahead of time and freeze it, and it just takes 30 minutes of active time to make the naan
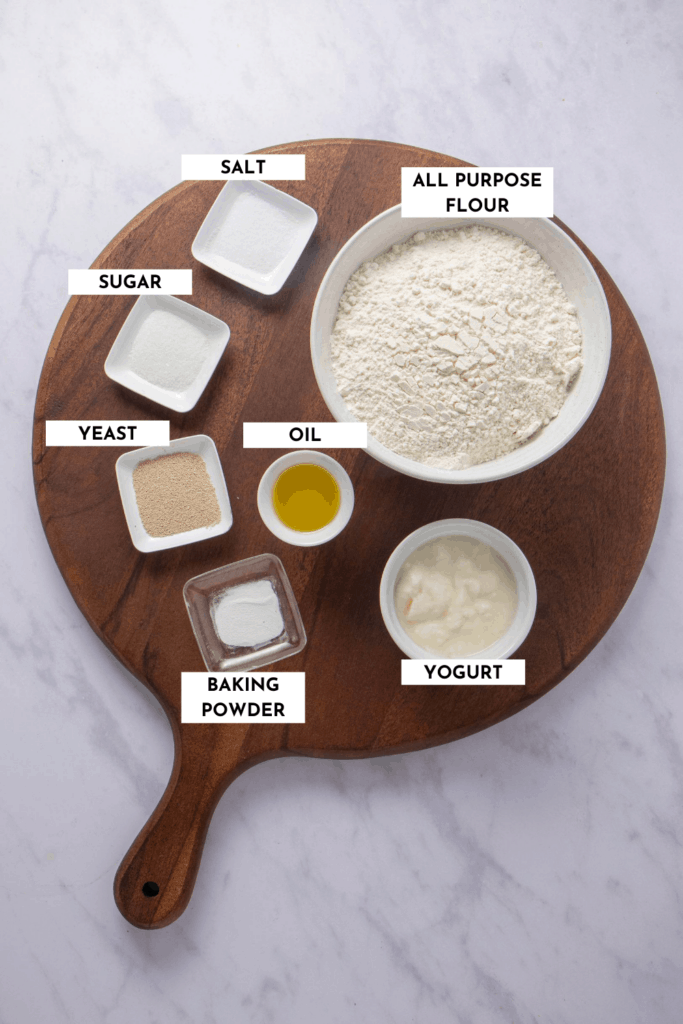
📋 Ingredients & variations
There are so many different ways in which you can make traditional naan at home. My recipe uses flour, yogurt, and active yeast.
So, here are a few variations you might find helpful if you're following a certain diet, or don't have access to some ingredients.
- Naan without yogurt: Just take some milk, add lemon juice or apple cider vinegar. This forms buttermilk you can use in lieu of yogurt.
- Vegan naan: Replace yogurt with vegan yogurt, and you are all set
- Gluten free naan: Replace all purpose flour with self-rising gluten free flour and forget about yeast. I've tested naan recipes with other gluten-free flour and haven't been too happy. If you have a different gluten-free method, hit me up in the comments!
- Vegan and gluten free naan: Replace all purpose flour with gluten-free self-rising flour. Then use a vegan yogurt instead of traditional yogurt.
- Whole wheat naan: I have good luck with using whole wheat flour to make naan as well. Friends also recommend using spelt flour and whole wheat flour together.
🥘 Step-by-step instructions
These are the instructions for my base naan recipe, that uses all purpose flour, plain Greek yogurt and yeast. Where possible, I've noted substitutions for some of the other variants. You'll activate the yeast, prepare and portion the dough and cook it on a cast iron skillet.
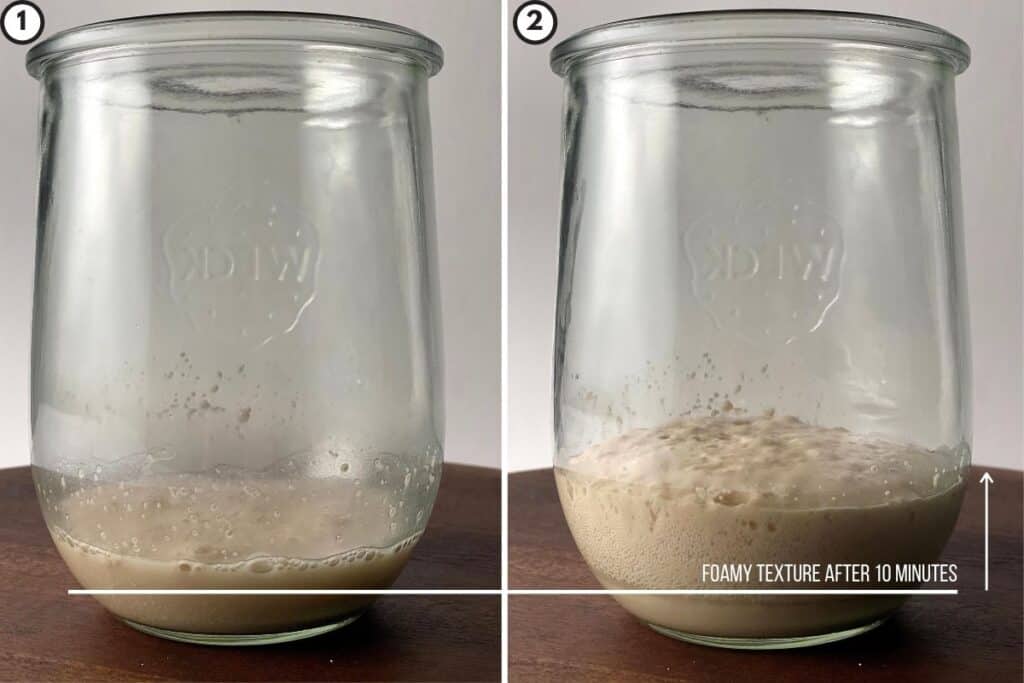
Activate the yeast
Add warm water, sugar and yeast to a bowl and mix well together. Let it sit for 10 minutes for the yeast to do its thing. When it starts to look frothy, you can proceed to the next step. If you're not using yeast, skip this step and add some baking soda directly to the next step.
Prepare the dough
In a bowl, add all purpose flour, the yeast mixture, salt, and yogurt and mix with a wooden spoon so it all comes together. If you're not using yogurt, mix coconut milk with some vinegar and let it rest for 10 minutes before using that in place in yogurt.
Note: the dough will be sticky but it should still come together and form a ball. Don't overwork the dough. Cover it with a damp towel or cloth and let it rest for about an hour.

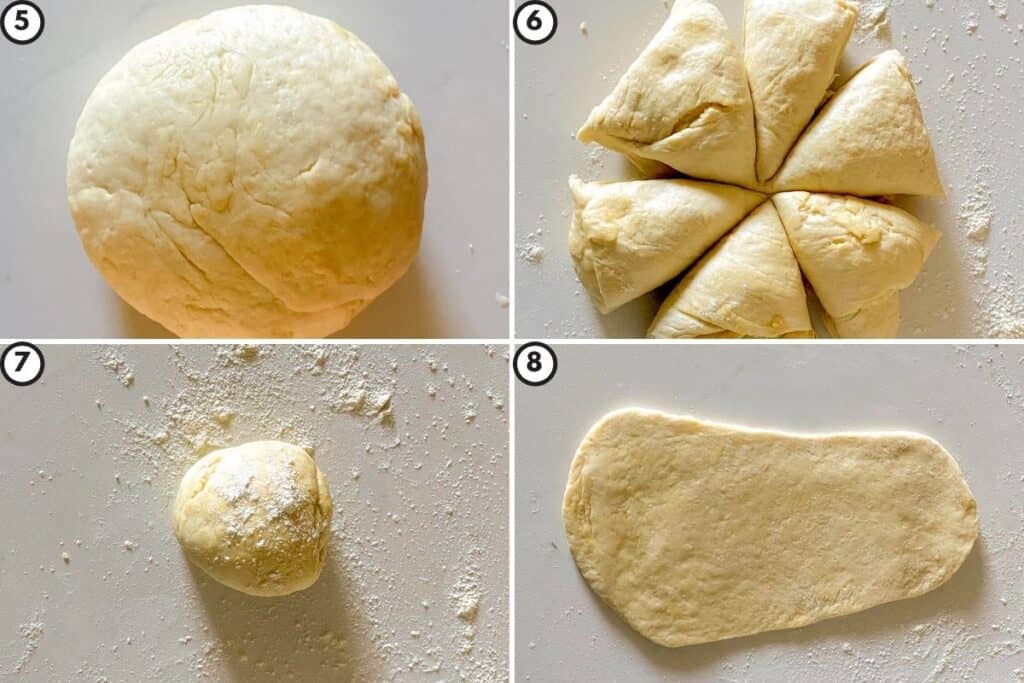
Portion and roll
After an hour (and up to four hour later) - once your dough has increased significantly in size, you can punch out the air and shape the dough back into a ball on your counter. Don't knead the dough, however! Just roll it back and forth until it takes shape.
Now, portion the dough into six chunks - roughly the size of a lemon each. If you want, you can also roll the dough into a cylinder and portion them that way. Place each of the dough balls in the same bowl, cover with a towel and get your cast iron skillet going. Letting the dough rest for about 10 minutes helps it regain some of the air pockets it lost.
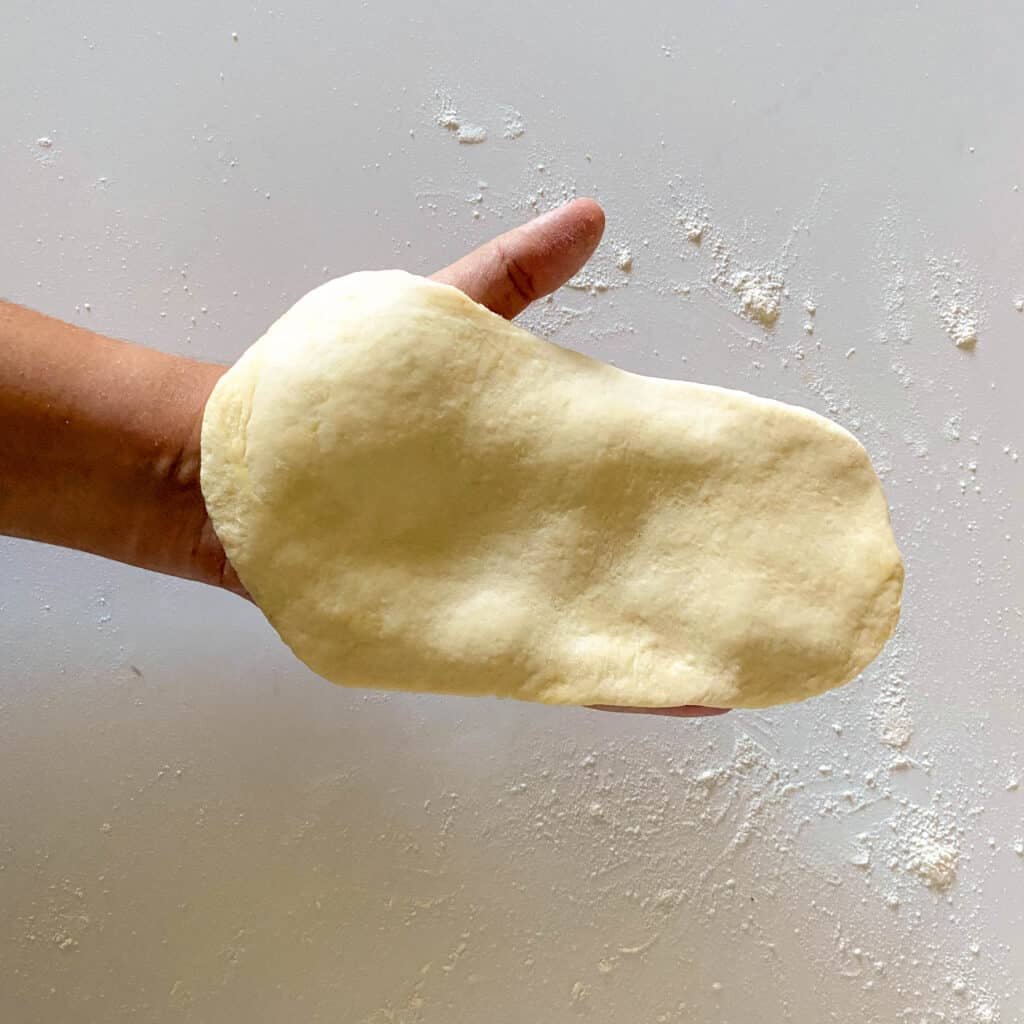
Once your cast iron is all set on the stove, flour your counter or working surface as well as your rolling pin (to prevent dough from sticking). Take one piece of dough and roll it into a roughly oval shape. I aim for ~¼ inch in terms of thickness (they'll puff up a bit when you put them on the skillet).
Note: Only roll one piece of dough at a time. This serves two reasons: one, it'll help keep the air pockets strong, which then leads to fluffy naan. Two, it gives enough time for the cast iron to reheat up between each naan as you're cooking it. Win-win!
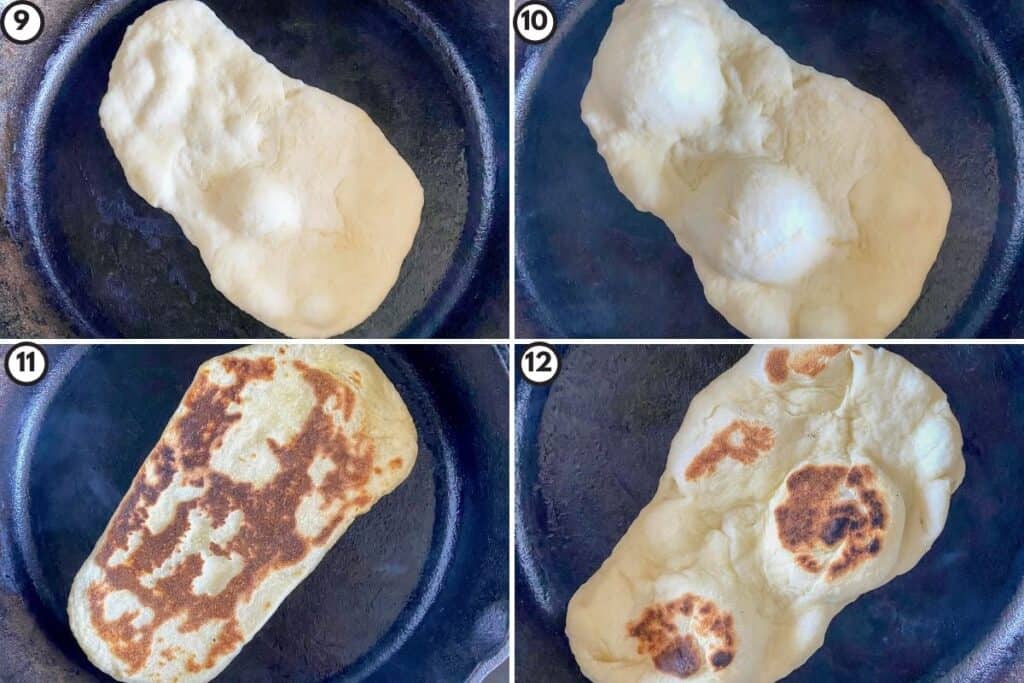
Cook the naan on a cast iron skillet
As I said in the precious step, before you start rolling the dough, I suggest you heat your cast iron skillet! This way, when you're done rolling the dough, it's hot and ready to go. If you're adding any seasoning (like garlic, sesame seeds etc.) press them into one side. Then, brush a bit of water on the other side of your dough (i.e. the one without seasoning). This will help it stick to the skillet and create steam, which in turn will help the naan puff up.
Place the side with the water down on the cast iron skillet. Wait for about five seconds (bubbles will start to appear on the upper side). Now, cover the skillet and cook for about 35 seconds. Then, flip the naan to the other side and cook for 30-45 seconds. Try to press down on the naan so all the sections cook evenly. You'll see small charred spots where the "bubbles" pressed down into the cast iron. This is the mark of a great naan!
Garnish and serve
I love to brush a bit of butter (with some minced garlic) on my naan. You can also add some shredded cheese on top. Or you can add butter with chopped jalapenos to give it a spicy finish. The possibilities are endless.
👩🏽🍳Tips for fluffy homemade naan
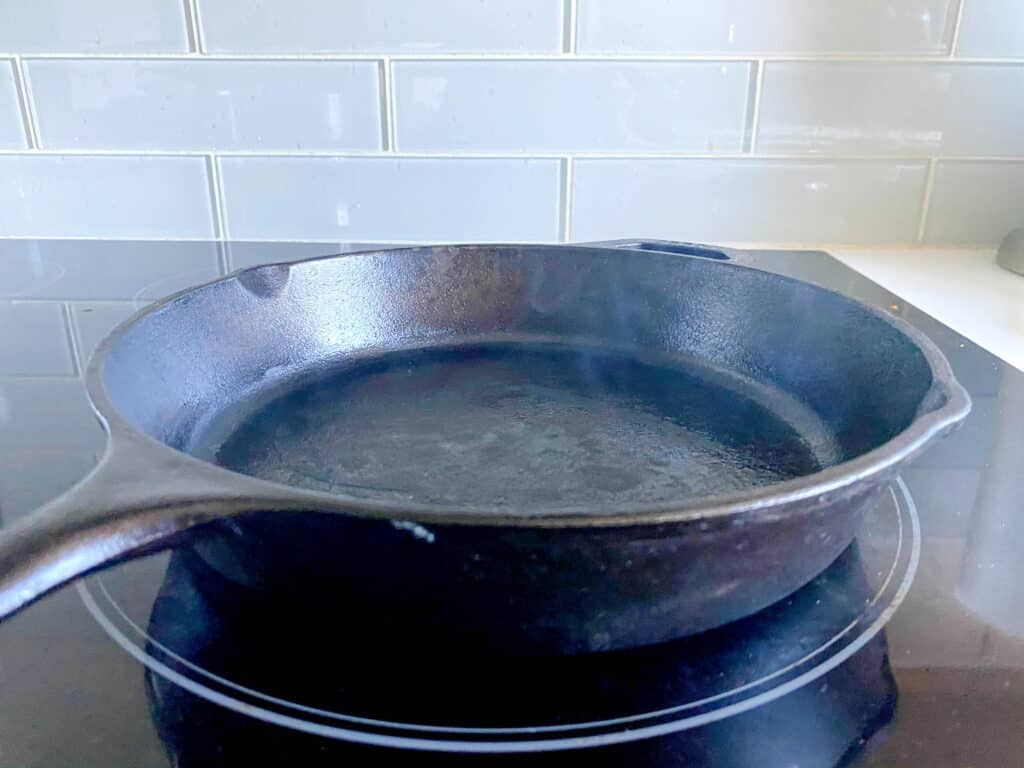
Use a HOT cast iron skillet (or pizza stone)
Most of us don't have the luxury of a tandoor oven at home (I'm extremely jealous if you have one of those!) Unless you have an outdoor brick pizza oven, the next best alternative is an extremely hot cast iron skillet. I've tried making naan in a standard skillet, on stove-top and an in an oven and nothing has come close to the texture from a cast iron skillet.
You can still cook on medium heat but just wait until the skillet is super hot. Then, allow for a minute between each naan to let the skillet heat up to the ideal amount (this is also one of the reasons I recommend rolling out the naan one at a time).
If you don't have a cast iron skillet, or want to use an oven. Preheat your oven to 450F, and throw a pizza stone (preferably cast iron here too) in there. Then, you'll just need to cook the naan for 2-3 minutes once the stone is hot enough.
Roll the dough one at a time, right before you put it on the skillet
There are two important tips for rolling the dough - you want it not too thin, and not too thick, and you should roll it right before you place it on the skillet. The reason? When you let the dough rise, it forms a bunch of air pockets. When you roll dough right before you cook it, you don't lose as many of the air pockets.
The other important thing to note here is to not overwork the dough! The fluffiness of the naan is driven by the air pockets inside, so the more you "roll" the dough, the less fluffy your naan will be. My suggestion is to gently pat down the dough and then use a roller to roll it once horizontally, and then roll it once vertically.
🥗 Storage, toppings and serving suggestions
Storage & reheating:
You can leave homemade naan out on the counter for a day or two and still be fine. However, if you have leftovers and you want to have them in the next week, you can place them in an airtight bag or container and place them in the fridge. I strongly caution against putting the dough in the fridge - it tends to get ultra sticky and it'll take a decent bit of effort to rework the dough into a usable form after that.
If you want to freeze them, just portion and place them in an airtight container and throw them in the freezer. They're good for at least 3 months. To reheat, I suggest sprinkling a TINY bit of water on the surface - then you can microwave it, or warm them on any pan. If you're reheating frozen naan, make sure to let them thaw to room temperature first. To keep naan warm for a party, I suggest placing them in an oven at 200F.
Homemade naan topping suggestions:
- Garlic naan: This is one of the most common types of naan. To make this, you can press minced garlic into the dough when you're rolling it, or you can mix some minced garlic into butter, and brush the naan with garlic butter once cooked.
- Butter naan: This is the simplest type of naan (and what's often served in Indian restaurants). Just brush your cooked naan with some butter, vegan butter, or ghee.
- Cheese naan: This is a favorite in our household. You can do this one of two ways. You can either mix in a sharp shredded cheese with the butter and brush it on the naan once cooked. Or for something decadent, you can stuff naan with cheese before you roll it. To do this, take the dough ball, press into a flat shape on your palm. Place cheese in the middle and roll it back up. Then roll the dough normally.
- Spicy, chili naan: Two ways to do this. You can either add some pepper flakes into your butter and brush cooked naan with this. Alternatively, you can add some chili flakes into the dough before you roll it out. For a fresher alternative, finely chop jalapenos and add those to the dough instead. For the ultimate loaded naan, do both this and the cheese stuffing and never want for anything else again.
Serving suggestions:
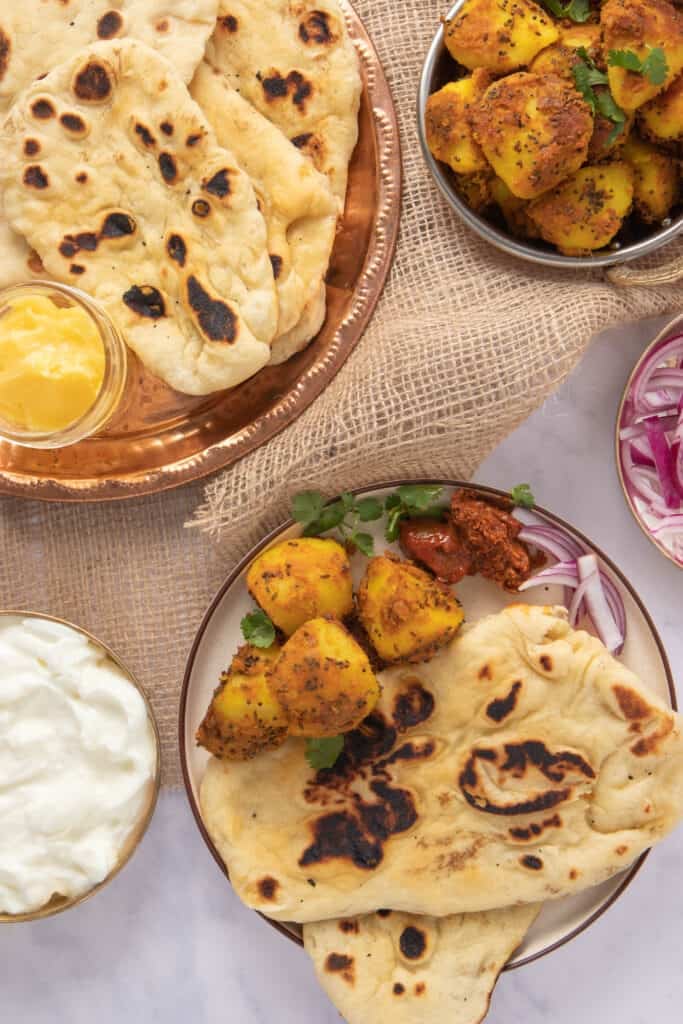
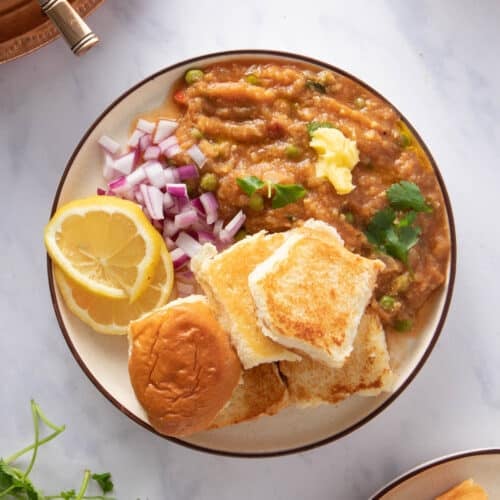
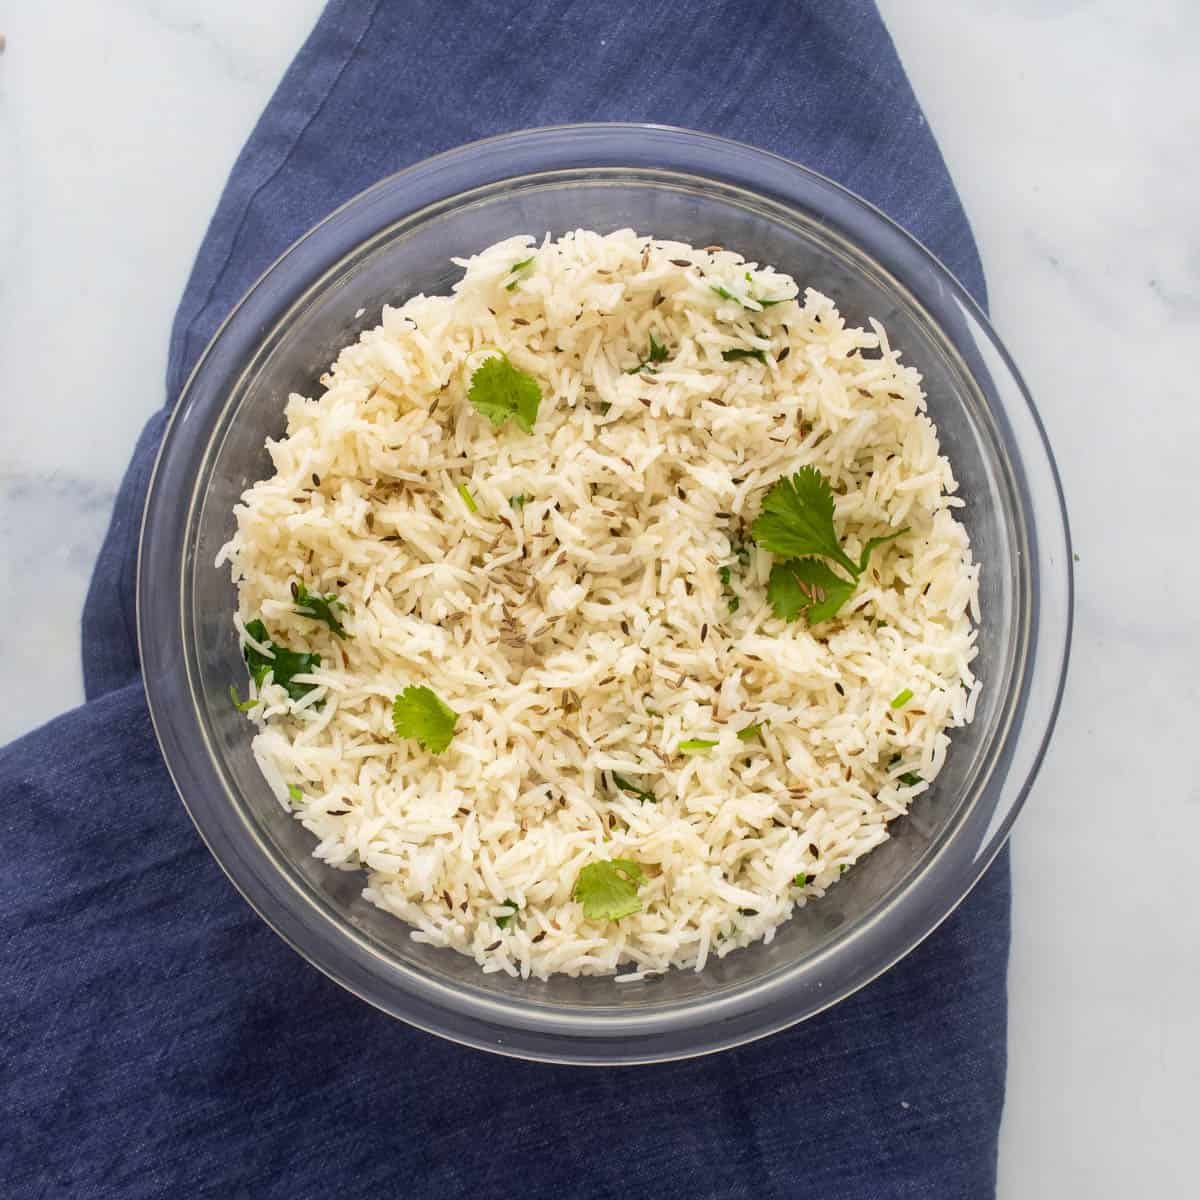
- Indian curry: The traditional route is to use the naan as a perfect, fluffy vessel for scooping up any type of Indian curry, whether that's a quick chana masala, a protein-packed lentil curry, aka dal tadka or a creamy vegan korma
- Flatbread pizza: Okay, once you have the naan you can literally load it up with anything you'd put on a flatbread - like, tons of mozzarella and delicious cherry tomatoes. Or just a whole bunch of cheese so you can make a grilled cheese naan flatbread. In the summer, I love making fresh basil pesto (or in the winter, kale pesto) and slathering that on naan along with some sauteed mushrooms and Parmesan for a great weekday lunch.
- Taco Tuesday: Make my favorite gochujang cauliflower tacos or just pop some of these delicious, crispy baked avocado fries to make a taco, but use naan instead of the regular taco shell. Game. Changing. If you're looking for a killer sauce to go with, mix it up with Indian raita!
For more Indian recipes check out the following:


If you tried this recipe, don't forget to comment and rate! ⭐⭐⭐⭐⭐
📖 Recipe

Homemade Naan
Ingredients
Yeast
- 2 teaspoon sugar, granulated
- 1 teaspoon active dry yeast, can substitute with instant yeast (check post if you don't have yeast)
- ¾ cup warm water, closer to lukewarm - not boiling!
Naan
- 2 cup all purpose flour, plus extra for dusting
- ¼ cup plain yogurt, unsweetened and unflavored
- 1 teaspoon salt, adjust to taste
- 2 tbsp olive oil, substitute with vegetable oil if easier
- ⅛ teaspoon baking powder
Instructions
- Add sugar, warm water and yeast together and mix well - then let it sit in a warm place for about 10 minutes until it becomes frothy
- Add salt and baking powder to the flour and give it a good whisk.
- Add yogurt and oil to the yeast mixture, mix with a fork first and then pour into the flour. Use your hands or a food processor to mix them together until they form a soft and pliable dough - this will feel a bit sticky but should form into a nice round ball (don't over work it!)
- Oil a mixing bowl at least 2x as large as the dough ball, place the dough inside and cover with a damp towel or plastic wrap. Let it sit in a warm(ish) location (for instance, next to a stove or oven) and rise for at least an hour (it should roughly double in size).Note: You can leave this out for up to 4 hours for even fluffier naan - the longer you leave it out, the softer and fluffier your naan is. I try to leave it out longer if I have the time but an hour should be good enough!
- Once it's risen, divide the dough into 6 equal portions (roughly the size of a lemon)
- Heat cast iron skillet on medium-high heat and get it really warm while you roll the first piece of naan (almost near smoking) - that's a good sign it's hot enough.
- Dust the ball with some flour, and roll the dough into a flatbread shape (roughly ¼" thick). It's tempting to roll all of them at once, but a key part of this recipe is to roll them one at a time (see post for details on why). You don't want to over-roll the naan either - essentially one or two good rolls on either direction should be sufficient. Note: The dough will be somewhat sticky but should still roll out into a nice long shape. If you have trouble with your rolling pin sticking to the dough, dust the pin and the dough ball with some more flour.
- Pat out any excess flour from the rolled out dough. If adding seasoning like garlic or sesame, press them into one side (using your hand). Brush the non-seasoning side with a thin film of water.
- Place the watered side of the naan on the cast iron skillet. Let it cook for about 5 seconds. You'll start seeing small bubbles appearing on the surface. Cover the cast iron skillet with a lid and cook for 45 seconds. Then, flip the naan and cook for another 45 seconds (covered) - once you remove the naan, it should have small bursts of black spots where the air bubbles used to be. This is a mark of a great naan!
- Brush with a thin layer of butter or even butter mixed with some garlic and cilantro (optional) and serve hot!
Notes
- Instant yeast vs. active yeast: If you want to use instant yeast, instead of mixing it with the water and the sugar, you can just add it straight to the dough instead - rest of the steps are the same!
- For yeast-free naan: you can use self-raising flour and yogurt. Alternatively, add 1 teaspoon of baking powder and ½ teaspoon of baking soda into the flour instead of using any yeast mixture - follow the rest of the steps as is! I'm working on a yeast free naan recipe for more detailed instructions, stay tuned.
- For vegan naan: I prefer using vegan yogurt, and I've found it works well!
- For gluten-free naan: use gluten-free flour. For a gluten-free and yeast-free version, use gluten-free self raising flour and Greek yogurt.
- If you're in a colder location, I recommend turning the oven to "keep warm" or set to 200F and let it warm about 2 minutes. Then turn it off, turn on the oven light, and throw the dough in there.
- It's important to not roll the dough out all at once - this breaks down the air pockets and can result in not "fluffy" naan. Rolling the dough one at a time in between cooking also allows for the cast iron pan to heat up between them.
- If your naan starts blackening too quickly, reduce the heat to a medium and let it come down for a minute or two before adding the next one. Trial and error is a large part of making naan (and each person's cast iron is slightly different!) - they'll all taste good, but it might take a few attempts to get it to how you like it! Case in point, this recipe took 9 attempts to get it just perfect.
- Adding the water on one side helps create steam within the naan and as a result, more air pockets as the steam expands due to the heat.
Nutrition
Note: This recipe was originally published on August 23, 2020 and was updated on November 20, 2020 with additional tips and photos for easy instructions


This recipe was fast, super easy, and the naan are awesome!
This is the 4th naan recipe I've tried (including from well-known Indian chefs!) and it's the only one that gives a result of "restaurant-like" naan. The keys seem to be a really hot cast iron pan and the technique of putting some water on one side of the naan as it cooks with a lid on the pan. The tips are very helpful.
Thank you so much Linda! Glad it worked for you and that the tips were helpful!
Should i put it on highest heat possible without burning?
Loved this recipe!! First time making naan from scratch and it will not be the last! 🙂 delicious
Thanks so much, Alice!
Thank you so much for the recipe
Always wanted to try it out but didn't have the courage.
Now I am more positive to make it again and again
Thank you so much, Fatima! I'm so glad you can enjoy this homemade naan as much as I do! Please don't hesitate to reach out if you have any questions!
First time making my own naan and it was simple, easy to follow and most important tasty as hell!
I love naan bread and can't wait to try your recipe. It is so good for sopping up all the sauces from delicious dinners and I love how delicious this naan looks. Thanks for sharing!
Is your cup uk or us cup?
US cup! And yes, initially to heat up the cast iron, use the highest setting, but then once you're cooking the naan, you can turn it down to medium heat.
I had no idea it was this easy to make. I can't wait to try this!
I always wanted to learn how to make naan bread at home, and I now feel confident with your detailed recipe. The bread sounds delicious and seems easy enough to make too.
I've always wanted to make my own naan -- thanks for breaking it down to make it easy!!