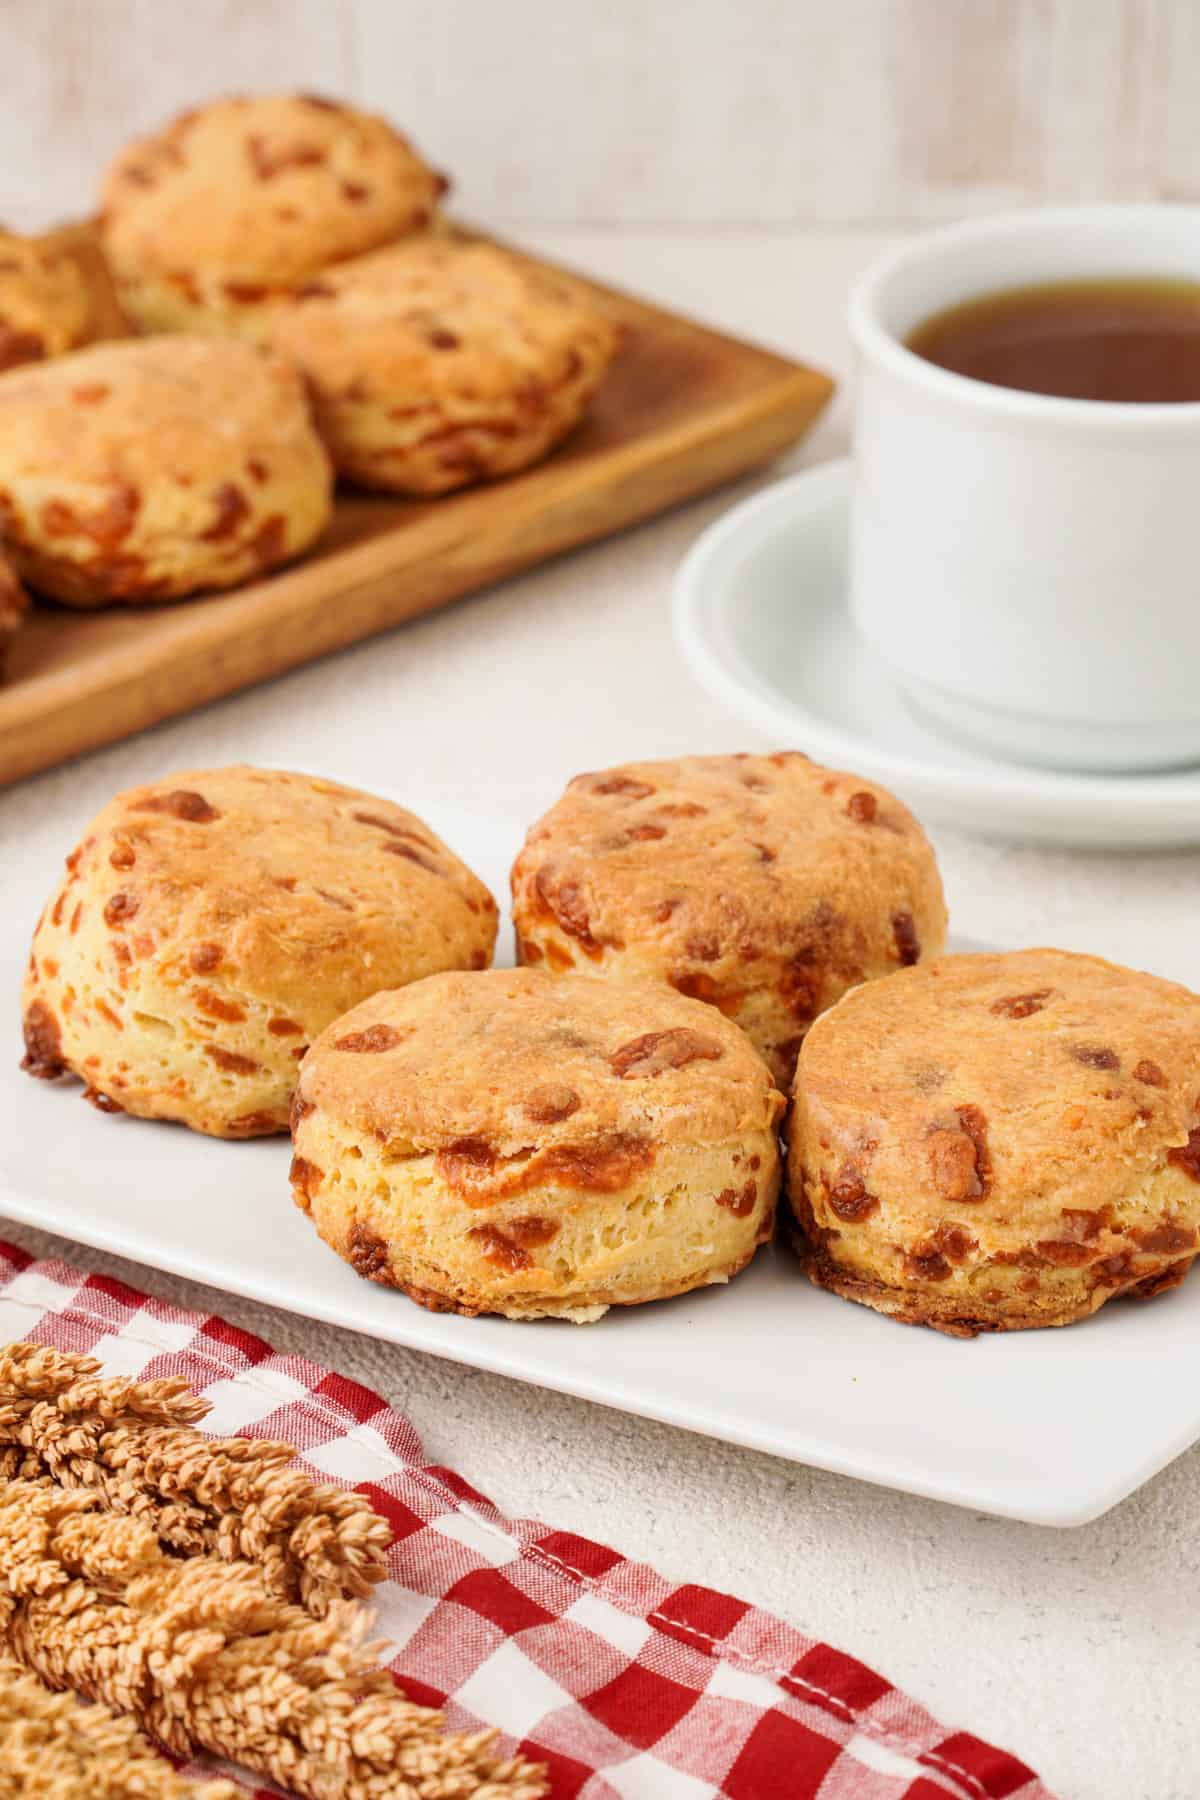
In our third-culture family, these homemade flaky buttermilk cheddar cheese biscuits have a prominent seat at the Thanksgiving table; they’re right there with any cookout for Labor Day! This recipe will help you can make these ultra flaky, cheesy, skillet biscuits from scratch with little effort.
This post contains helpful tips and tricks! If you’re in a rush, please use the “Jump to Recipe” above!
💭 Why you’ll love this recipe
Where do I even start?!
- Ready in 45 minutes: Start to finish, this recipe has been tested so many times to make sure you have a hot batch of biscuits in under an hour.
- Great for make ahead: The biscuits and the dough freeze easily. So, it makes for a great make-ahead side for any family gathering or dinner party!
- Ultra, ultra flaky and easy bake recipe: I call these biscuits the “Leaning Tower of Biscuits” because they get so tall and flaky! Delicious!
📋 Ingredients and notes
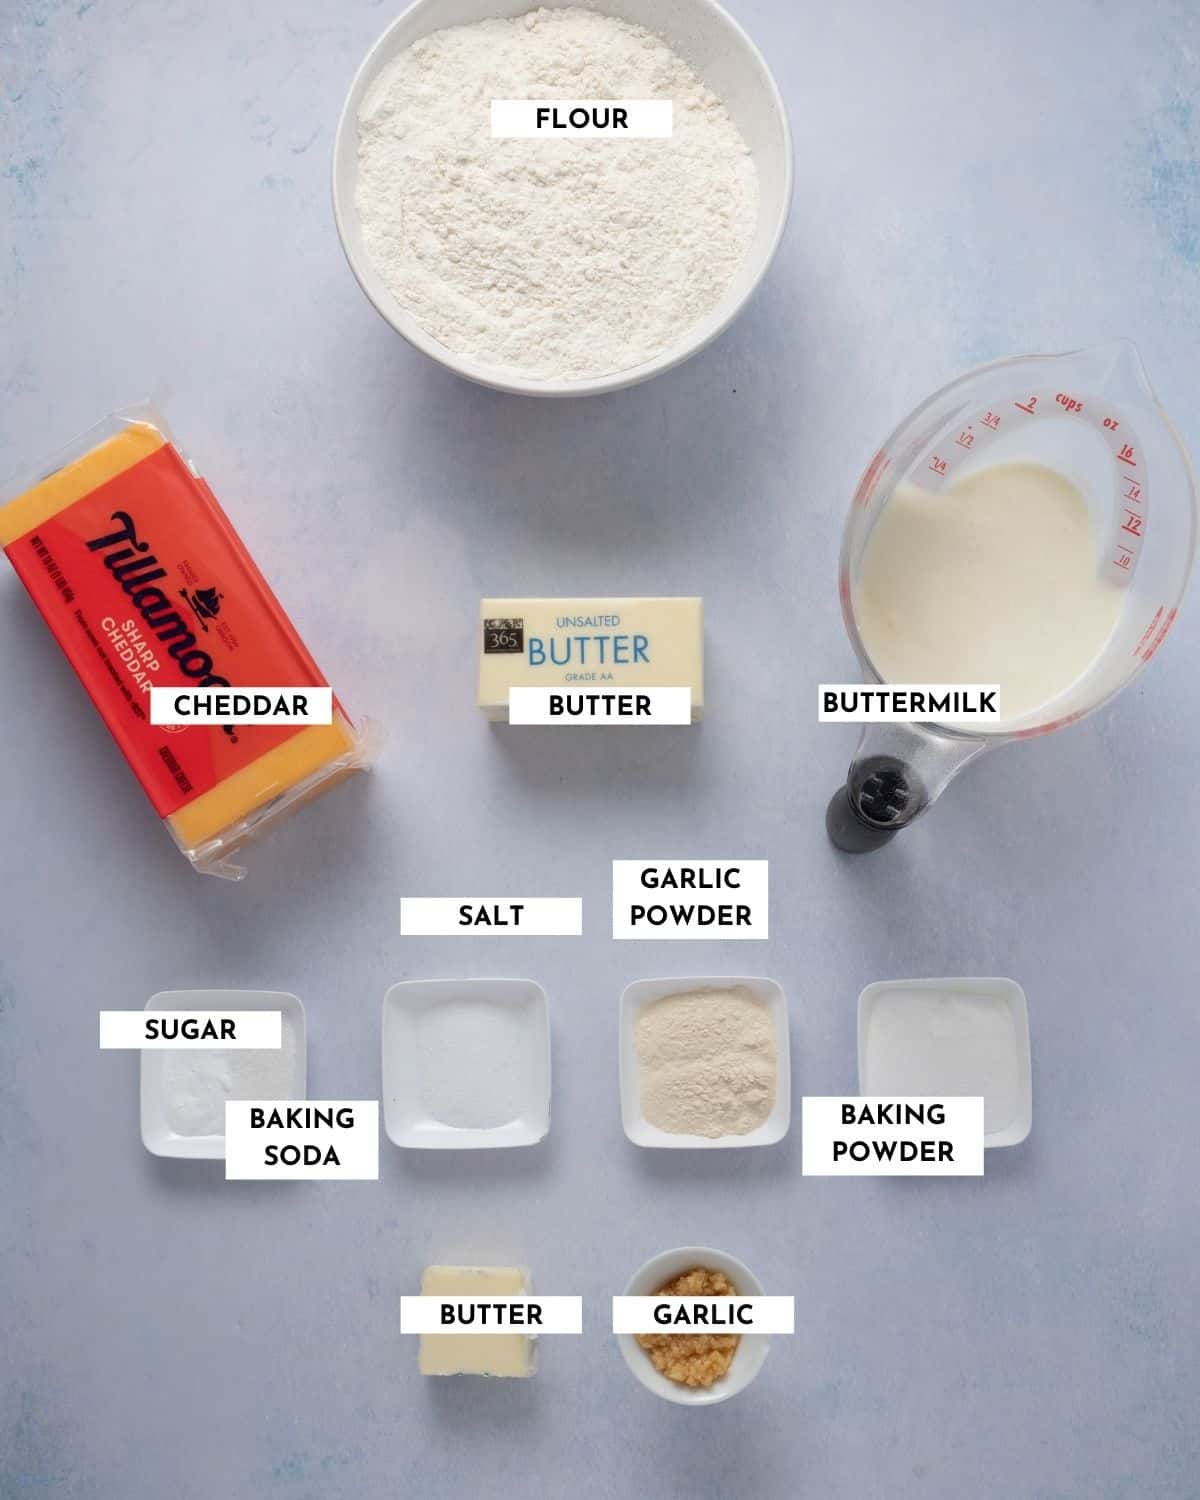
You’ll need all purpose flour, unsalted butter, sugar, baking powder, garlic powder, buttermilk, salt, and shredded cheddar cheese. For topping, I use butter, and minced garlic. This recipe can be made in a cast iron skillet (which browns the bottom really nicely) or in a regular baking sheet. The buttermilk acts as the binding agent.
Notes and substitutions
- Buttermilk: I love to use whole fat buttermilk in this recipe because it provides a nice tangy flavor. No buttermilk? No problem. You can substitute whole milk or curdle milk with lemon juice or vinegar. To do this, add 2 teaspoons of lemon juice to a cup of whole milk and let it sit at room temperature for 10 minutes.
- Cheddar: I like to use Tillamook sharp cheddar cheese in these biscuits (this is not a sponsored post, I just love that brand!) While packaged shredded cheddar works in a pinch, even if you use a different brand, try to get a wedge of fresh cheddar cheese and shred it yourself if possible. If you’re looking for other cheese types to use, Pepper Jack is a great option.
- Vegan: To make these vegan, I’d recommend subbing the buttermilk with soy milk (unsweetened), plant based butter (Country Crock is a great option), and vegan Violife cheese shreds.
👩🏽🍳Make perfect flaky cheddar cheese biscuits!
First off – don’t be afraid of trying this at home! I promise you, this recipe is SUPER simple and you don’t need to pull off any magic tricks. You’ll get your hands dirty, but it’s worth it! First, pop the butter into the freezer while you get the ingredients ready.
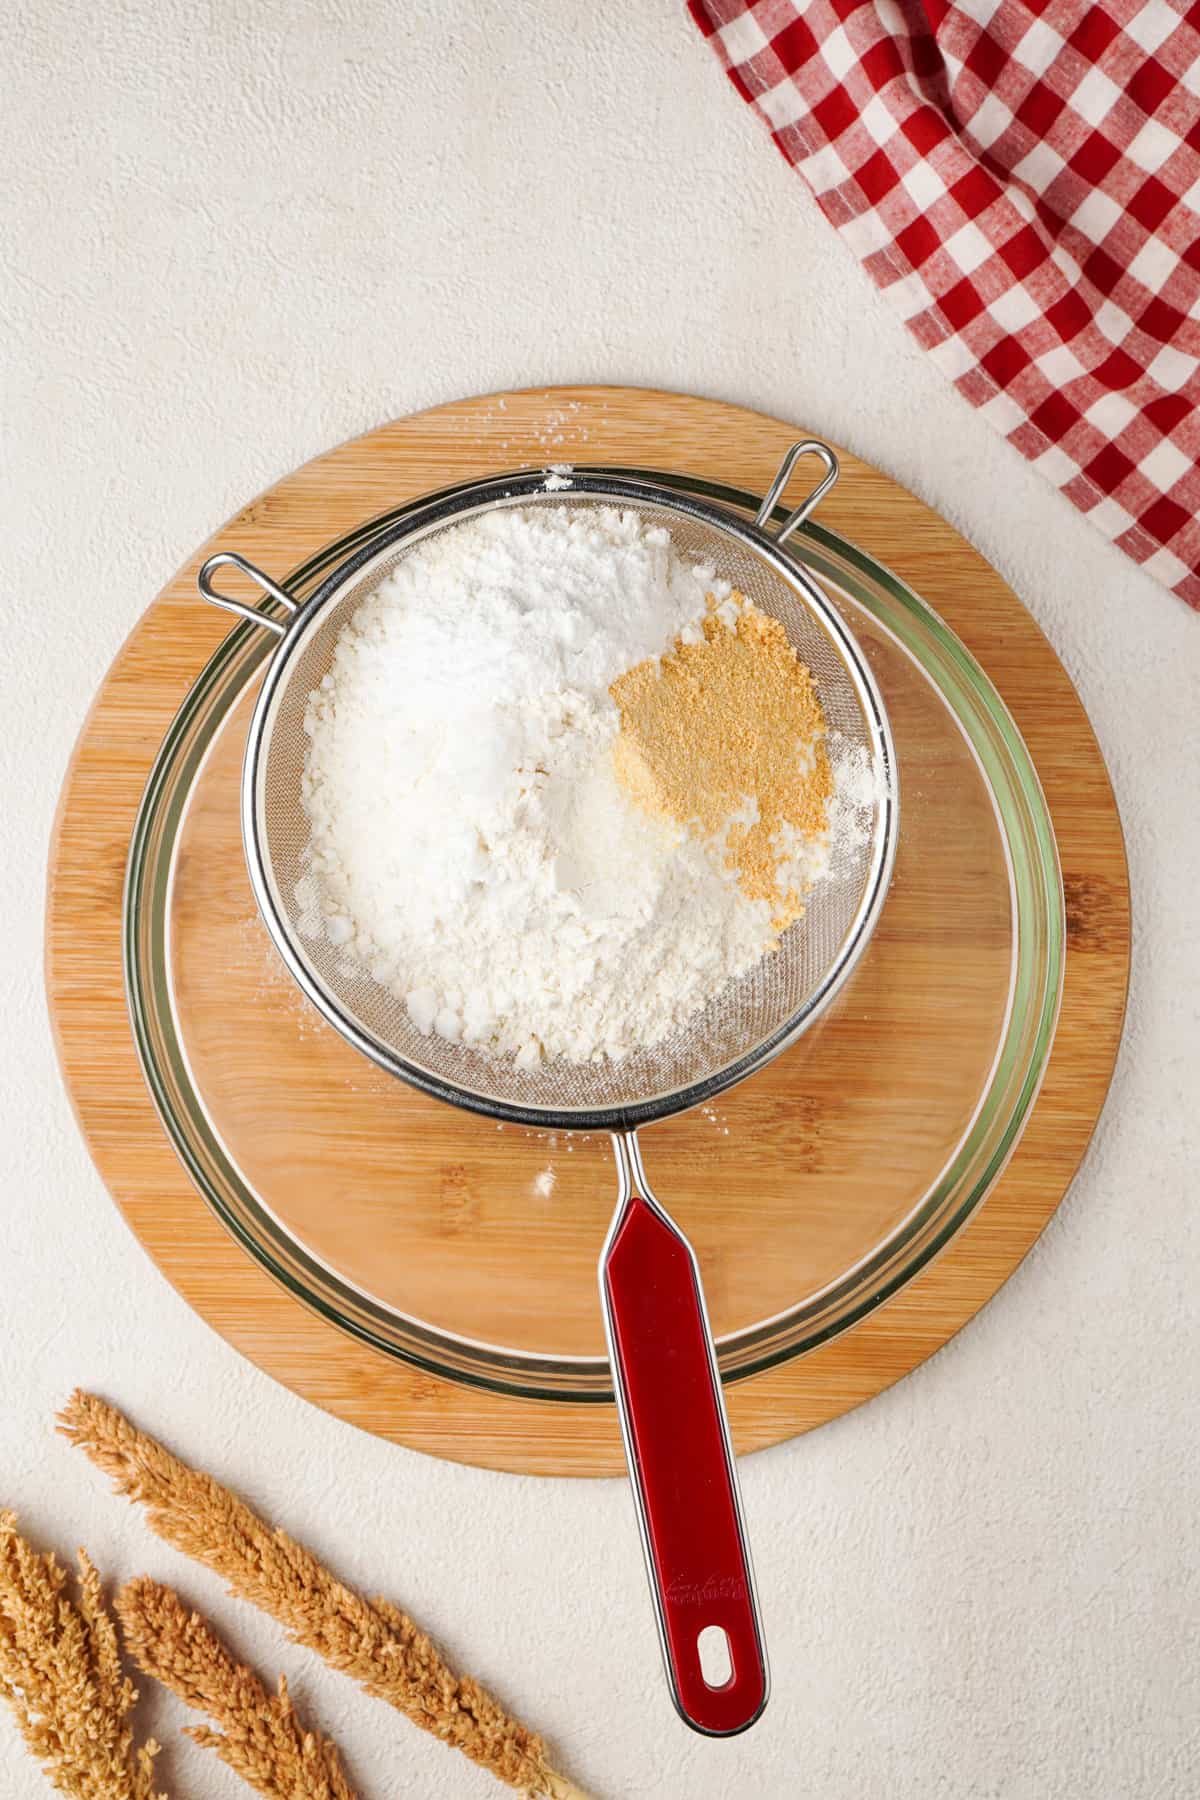
Sift dry ingredients together or use a whisk to aerate
I use a sieve to sift the dry ingredients (flour, baking powder and soda, salt, sugar and garlic powder) together. This ensures that all of the components are mixed well together, and aerates the flour and prevents clumping. If you don’t have a sieve, you can dump the dry ingredients and whisk them together!
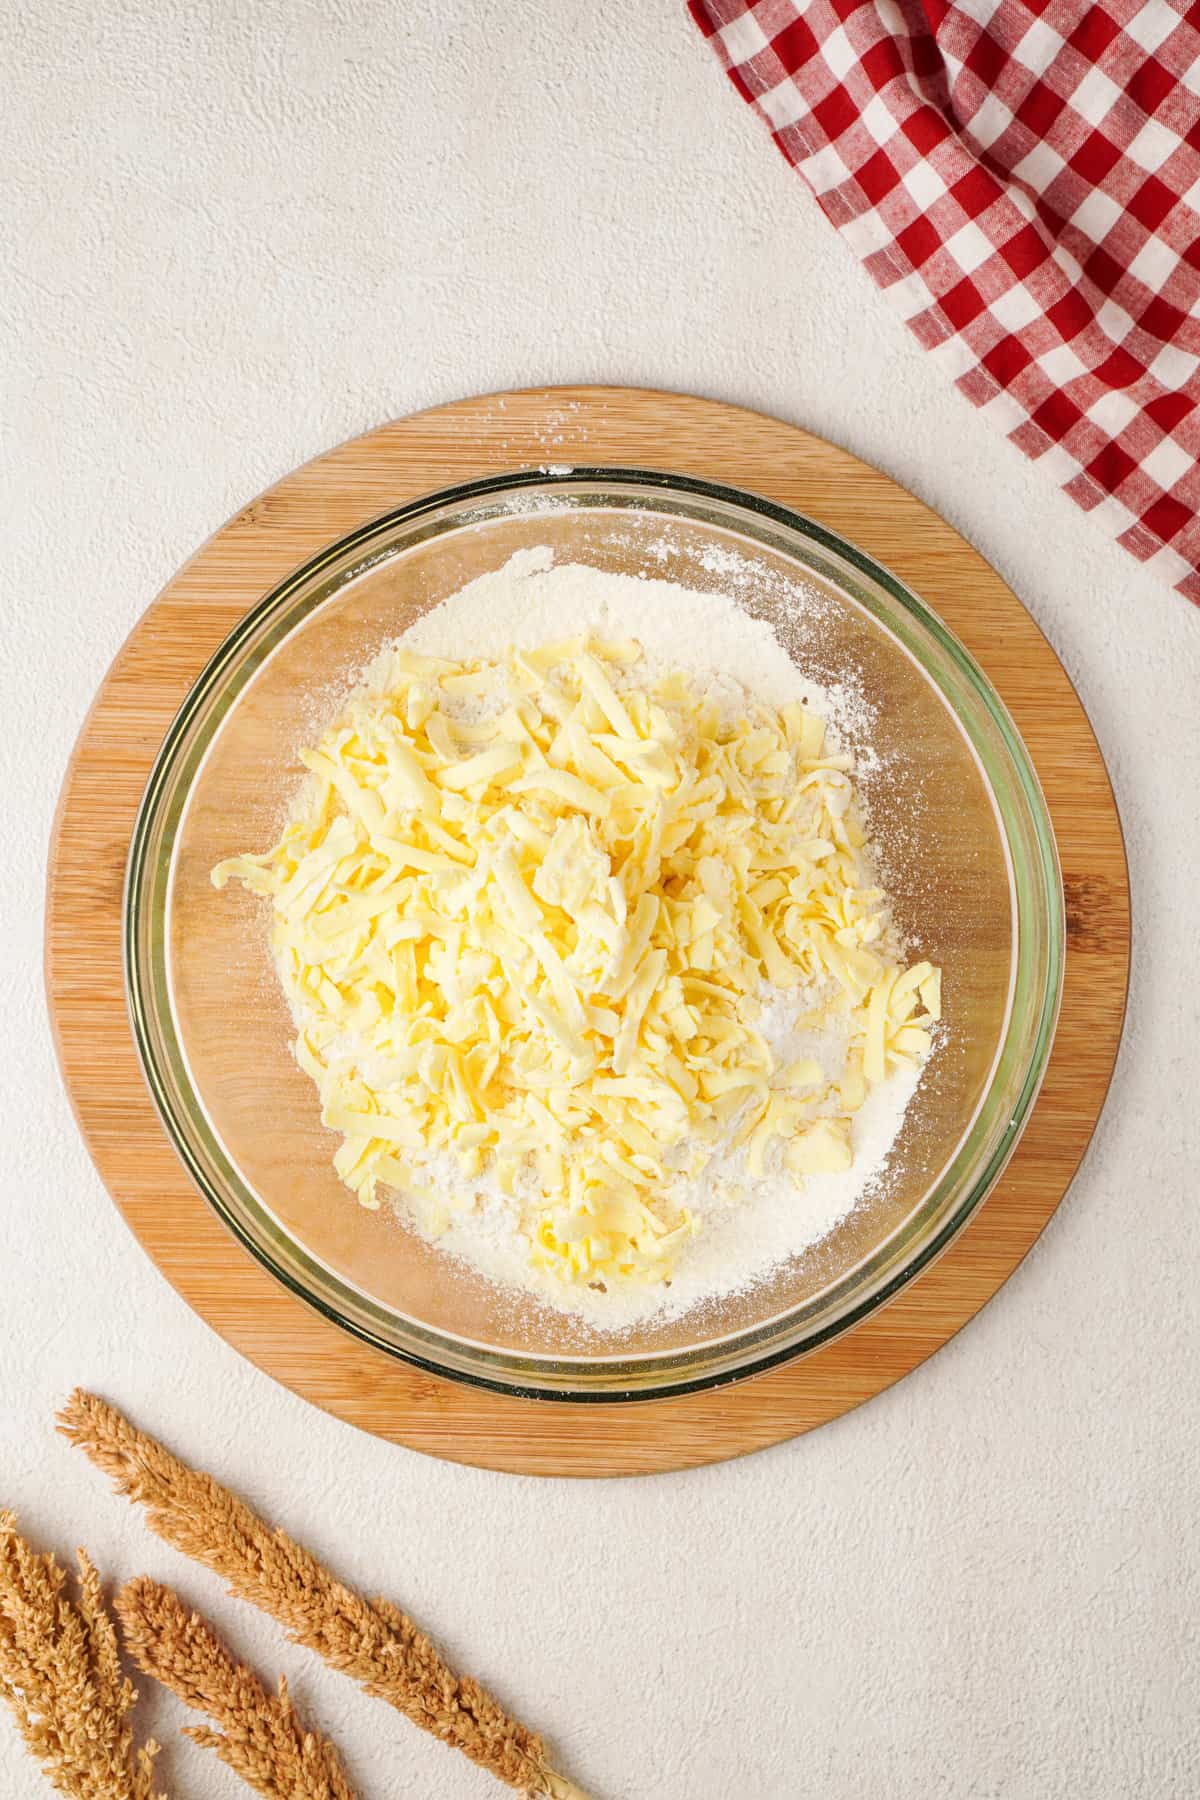
Shred cold butter and fold into the dry ingredients
I recommend using a box grater to shred the butter. To prevent the butter melting or sticking when you do this, just dust the sides of the box grater with some flour and then drop the stick of butter into some flour before grating to avoid it melting from the heat of your hands. This works like a charm.

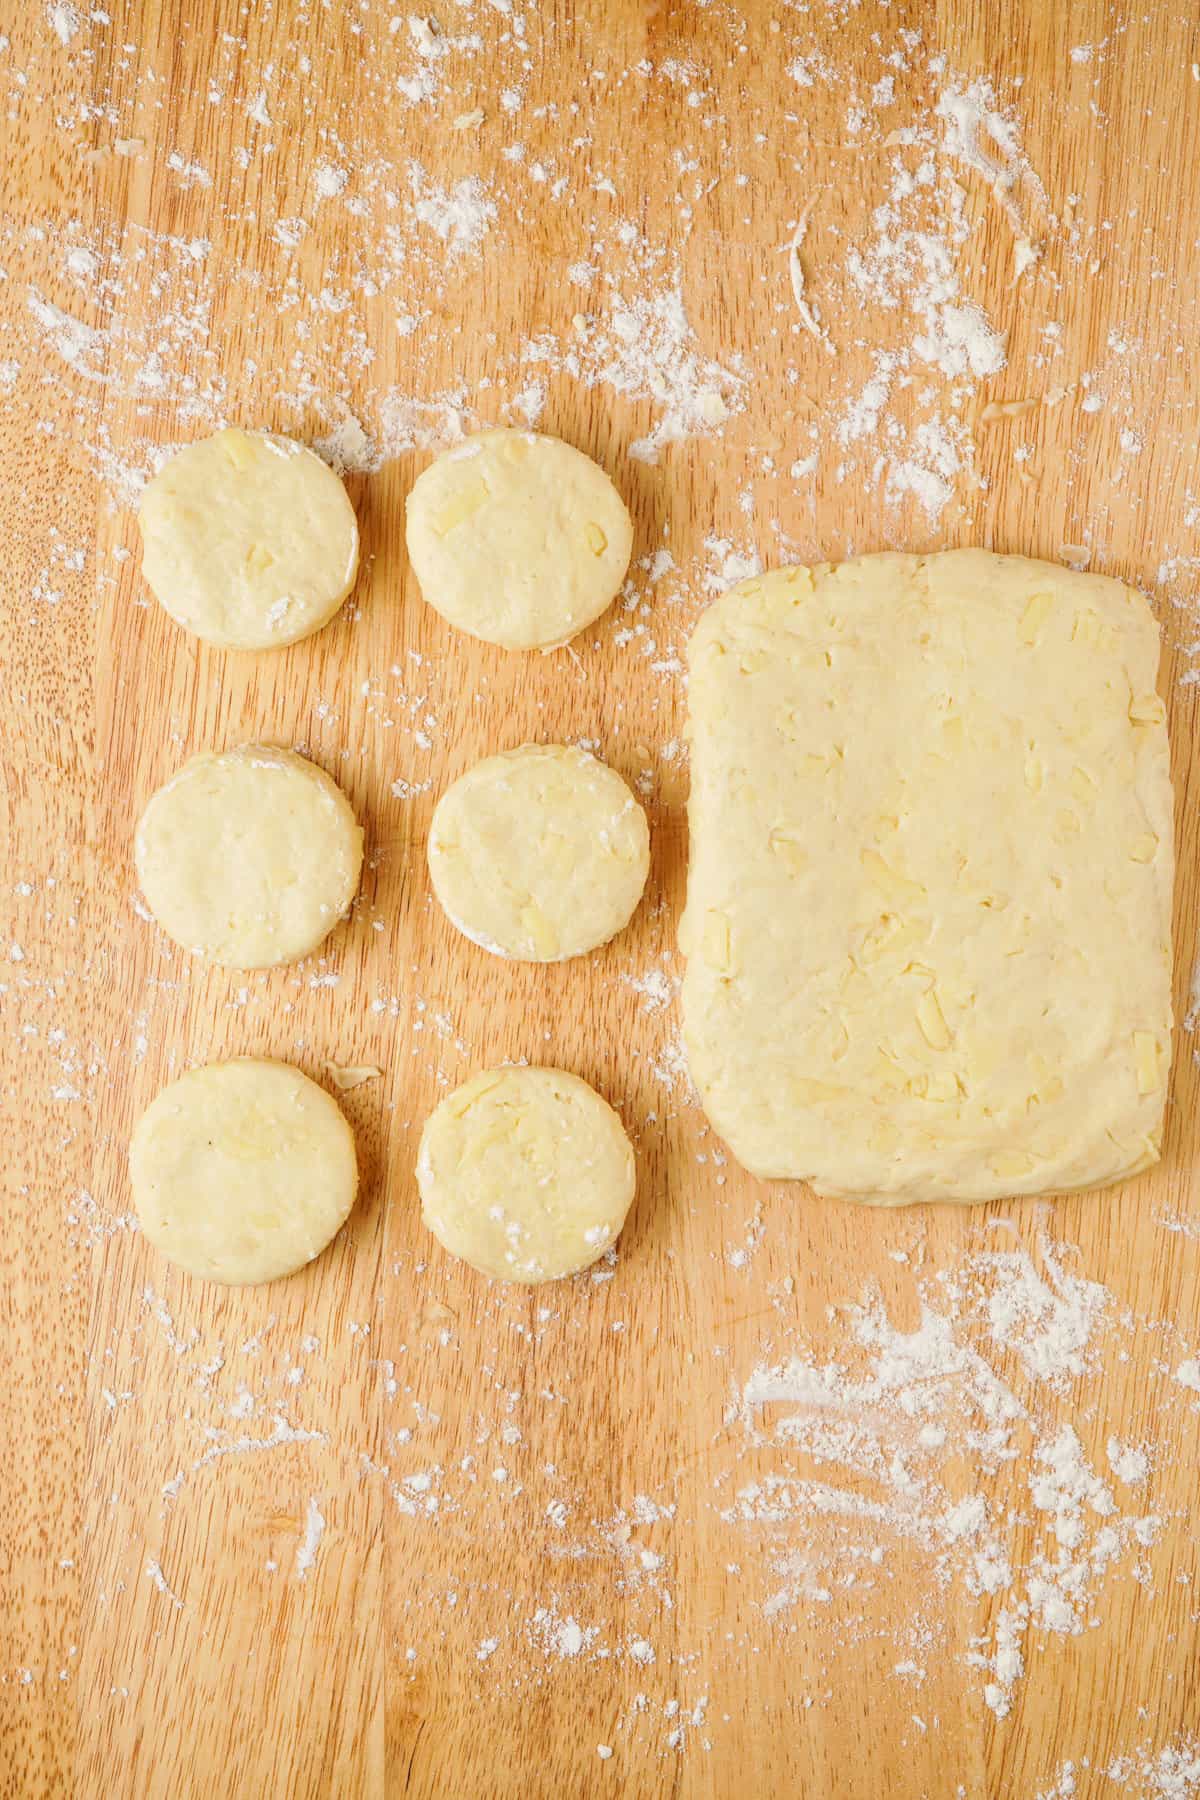
Make dough and layer it on a well-floured surface
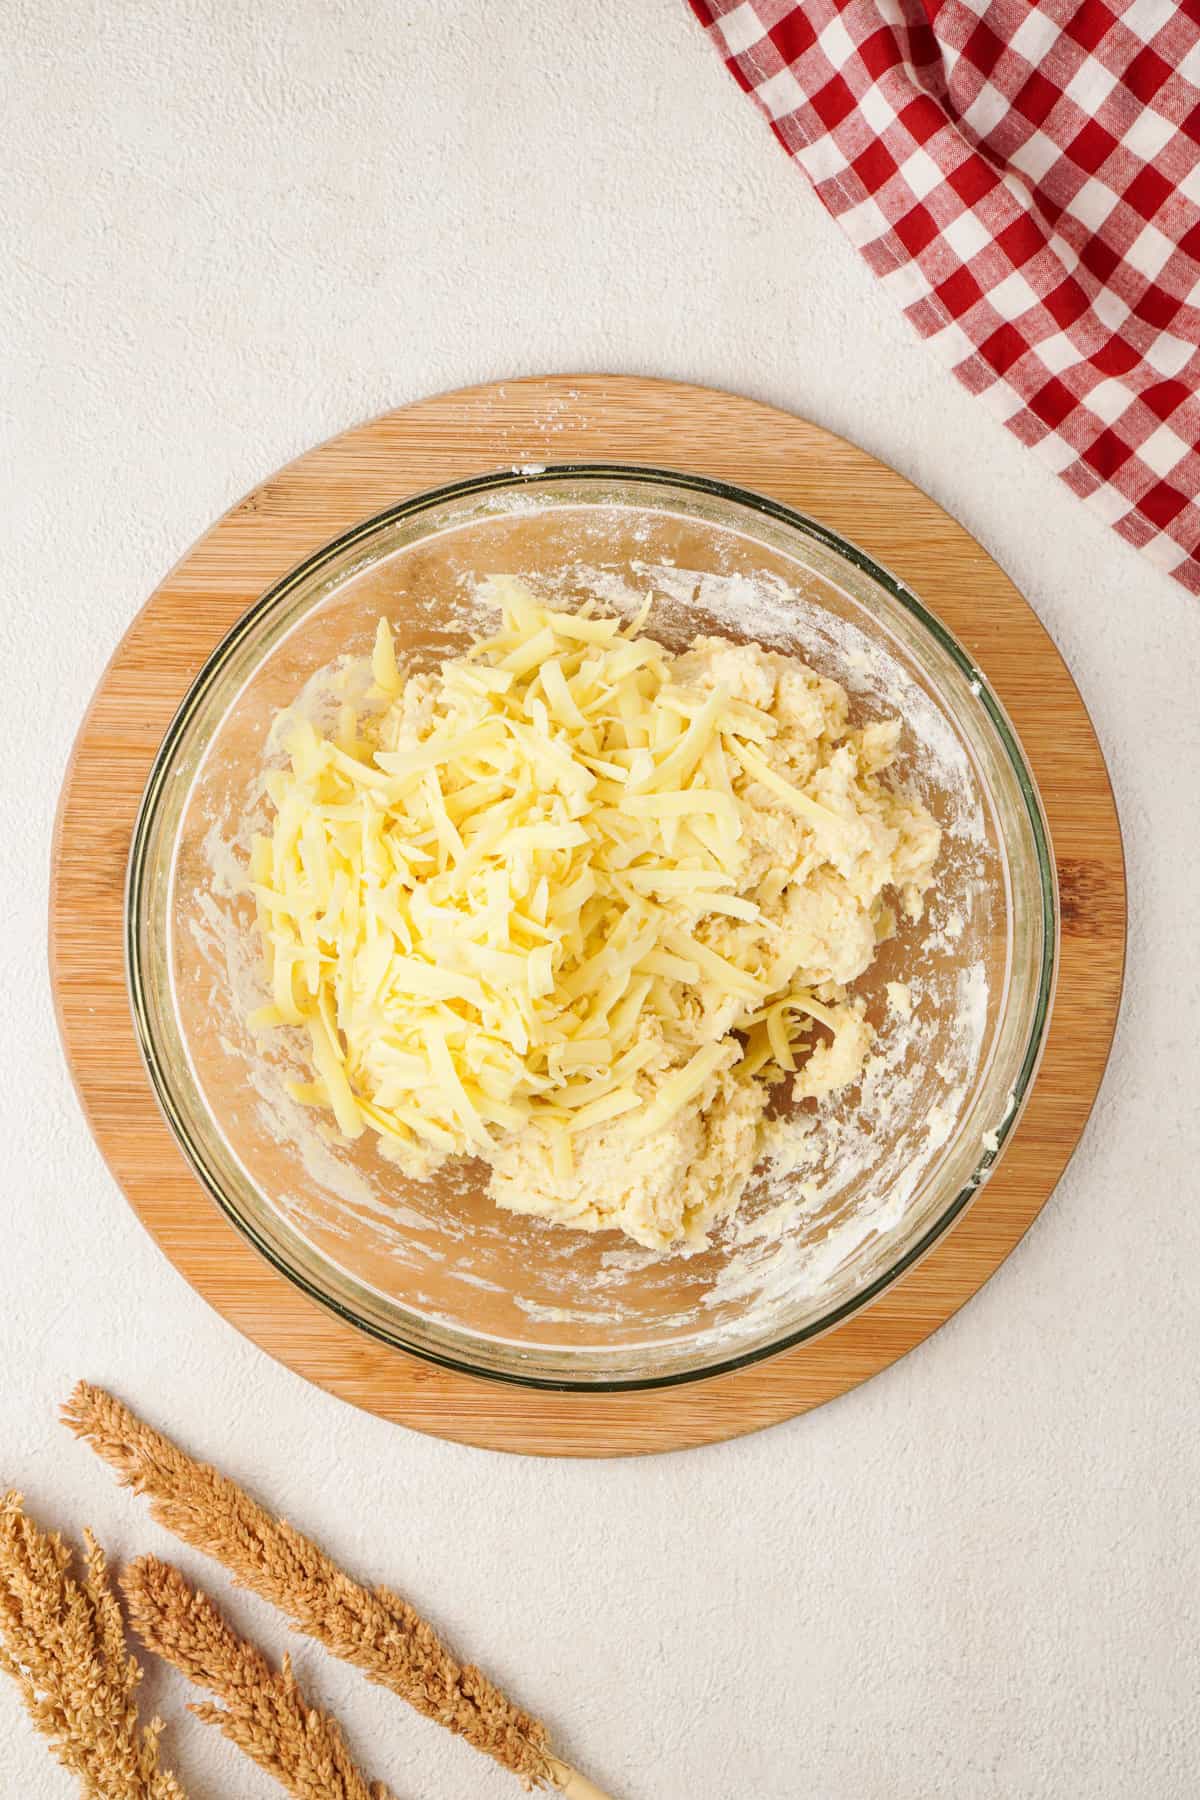
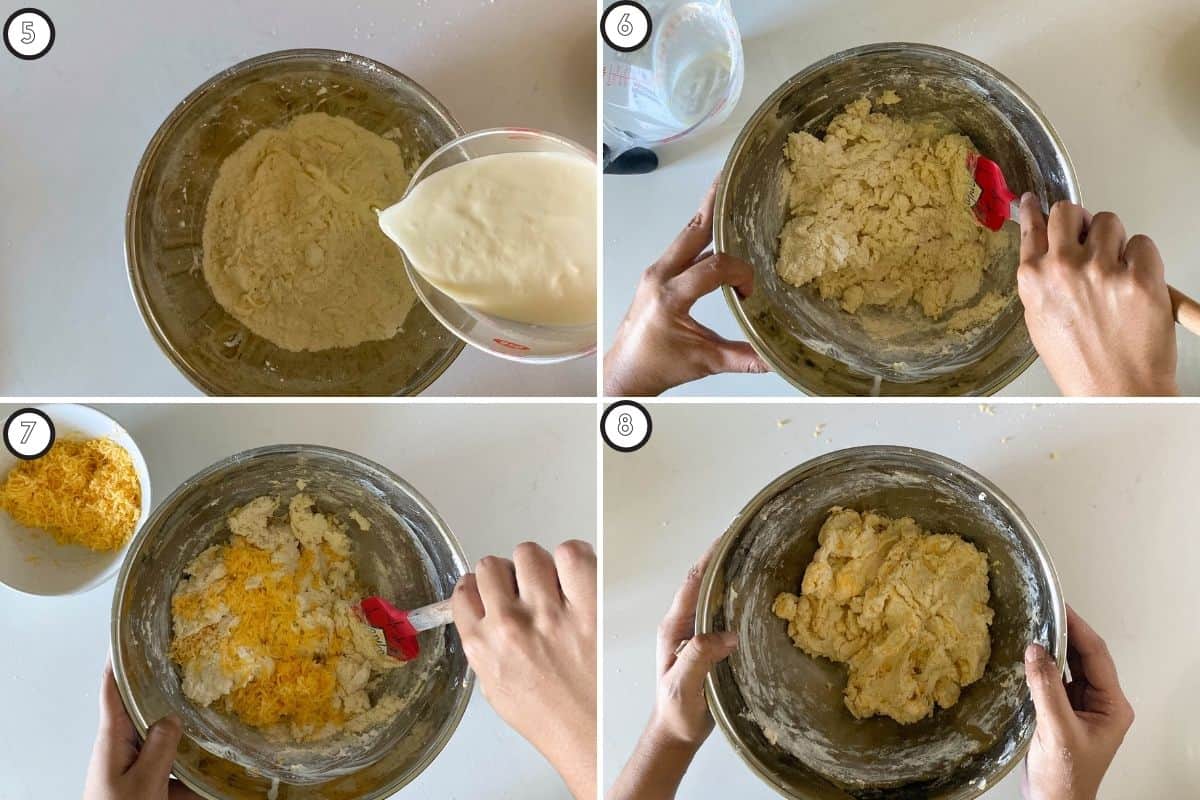
Add the cold buttermilk slowly to the flour mixture to make sure that the dough is evenly hydrated. You’ll notice that the dough is somewhat sticky – don’t overwork it or knead it! Shred your cheddar cheese and add this shredded cheese to the dough. Gently fold until it comes together. You can also use a pastry blender. P.S., if you haven’t used one of those, you’re really missing out! They make the whole process so much more fun.

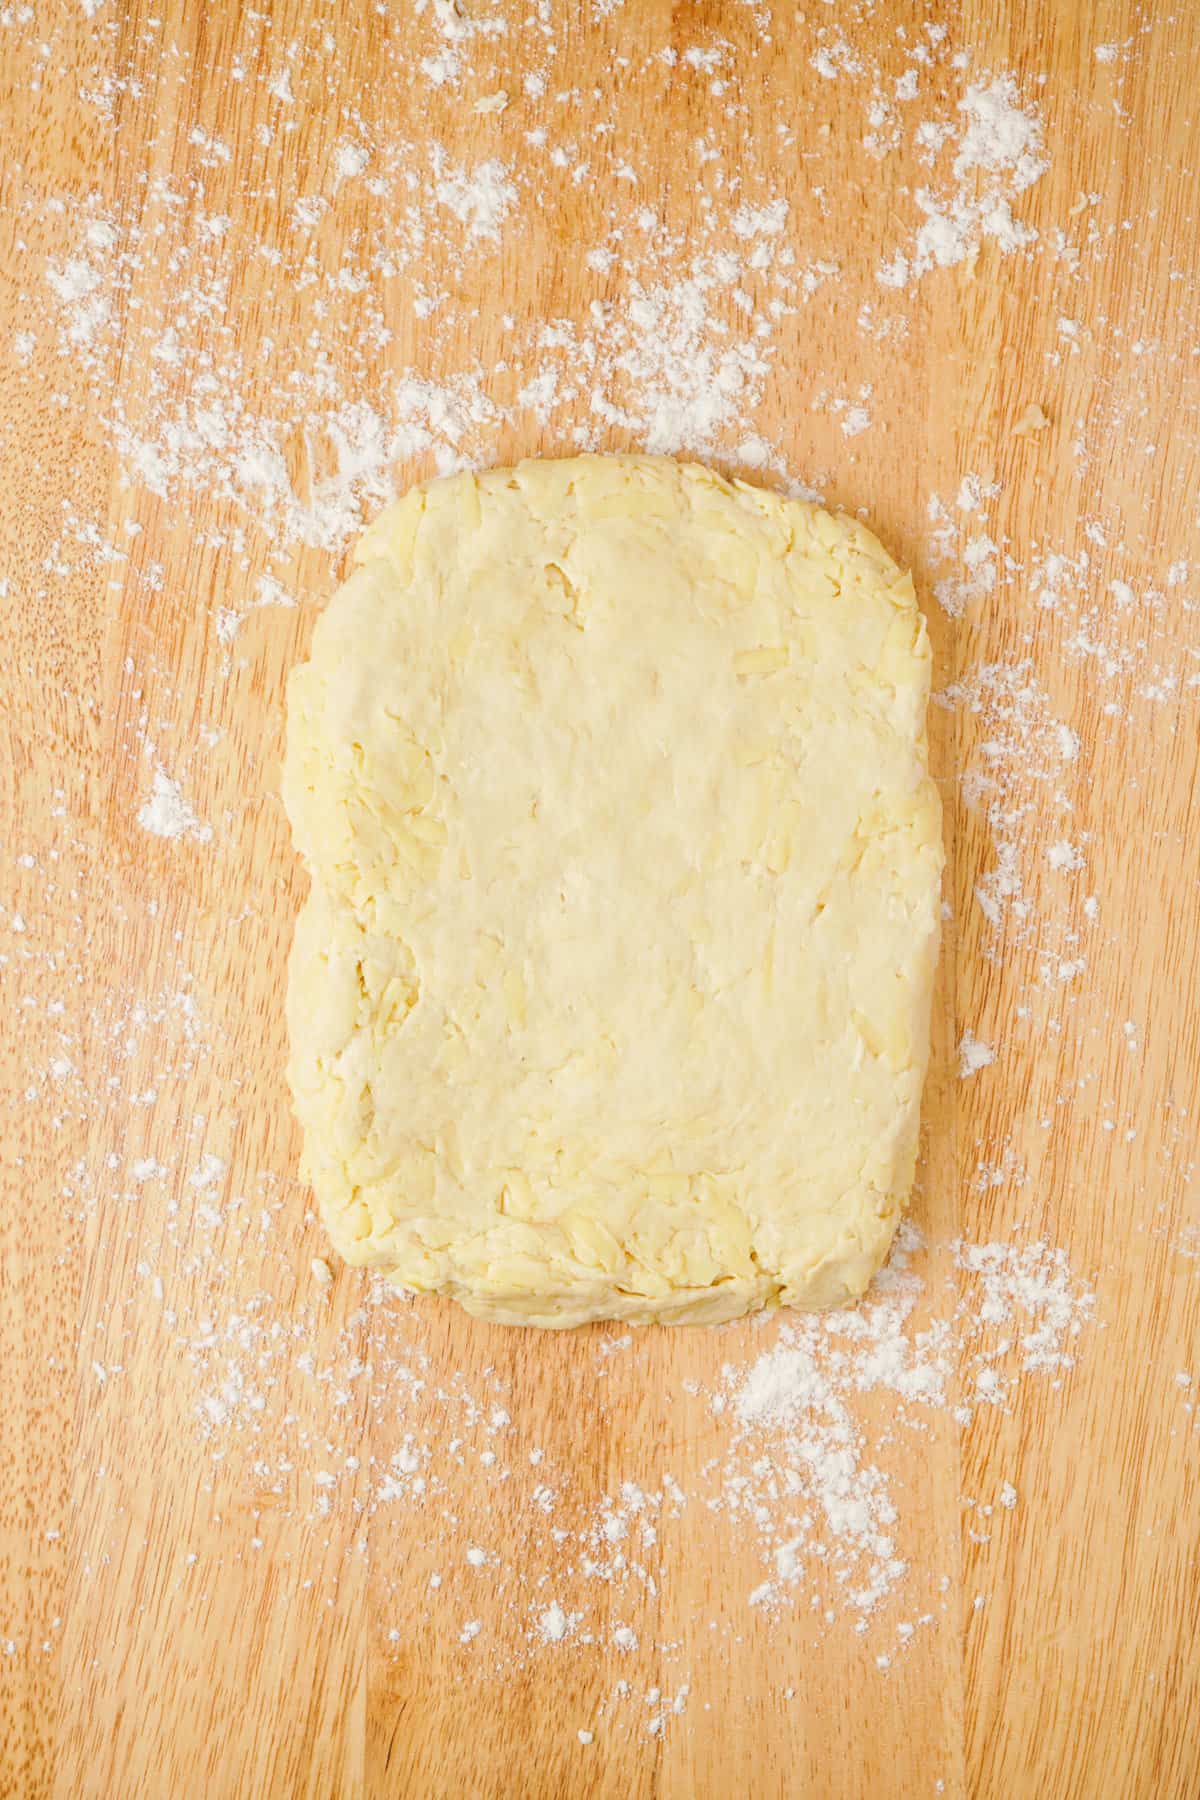
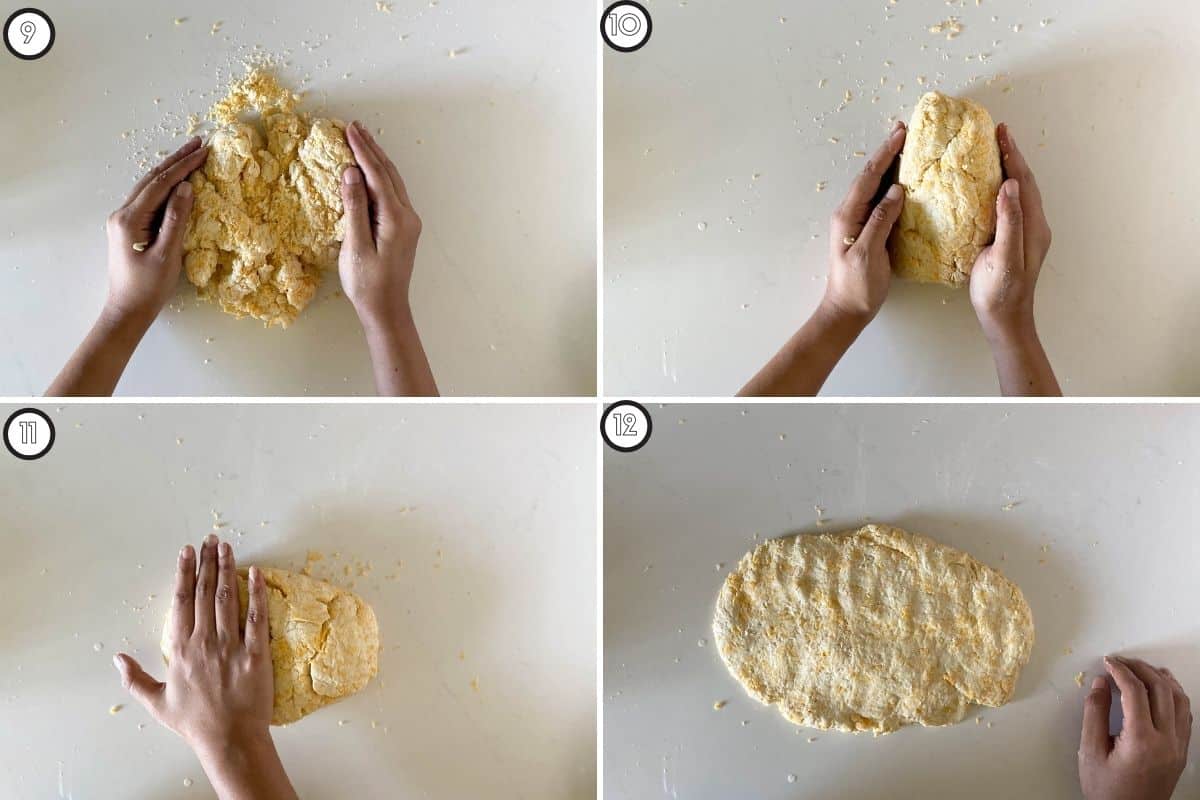
Then, throw it on a floured work surface. Rock it side-to-side to get a nice smooth texture. You can stop here if you want but I highly recommend going to the next step to ensure maximum flakiness!
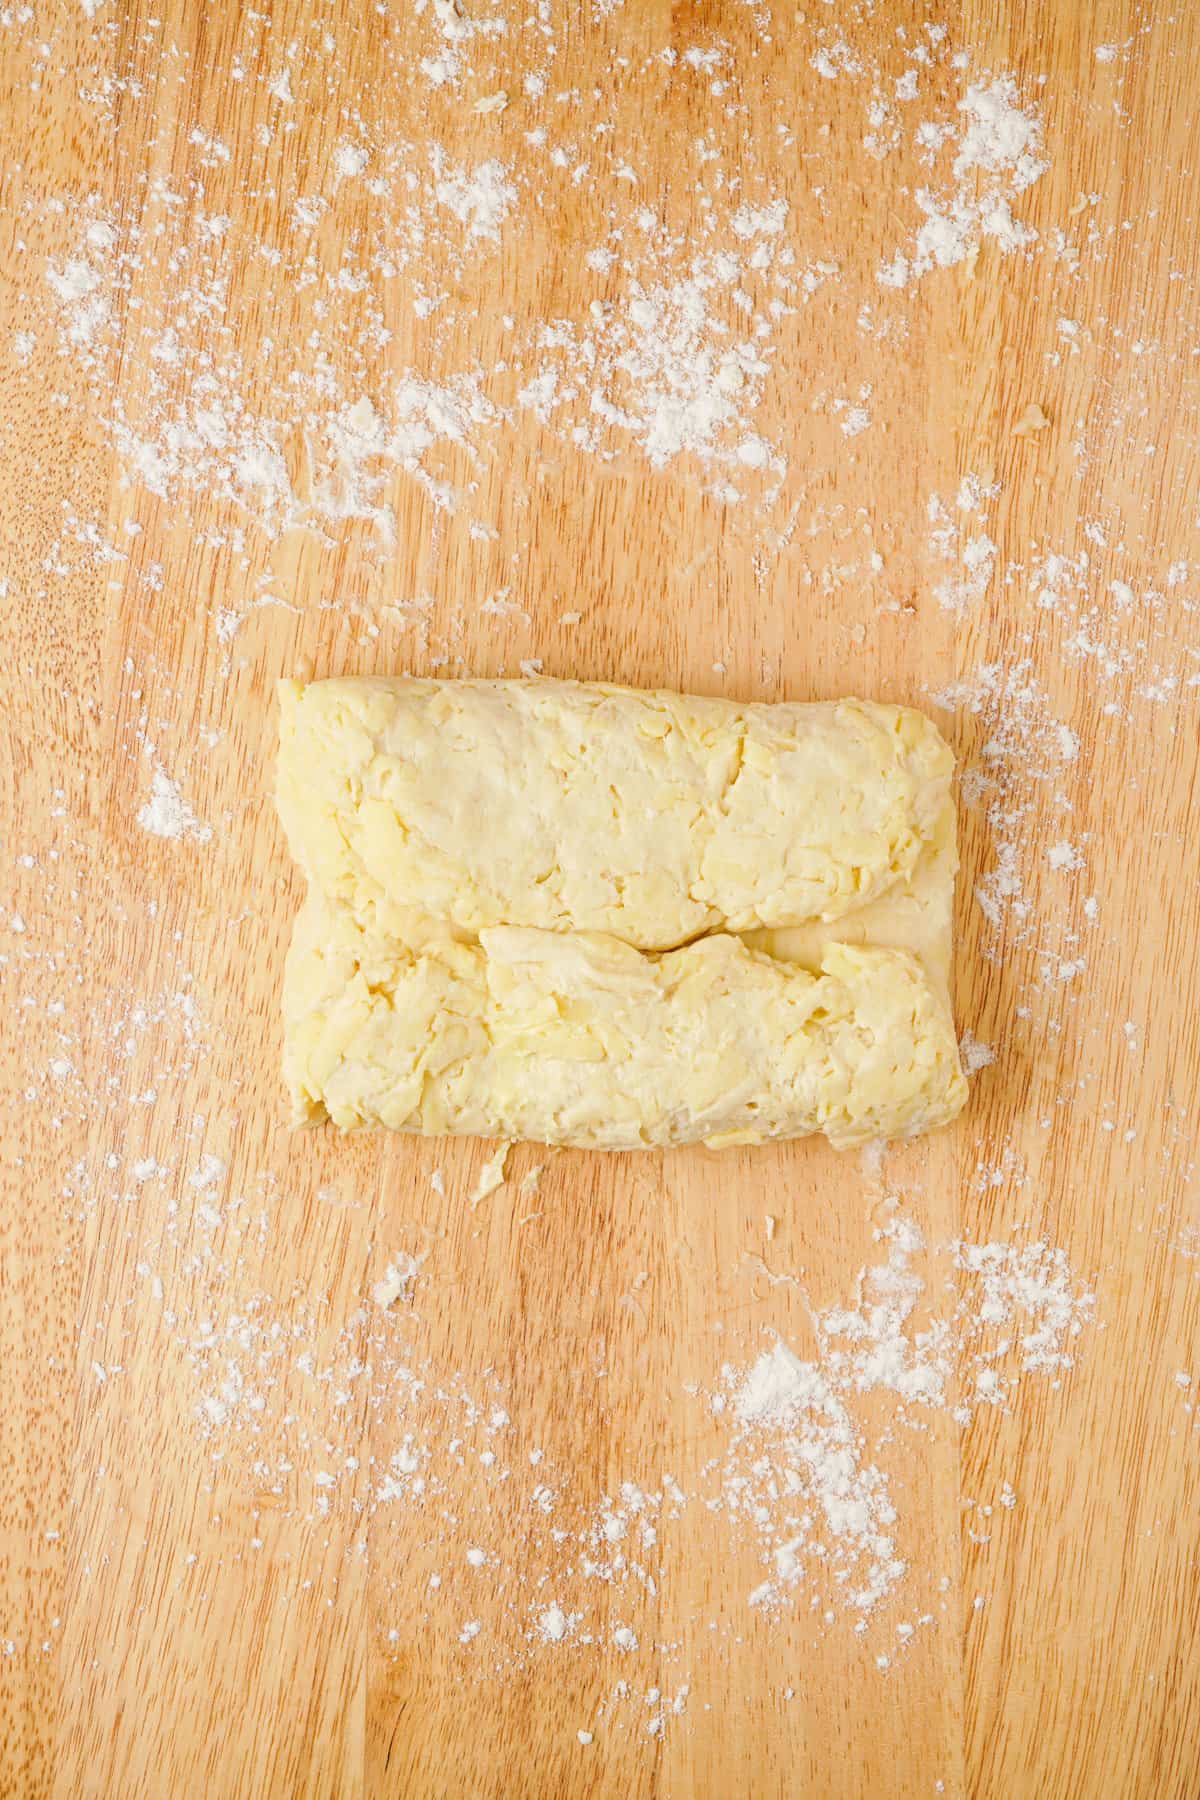
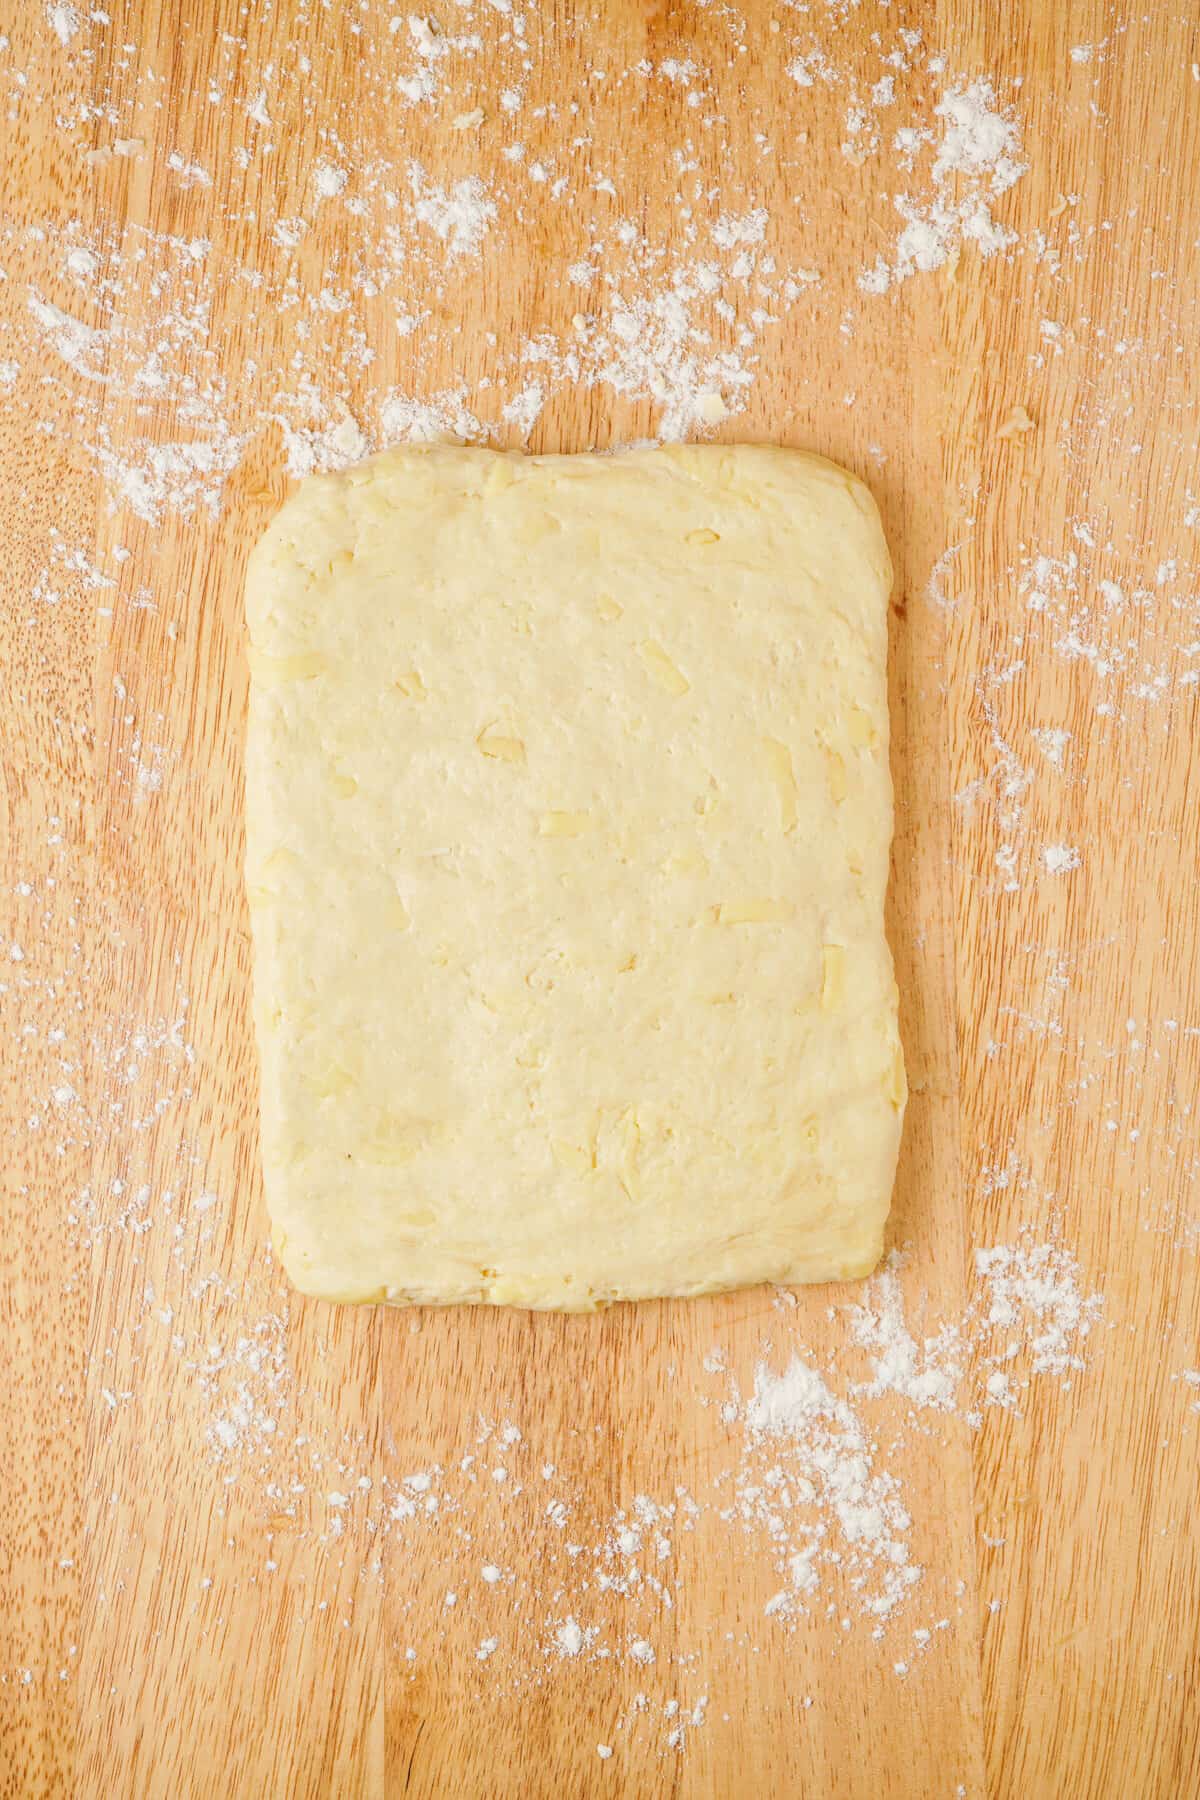
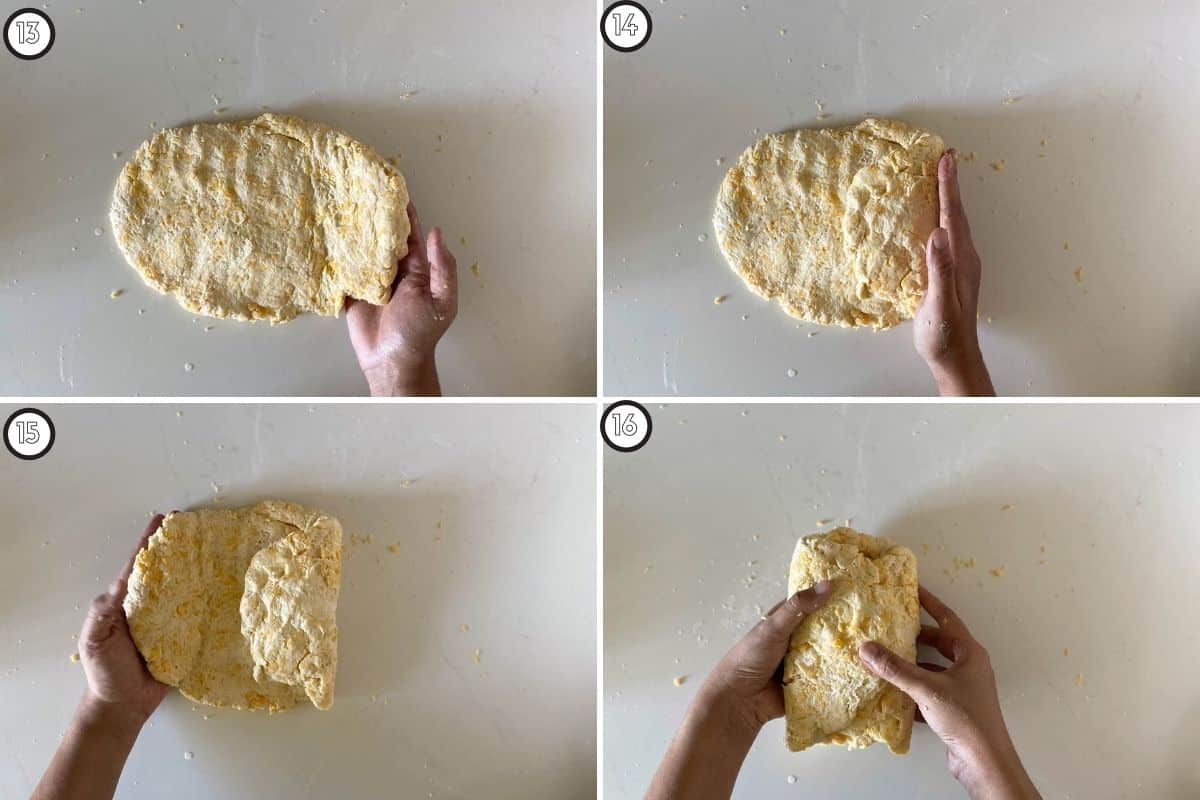
Flatten this dough gently, fold the sides in, and then flatten again. I usually do this three times before I cut my biscuits. This ensures crazy flakiness. Try not to use too much pressure if you can.
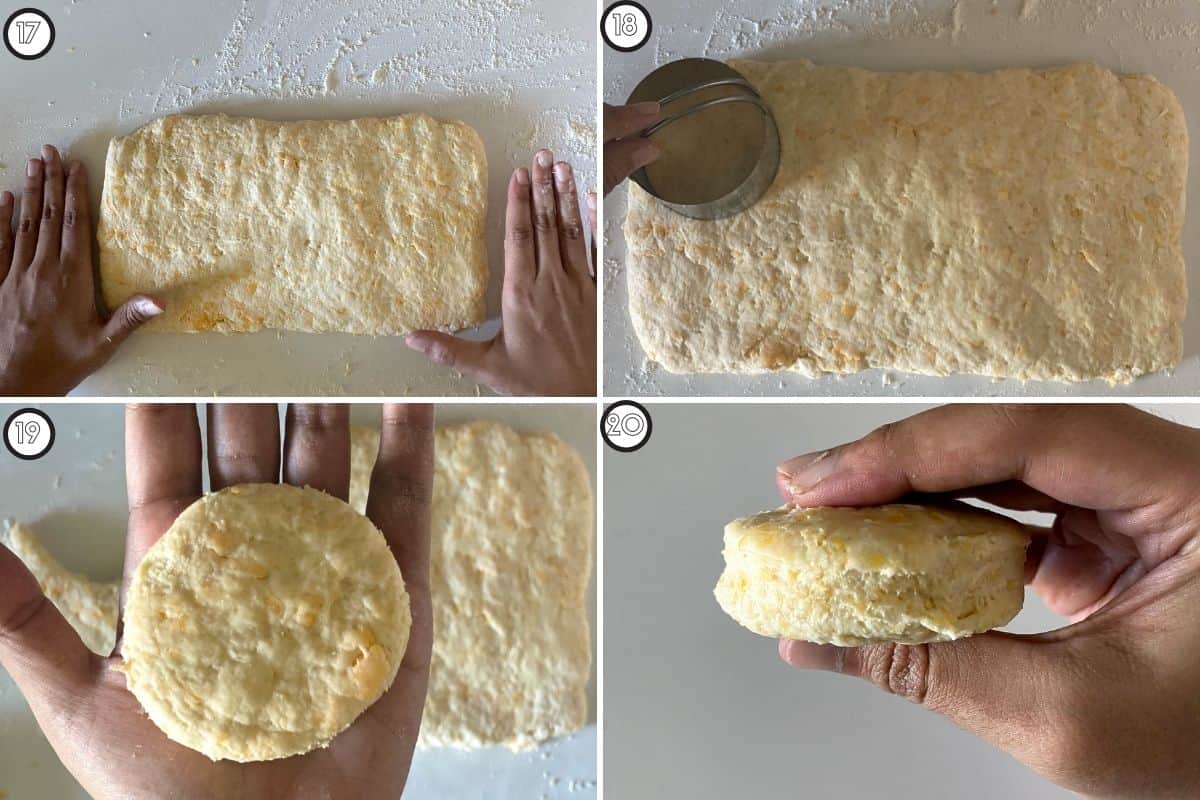
Punch out using biscuit cutter or by hand
Using a biscuit cutter makes even looking biscuits or cut them out by hand for more rustic biscuits.
The sharp edges of a biscuit cutter helps biscuits rise without losing shape. Try to avoid twisting the biscuit cutter. Just place on the dough and push straight down. Start from the corners of the dough, so you can just slide the biscuit off the edge. Then remove the cutter. Place the edge with the pinched rim facing the top. If you’re in the market for a good biscuit cutter, this is my favorite!
If you don’t have a biscuit cutter, use a 1/4 cup measuring cup or glass, and press it straight down. Or for a more rustic biscuit, just scoop 1/4 cup of dough and place on skillet and flatten them a bit to resemble a biscuit. These biscuits will still be flaky but maybe not as tall!

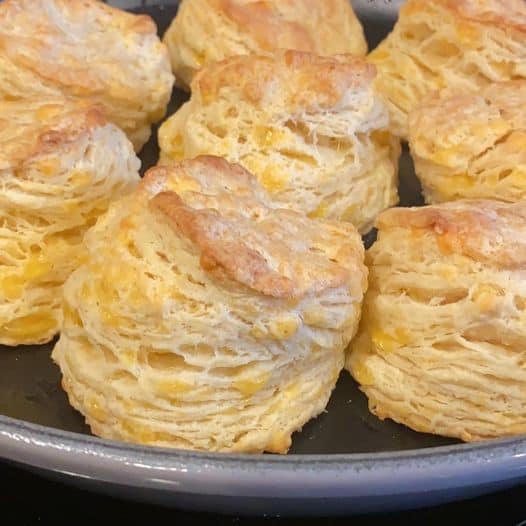
Bake using a cast iron skillet or baking sheet
These biscuits could called skillet biscuits, because I love the crispy bottom from using a cast iron skillet. That said, you can get equally delicious biscuits using a standard baking sheet. Remember to rub butter generously along the bottom of a baking sheet. If it’s a non-stick sheet, avoid parchment paper. If not, you can either use one or not depending on whether you want a more crispy bottom! Or, you can use a cast iron biscuit pan if you want the best of both worlds!
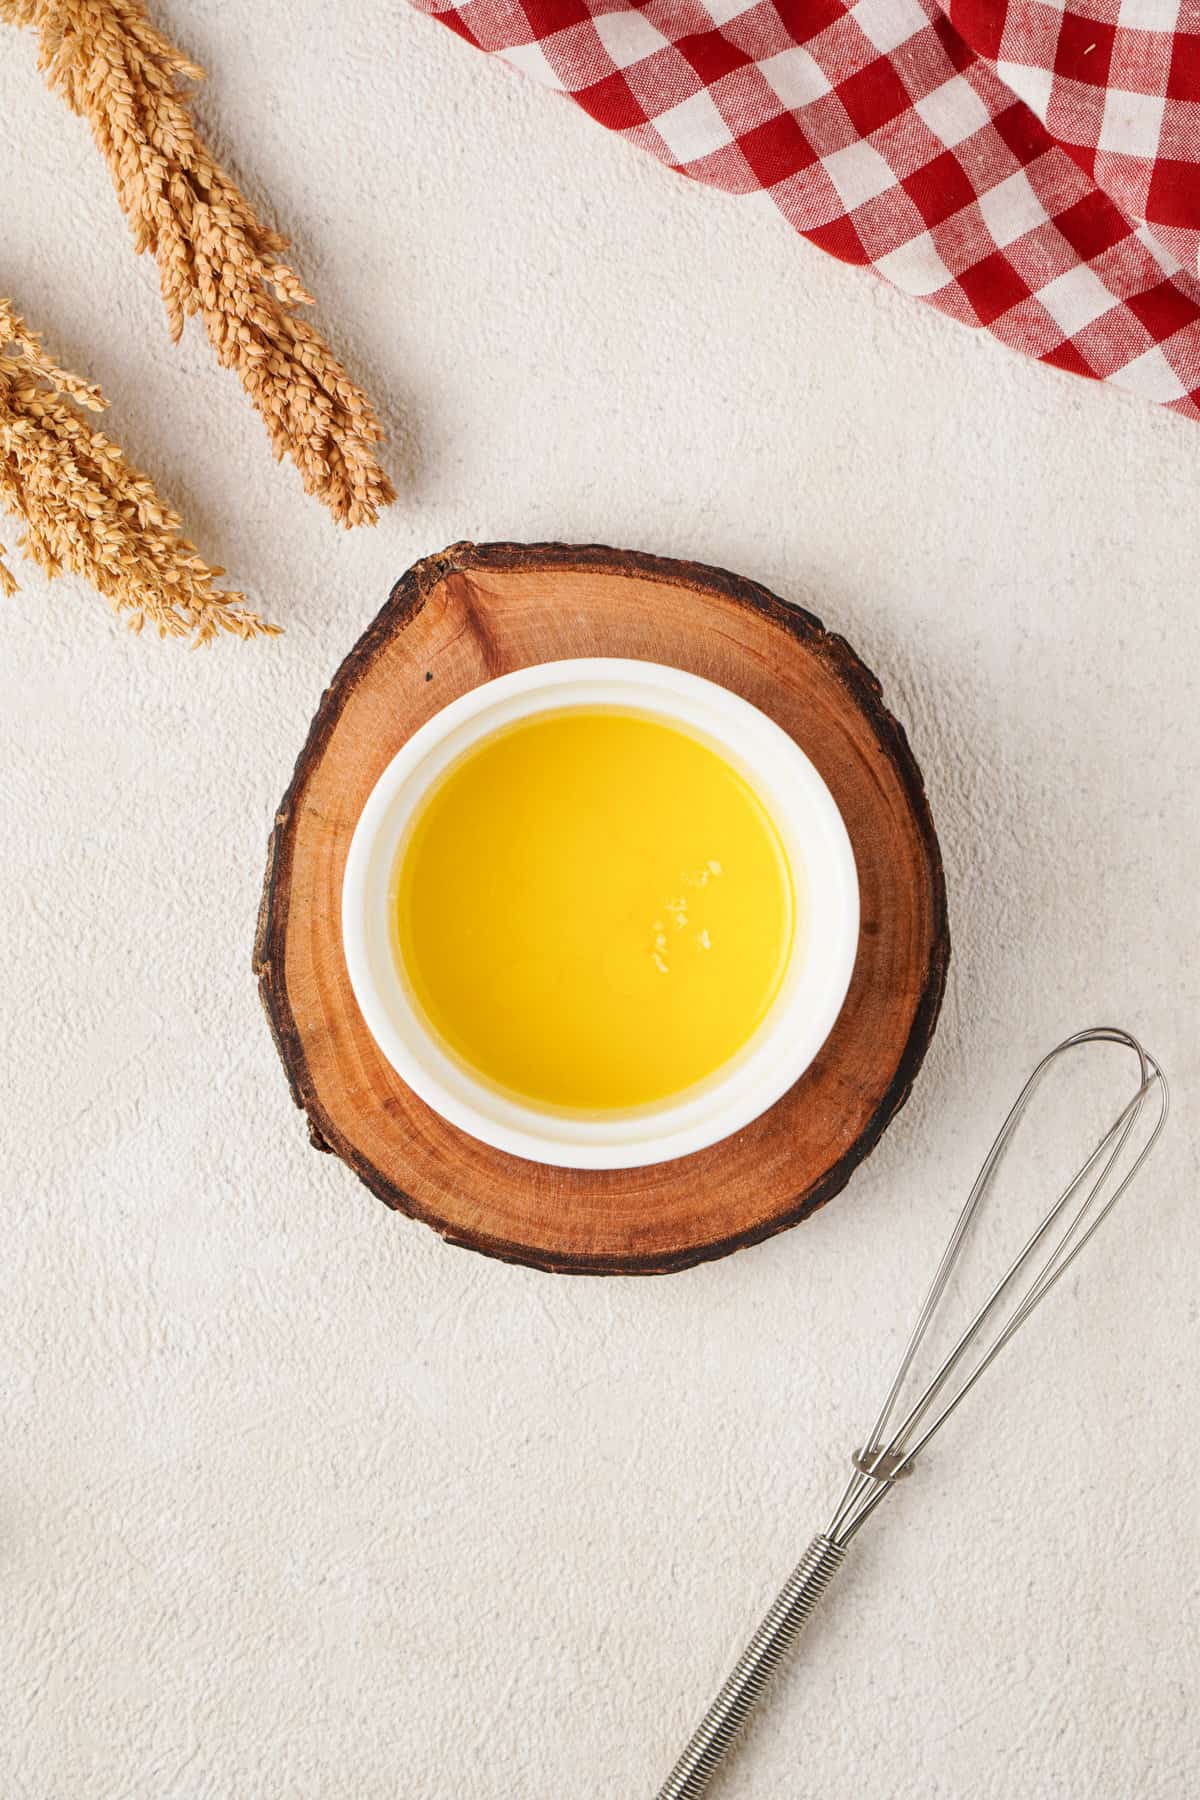
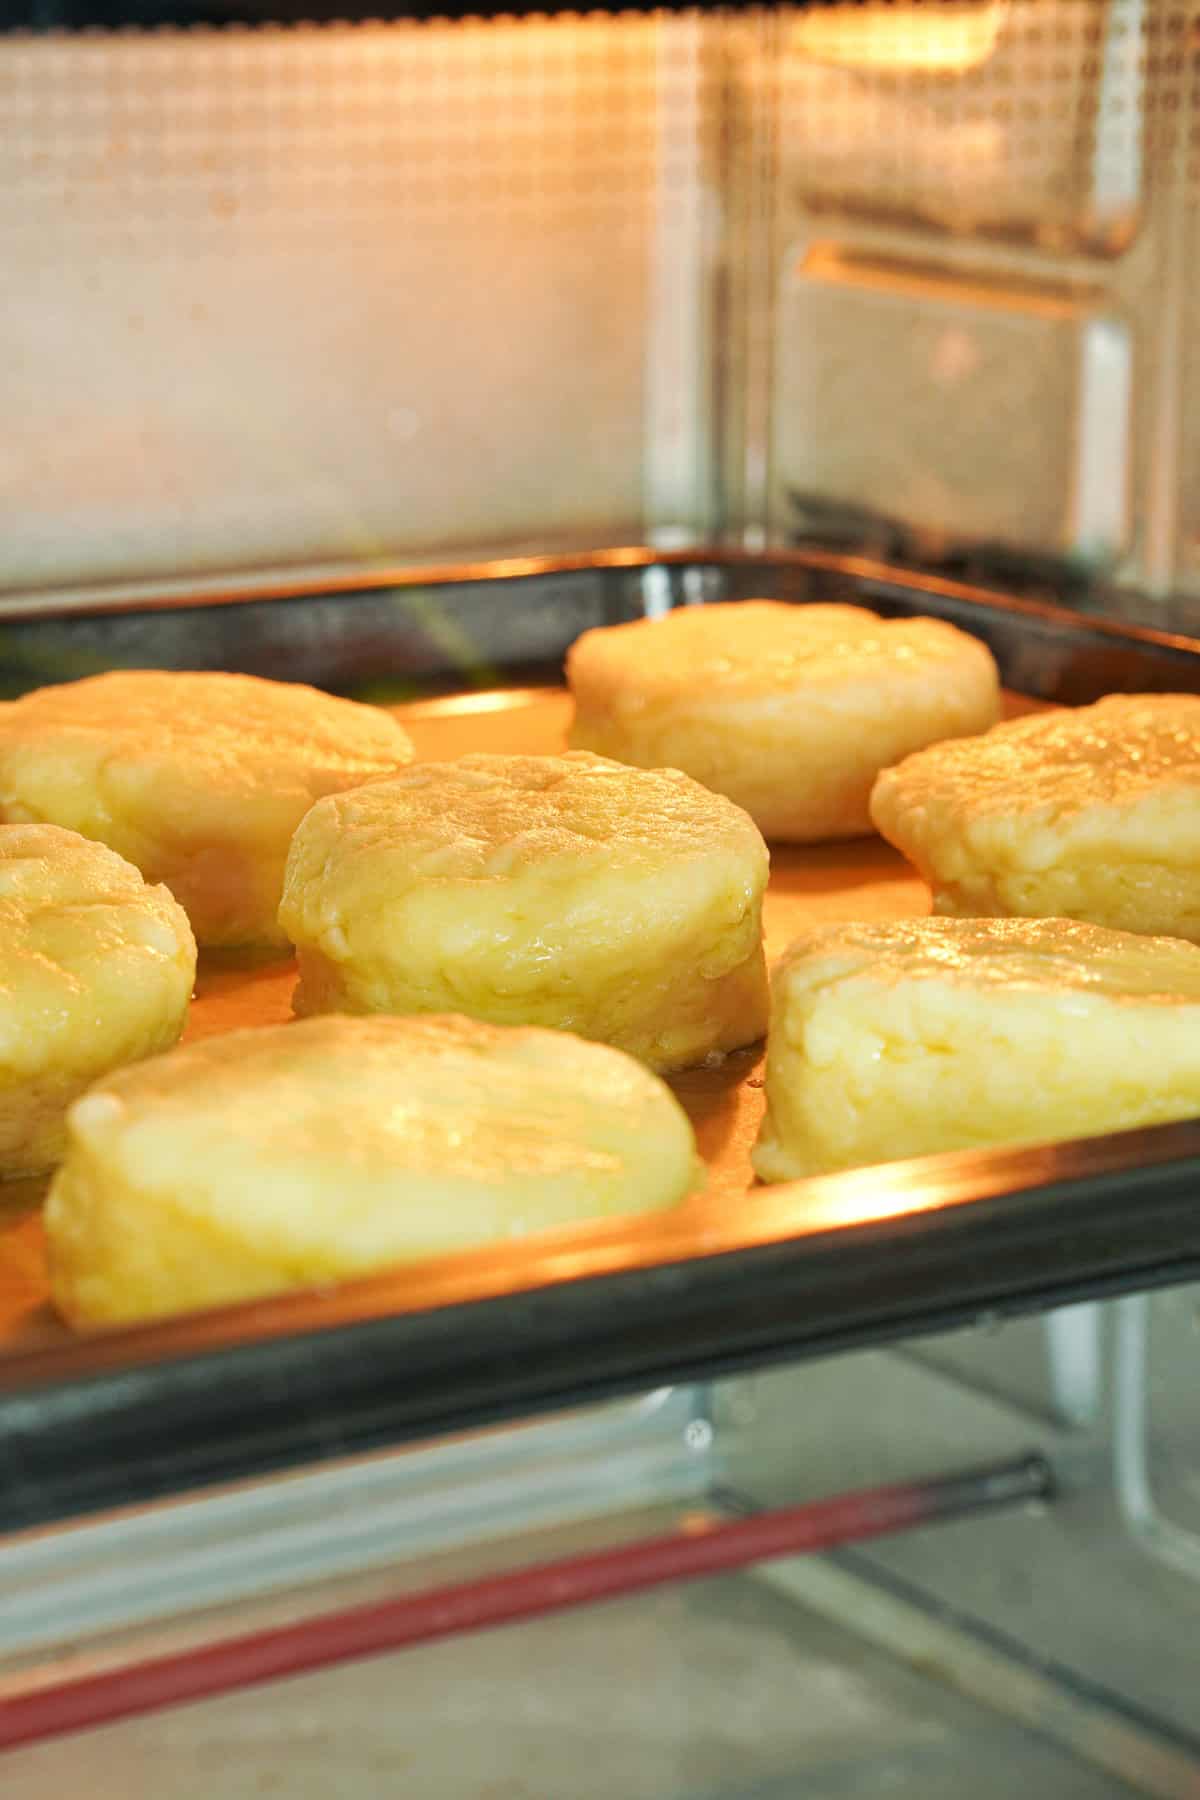
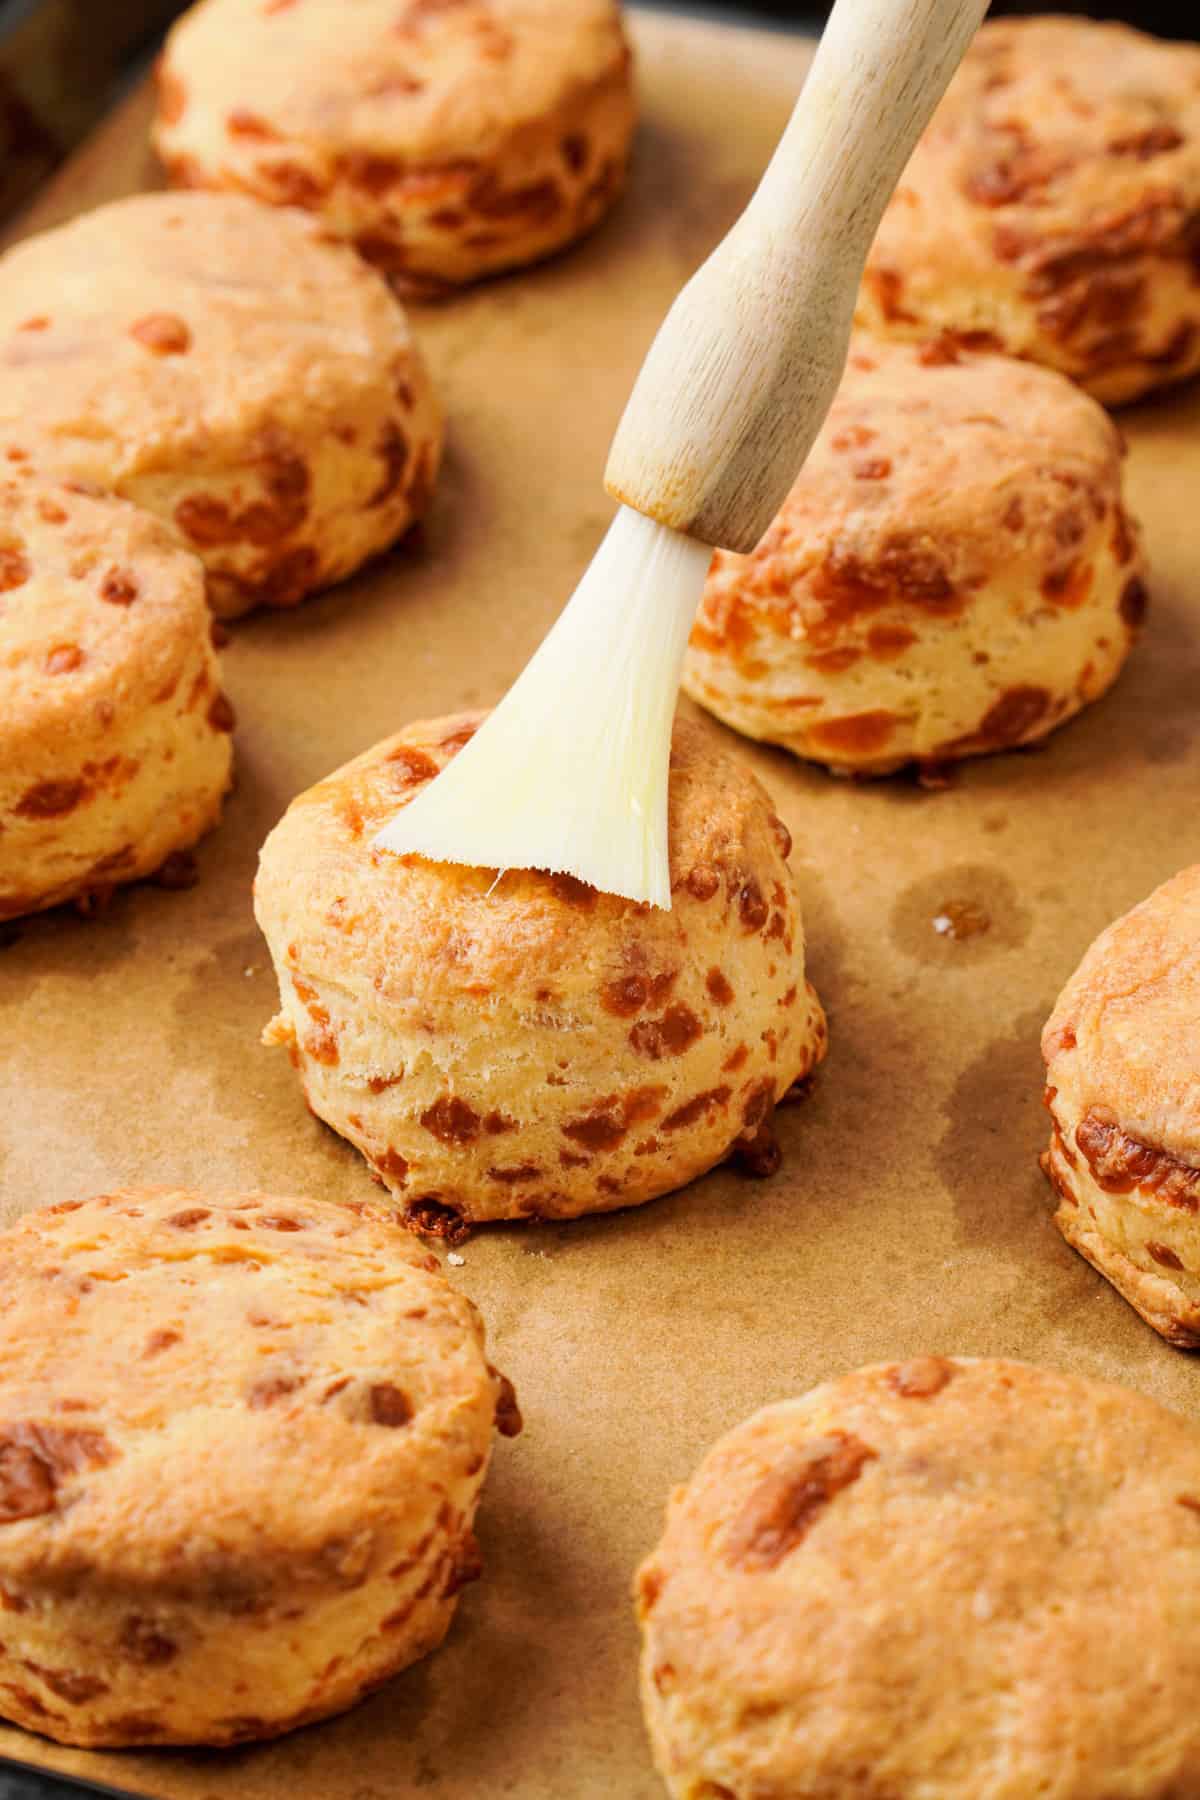
Prepare a mix of the butter and garlic, and brush the biscuits with the melted butter mixture before they bake.

Bake in the oven at 425F for 20 minutes. They’ll be a beautiful golden brown when they’re done. Brush the golden biscuits with butter blend again after.
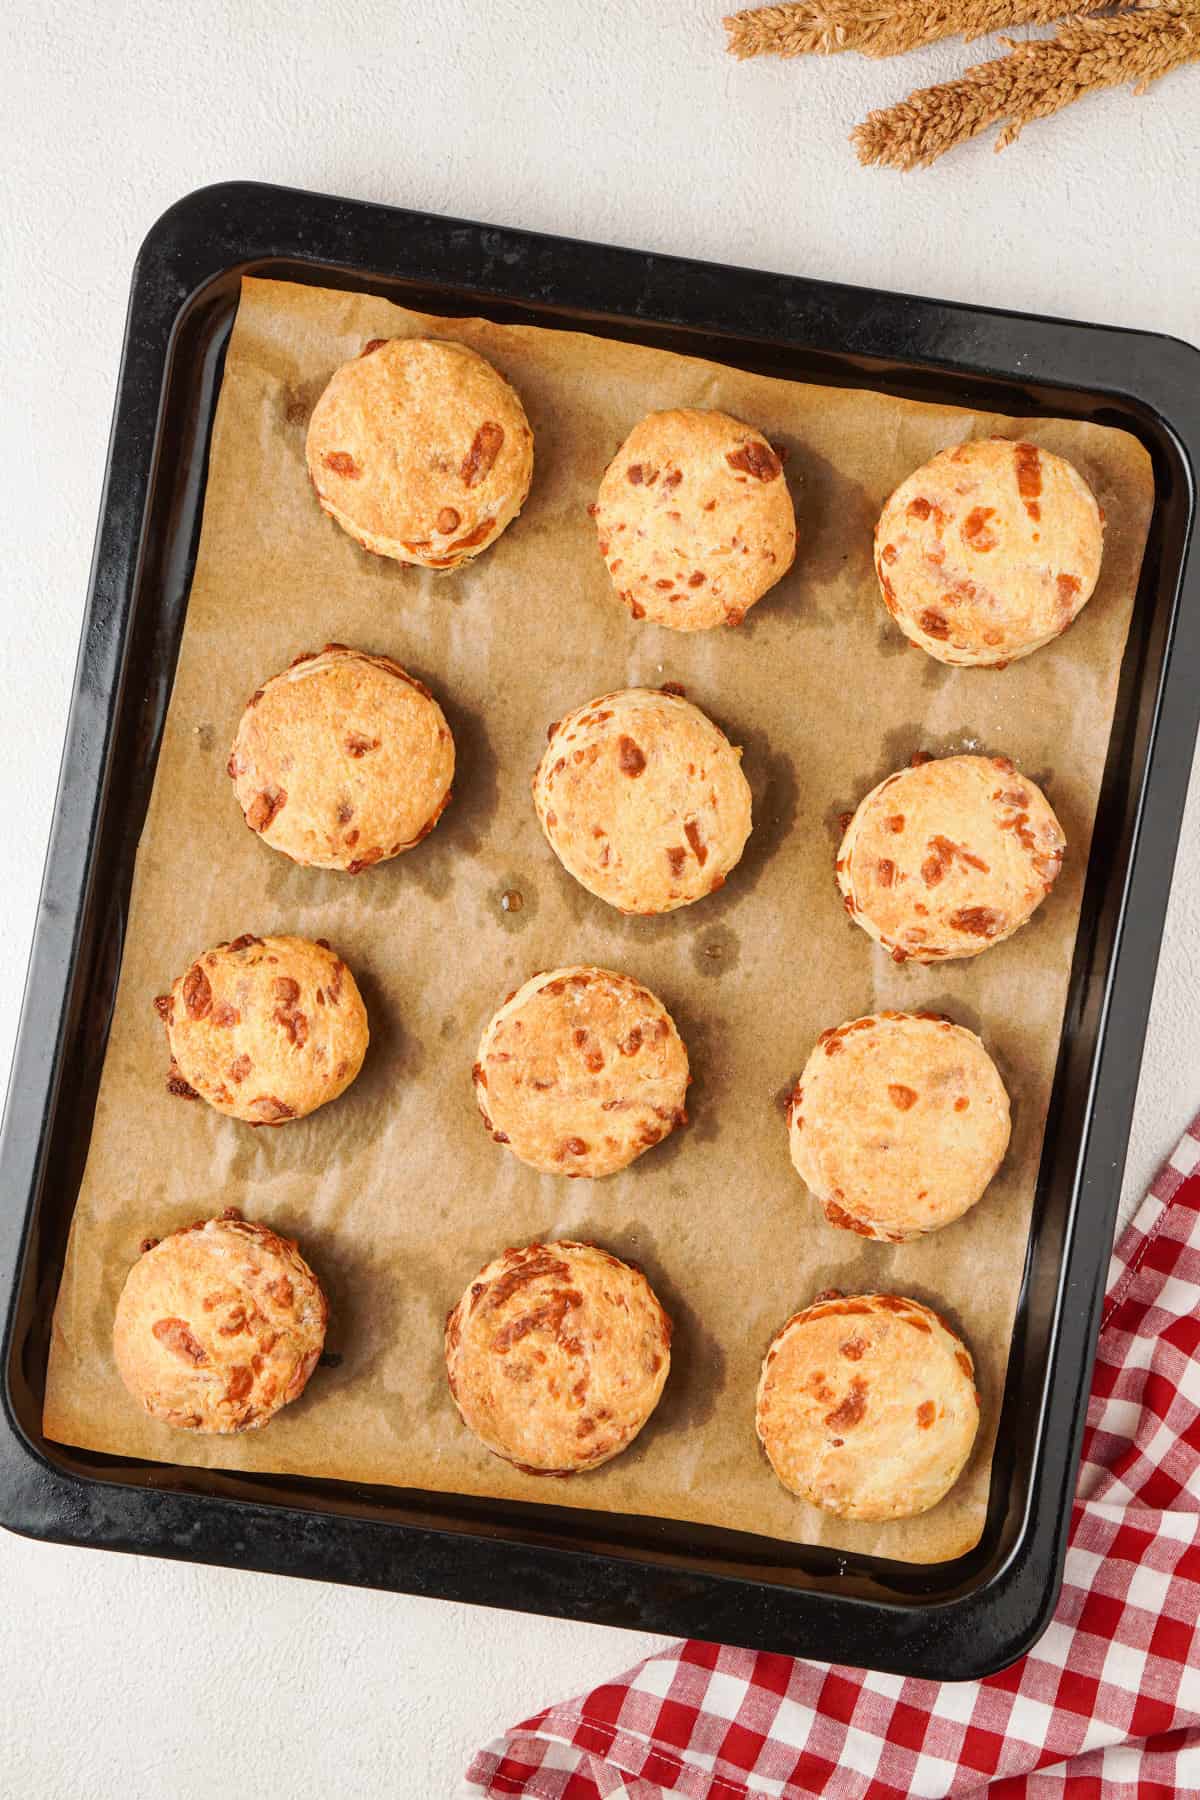
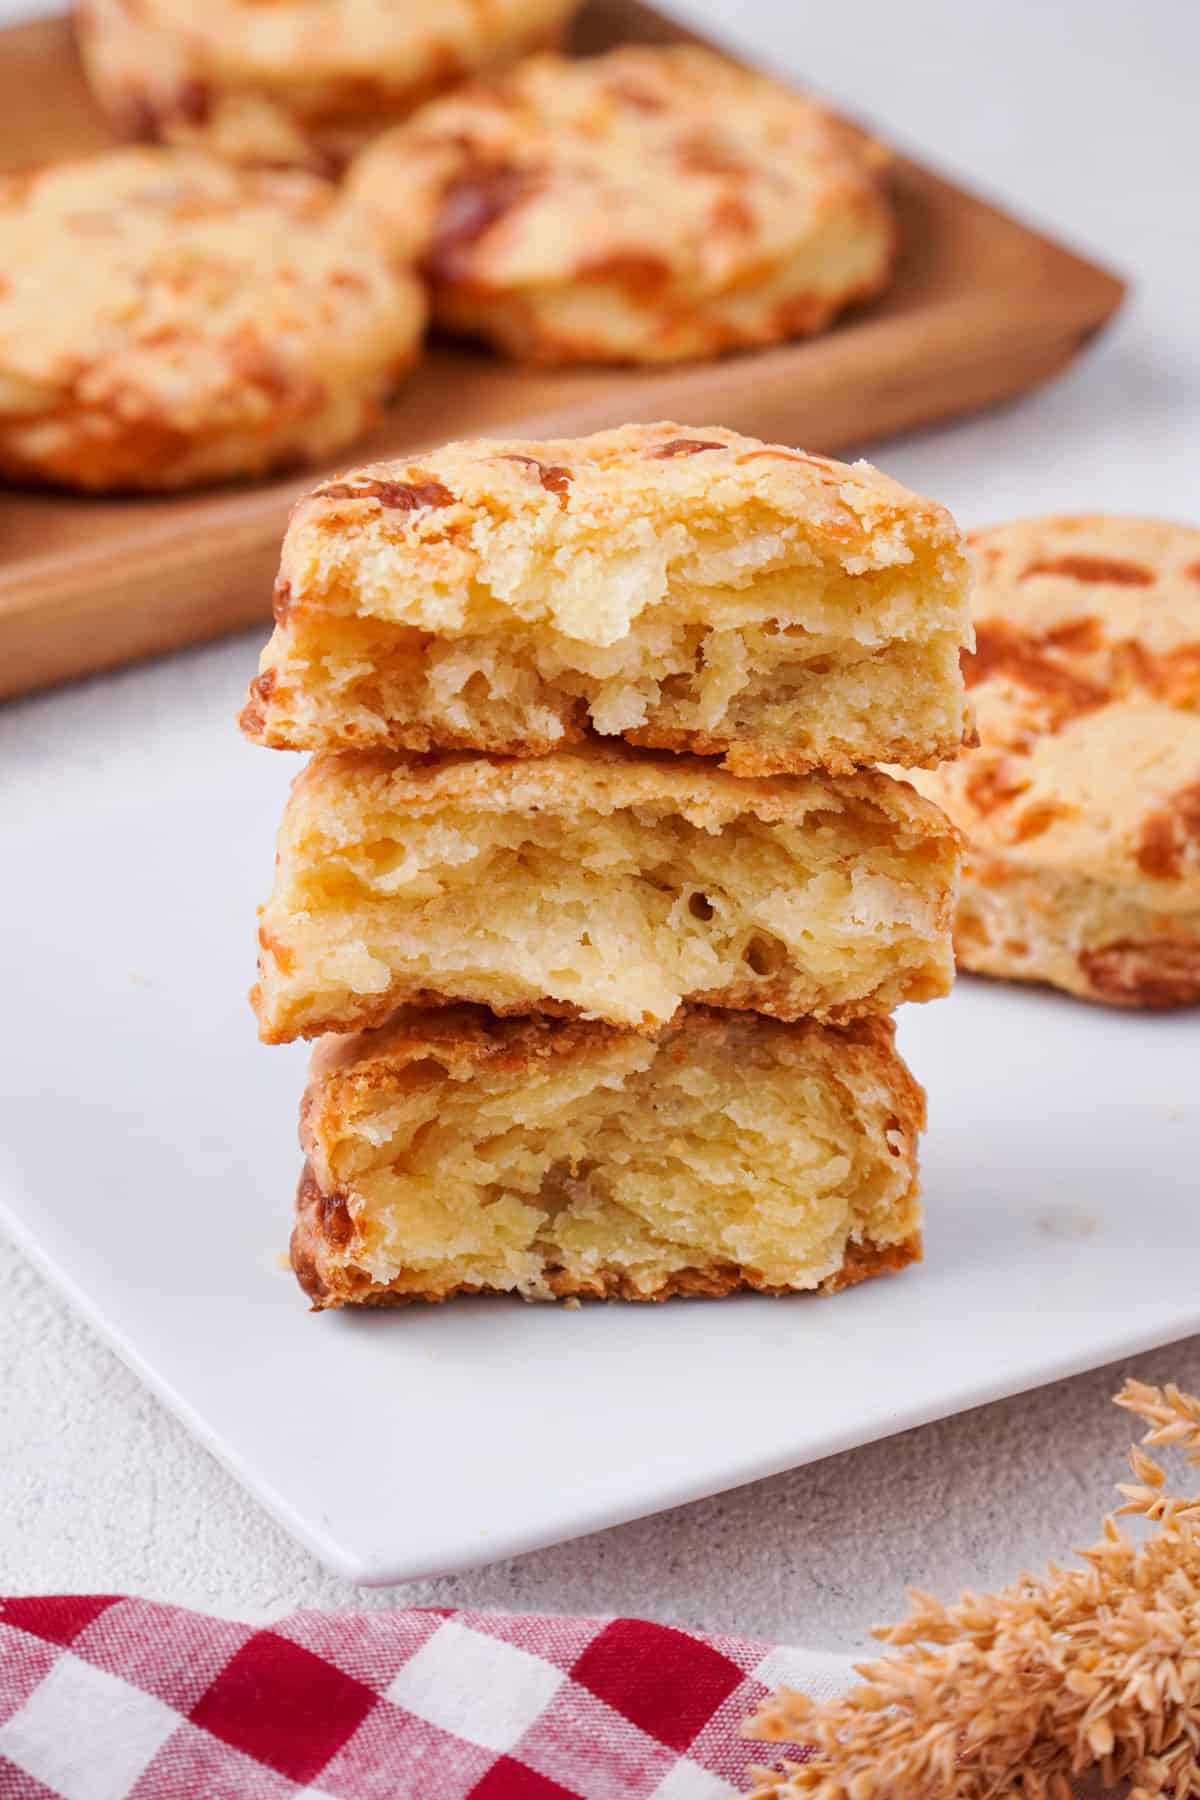
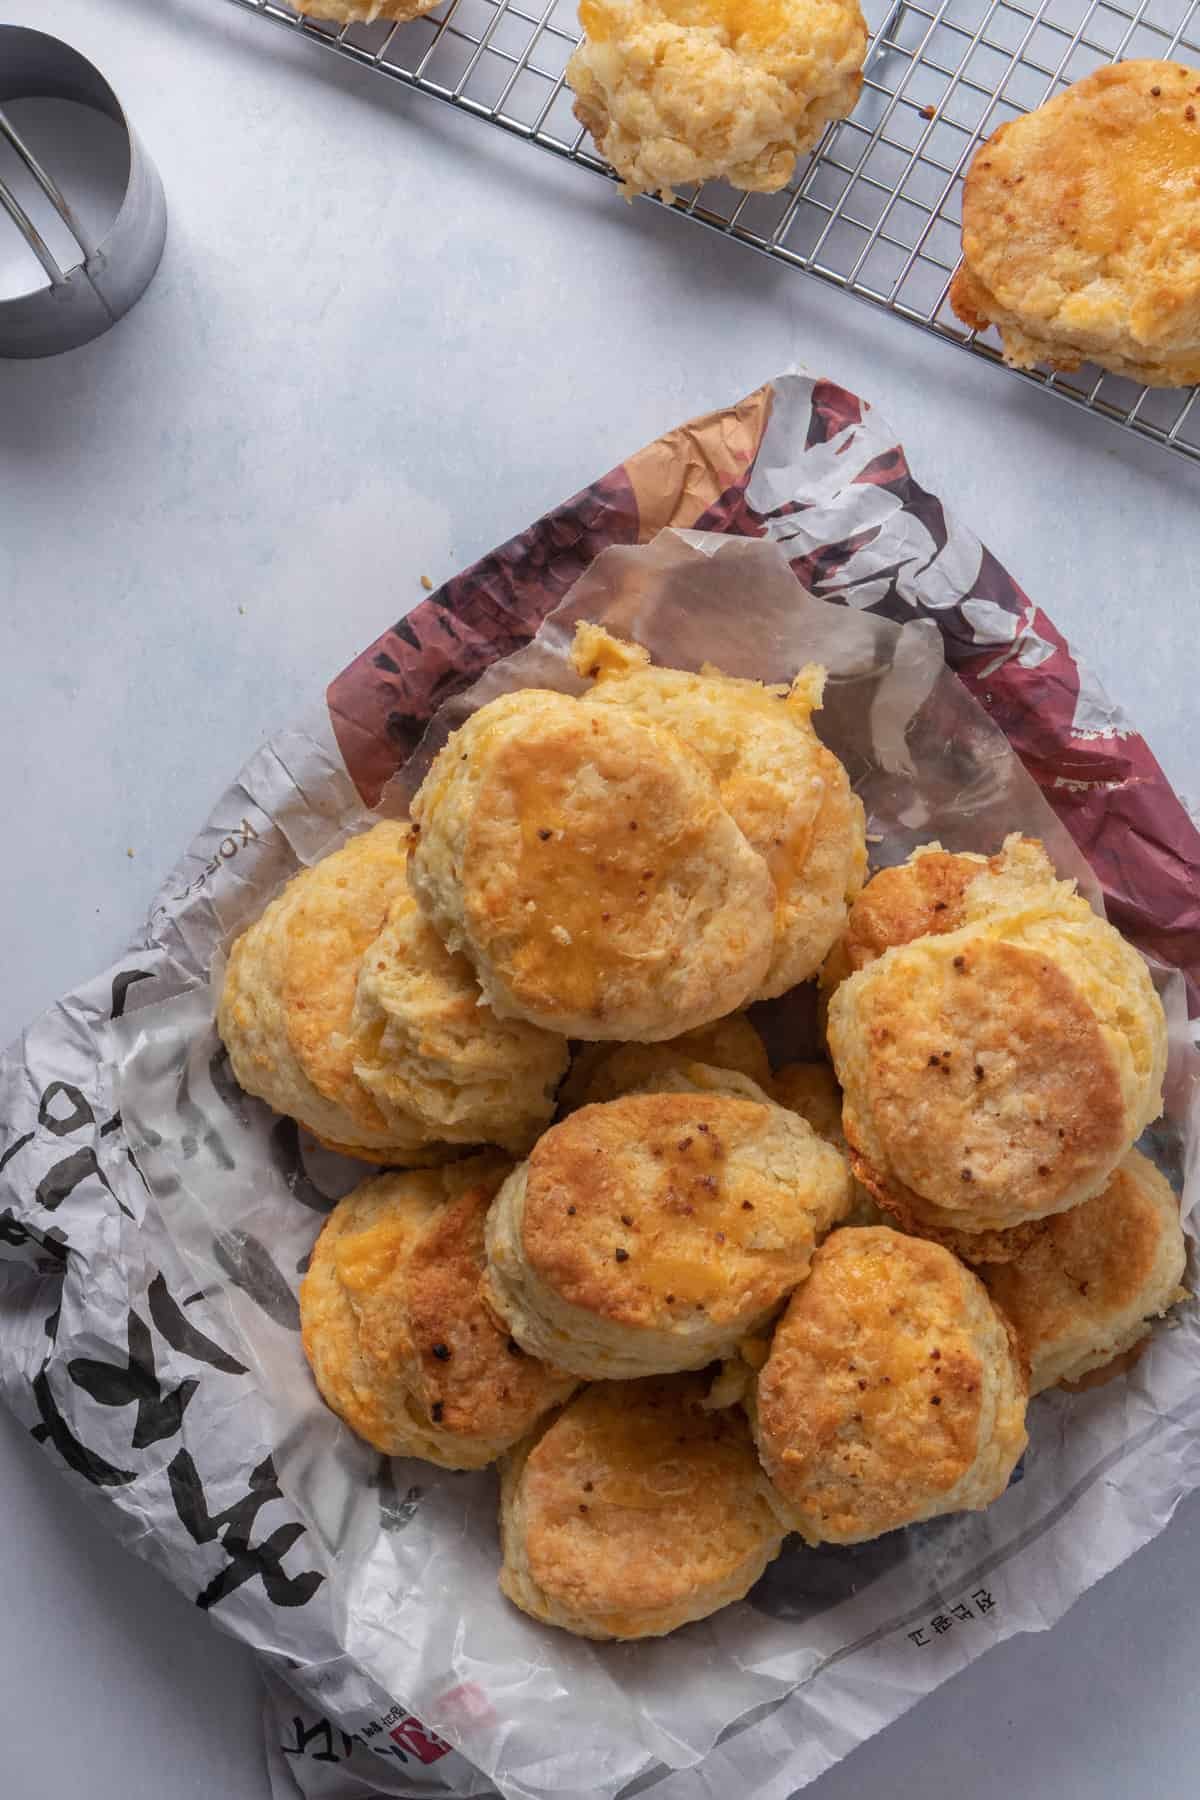
Enjoy your delicious, homemade, flaky buttermilk cheddar cheese biscuits!
🍴 Top tips for flaky cheese biscuits!
- Cold butter is key! There’s science behind this. You want the butter to be cold until it hits the oven. Then, when it melts inside the biscuit dough, it releases steam because butter has water! This makes the biscuits puff and become flaky. So you want to make sure the butter remains cold as much as you can. I put the stick of the butter in the freezer until I’m ready to grate it. You can also use seasoned butter if you wish.
- Add fresh baking powder (and yes, a whole tablespoon!) If you really want to take your flaky layers to the next level, you have to use fresh baking powder as the leavening agent. To test whether you baking powder is fresh, add it to some hot water. If it bubbles strongly, then you’re good to go.
- More folds, more layers. The more folds you can incorporate while you’re preparing your biscuit dough, the more flaky your biscuits will be. I try to fold the dough at least three times, so I can get the maximum flakiness.
- Do not knead too much or apply too much pressure. Applying too much pressure or overworking the dough can develop too much gluten. This, in turn, makes the dough rather tough, and your biscuit will not be as flaky.
- Do not twist the biscuit cutter, if using one. You’ll want to press straight down, and back up again. Twisting the biscuit cutter seals the edges and prevents the biscuit from rising.
🍴 Serving and storage suggestions
I love serving these biscuits with all kinds of soups and stews (think: butternut squash soup, Nigerian spinach stew, spicy pumpkin soup). But let’s be real, I probably just eat these biscuits on their own half the time (or with a generous dollop of this tomato miso jam when tomatoes are in season).
If you have leftovers after you make this biscuit, I applaud your self control. Throw them in an airtight container and leave them out on the counter at room temperature for up to 3 days. If you put them in the fridge, I’d throw them in the oven at 350F for 5 minutes to reheat them.
If you made excess biscuit dough or want to bake in batches in the next couple of days, you can wrap dough in plastic (tightly) and store in fridge for a day or two. I don’t recommend keeping in the fridge beyond that. I also love repurposing them into homemade dumplings! Have extra ingredients? Check out this recipe for Pao de Queijo (Brazilian cheese bread).
You can also freeze the biscuits in airtight containers for up to 3 months. Once you’re ready to eat them again, thaw them first for about 60 to 90 minutes so they’re at room temperature. Then, warm in the oven at 350F for 10 minutes.
If you want to freeze the dough, just wrap them (tightly) in plastic wrap and throw them in the freezer for up to 3 months again. Then, you can repeat the same steps. Thaw, bake, enjoy.
If you tried this recipe, don’t forget to comment and rate! ⭐⭐⭐⭐⭐
If you enjoyed this recipe, you will also enjoy these other delicious sides:
[fsri image_class=”feast-image-round” id=”3792,3388,3321,3823″]

Flaky Buttermilk Cheddar Biscuits
Equipment
- 1 Pastry Blender optional
- 1 Biscuit Cutter optional
- 1 Cast Iron Biscuit Pan optional
Ingredients
Biscuits Dough
- ½ teaspoon sugar, don't skip this!
- 1 teaspoon salt
- 1 tablespoon baking powder, not a typo – you'll need 1 tbsp!
- ½ teaspoon baking soda
- 2.5 cups all purpose flour, plus ½ cup for dusting and work surface
- ½ cup unsalted butter
- 1 cup cold buttermilk, Get whole fat if possible – low fat doesn't rise as much
Biscuit Flavoring
- 2 teaspoons garlic powder
- 1½ cups shredded cheddar cheese, shred fresh if possible
For Brushing
- 4 tablespoons unsalted butter
- ½ teaspoon minced garlic
Instructions
- Before you start, pop ½ cup unsalted butter into the freezer for a few minutes. Preheat the oven to 425°F
- Have a bowl with the excess flour set aside for dusting the work surface.
Prep the biscuit dough
- Add ½ teaspoon sugar, 1 teaspoon of salt, 1 tablespoon of baking powder, ½ teaspoon of baking soda, and 2 teaspoons of garlic powder to a a sieve and sift them together. Alternatively, whisk to combine nicely and aerate the flour.
- Dust the side of a box grater (with the largest holes) with flour. Take your stick of butter from the freezer and drop it into a flour, and grate that stick of butter. Place in the fridge while you prep everything else. Add grated butter into flour mixture and use your fingers to mix it in – the flour and butter should NOT stick. Use your fingers to pinch butter with the flour if you can! Note: If you're using a food processor, make sure to chill the bowl and the blade (or disc) before you shred. Otherwise, the butter will melt on the steel (and that's not fun to clean out!)
- Now, slowly add 1 cup of cold buttermilk, and use a rubber spatula until a coarse mixture forms – take care not to add too much liquid at once! This can over saturate some parts of the dough and leave others totally dry.
- Using the same side of the box grater, shred cheddar. Then add 1½½ cups of sharp cheddar cheese and fold this into the dough until it's pliable using your hands (don't overwork it!)
Make the biscuits
- Spray your counter with some cooking oil spray (optional) and dust it with some flour – this helps make sure that your dough doesn't absorb all the flour on the counter
- Empty your dough on the work surface and roll it between your hands (almost rocking side to side) – do not knead the dough!
- Then, pat the dough from side to side to flatten it (use one hand and don't apply any pressure). Once it's flat in the shape of a rectangle, fold either side towards the center. Now rotate the dough so it's perpendicular to what it was before and pat it down once more. Then, once more (so a total of three times)
- Now, place the nice flat surface on your counter and pat the dough into a nice rectangle, about 1/2" thick (less than the distance upto the first joint of your index finger) – this will make biscuits that are 1-1.5" thick (they'll double when you bake) Dust a biscuit cutter (2 1/4") with flour and then punch into the dough. Take care not to twist it until your biscuit cutter has hit your work surface. Shake the biscuit out of the cutter.
- Bring the scraps together and pat them into a rectangular dough (avoid the rolling pin). Punch out the biscuits. Add the rest of the biscuits close to each other, arranging them in a circle (take care not to punch them down while arranging them)
- Make sure that the pinched edge (what used to be on the bottom) is at the top – this will ensure a higher rise!
- Melt 4 tablespoons of butter for the topping, add ½ teaspoon of minced garlic and mix well. Brush the tops of all your biscuits with this butter-garlic mixture
- Then, pop them into the oven and bake them for about 20 minutes until the top is golden brown. Or you can tap the biscuit with a fork to check the consistency. If it's not quite as brown, pop them back in for another 3 to 5 minutes (this will depend on your oven!)
- Pull them out of the oven, brush with a bit more butter (and any cheddar cheese if you have extra) and pop them back in for 2-3 minutes.
- Brush the baked biscuits with more butter. Enjoy the flakiest biscuit ever!
Notes
- If you don’t have a cast iron skillet, just butter the bottom of a baking sheet and use that instead. Also, the oven rack you use will determine how “crispy” the top and bottom get. Using the bottom rack, where there’s more direct heat will lead to crispier edges.
- Use cold, cold butter and grate it into the flour – this ensures that the butter remains cold until it goes in the oven. The water in the butter steams and helps the biscuit become puffy and beautiful
- Don’t overwork the dough and there’s no need to knead (see what I did there!) – you want to pat down the dough gently to get the biscuit to the right consistency
- Don’t twist the cutter until it’s at the work surface and make sure you place the pinched side on the top so you can allow it to rise
- Use full fat buttermilk – you need the fat in the buttermilk to make the biscuits
- If you have biscuit dough in irregular shapes left over, just pop them back in the cast iron skillet once your proper biscuits are done – these biscuit drops make for great snacks in between the main snacks!
Nutrition
Nutrition information is automatically calculated, so should only be used as an approximation.
Note: This recipe was originally published on August 16, 2020. It was rewritten and republished on August 27, 2022 with new pictures. The original recipe photos and step-by-step instructions can be found below.
Step-by-Step Visual Instructions
I’ve aggregated the visual instructions together in one spot so you can confidently make these flaky buttermilk cheddar cheese biscuits!


These are freaking amazing. We made them for the super bowl as a side to steak and bleu salad. We made buttermilk with milk and vinegar and they still were awesome, though not as good of a rise. Reminded me of Red Lobster biscuits!
cheddar biscuit looks so perfect. Loved that they are baked in cast iron pan. Step by step instructions really making it easy to make. Thanks for sharing with all tips. Looking forward to trying them soon.