Dal tadka is a classic dish made with yellow lentils, spices, and a tempering of aromatics. This easy recipe is perfect for a weeknight meal, and with its rich flavor and creamy texture, it will become a satisfying dish everyone will love.

This post contains helpful tips and tricks! If you’re in a rush, please use the “Jump to Recipe” above!
🍲 What is dal tadka?
Dal refers to lentils. Tadka means “tempering” (infusing fat, typically oil or ghee, with spices and aromatics). This involves heating oil or ghee, adding spices like cumin seeds, dried red chili peppers, and curry leaves to infuse flavors into the oil. This flavored oil is poured on top of the completed dish. So, dal tadka or tadka dal is basically a simmered lentil base with the tempering poured on top.
Restaurant style dal tadka also often involves a ‘dhungar‘ process (which adds a smoky note by using charcoal). However, most home recipes are quite simple, and do not need this step to pack a punch with flavors.
Why you’ll love this recipe
I believe in creating authentic flavors without the complexity of many “single use” ingredients. I think you’ll love this recipe because:
- Simple and ready in one hour: My recipe is simple and does not use too many special ingredients. In fact, most ingredients and spices can be found at most local grocery stores or online – no need for specialty items!
- Authentic flavors: This recipe is my mother’s and grandmother’s exact recipe, so it’s been tested over three generations, so you can trust it! The lentils are soft and creamy, and the spices add a rich and complex flavor.
Looking for other meals with lentils? Try my kitchari, Ethiopian Misir Wot, or Mulligatawny Soup! All are vegan and gluten-free.
Ingredients & Notes
To make this dal tadka recipe, you’ll need toor dal (also called arhar dal), tomatoes, onions, Thai green chili peppers and red chili powder. You’ll need mustard seeds, cumin seeds and red chili powder for the tadka (i.e. tempering).

Ingredient Notes
- Types of lentils: This recipe uses toor dal (split pigeon peas). Stock up, since it’s the backbone of lentil dishes in India! You could also use masoor dal (red lentils), moong dal (split green gram) or chana dal.
- Use of peppers: I buy Thai chili, but Serrano peppers work too – make sure to chop them, and then seed them if you don’t want the full spice hit. I’ve used dry red chilis but you can omit this if you don’t have an Indian store nearby or can’t purchase online
- Whole vs. ground spices: Many Indian dishes will use both the whole spices and the ground spices to enhance the overall flavor of the dish. If you don’t have whole spices (e.g. cumin seeds) – skip that part and just use the ground spices. It’ll still taste great! You can also add more spices like asafoetida or garam masala to enhance the flavors of the dish.
- Vegan substitutions: If you’re vegan, I recommend using vegan butter as the fat to do the tempering, instead of the ghee. This will slightly alter the taste, but no reason to not enjoy the dish!
Make dal tadka on stovetop
There are three steps to make the best dal tadka recipe: cook dal, make the base, and then add the tadka.
Clean and cook the lentils until they’re tender
Sift through lentils to remove small particles or stones (it’s unlikely you’ll find any but good to make sure!). Then, measure lentils, rinse them thoroughly until the rinsed water runs mostly clear (typically, twice, but sometimes it can take a couple of tries)
Once lentils are clean, add them to a fresh pot of water. Then, close the lid and bring to a boil. If it foams, skim it off, turn down the stove to a simmer and cook until tender (30 – 45 minutes depending on type and age of lentil).
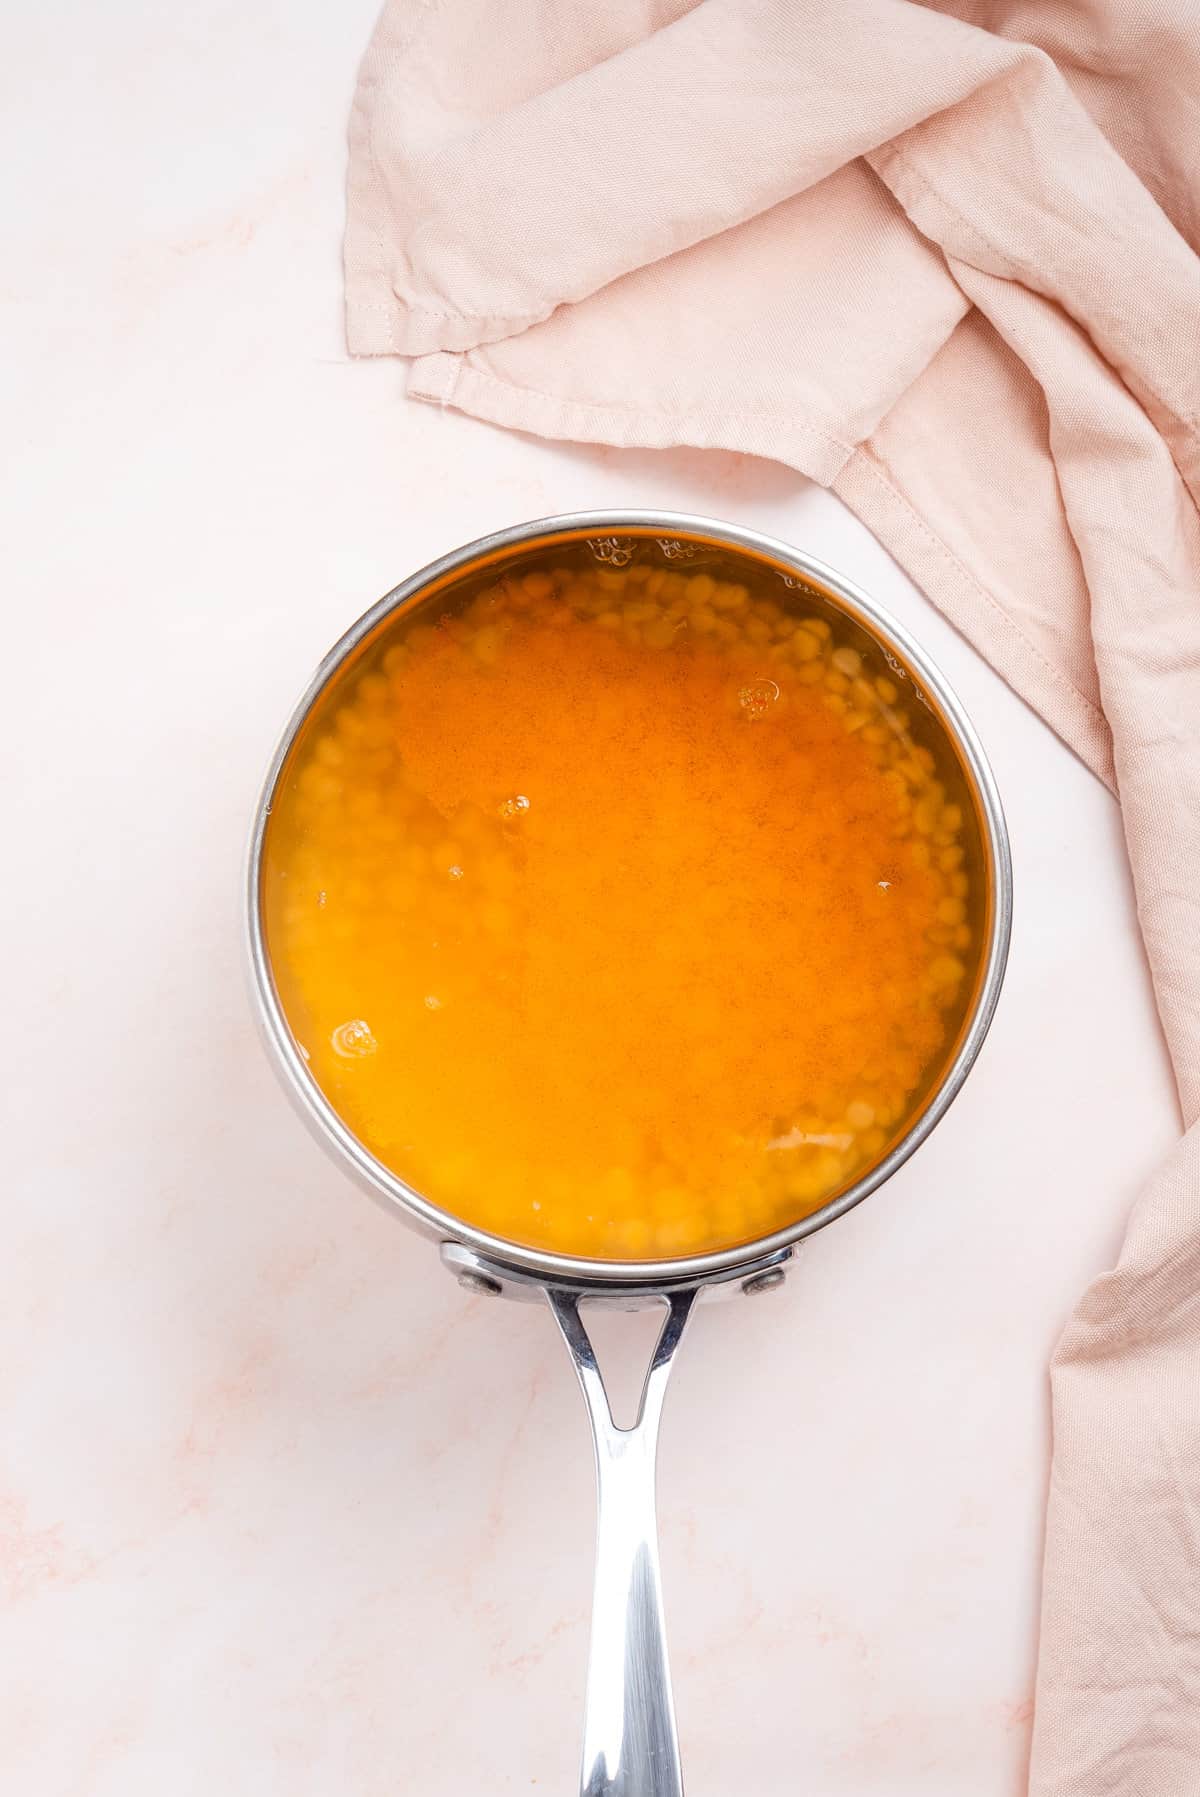
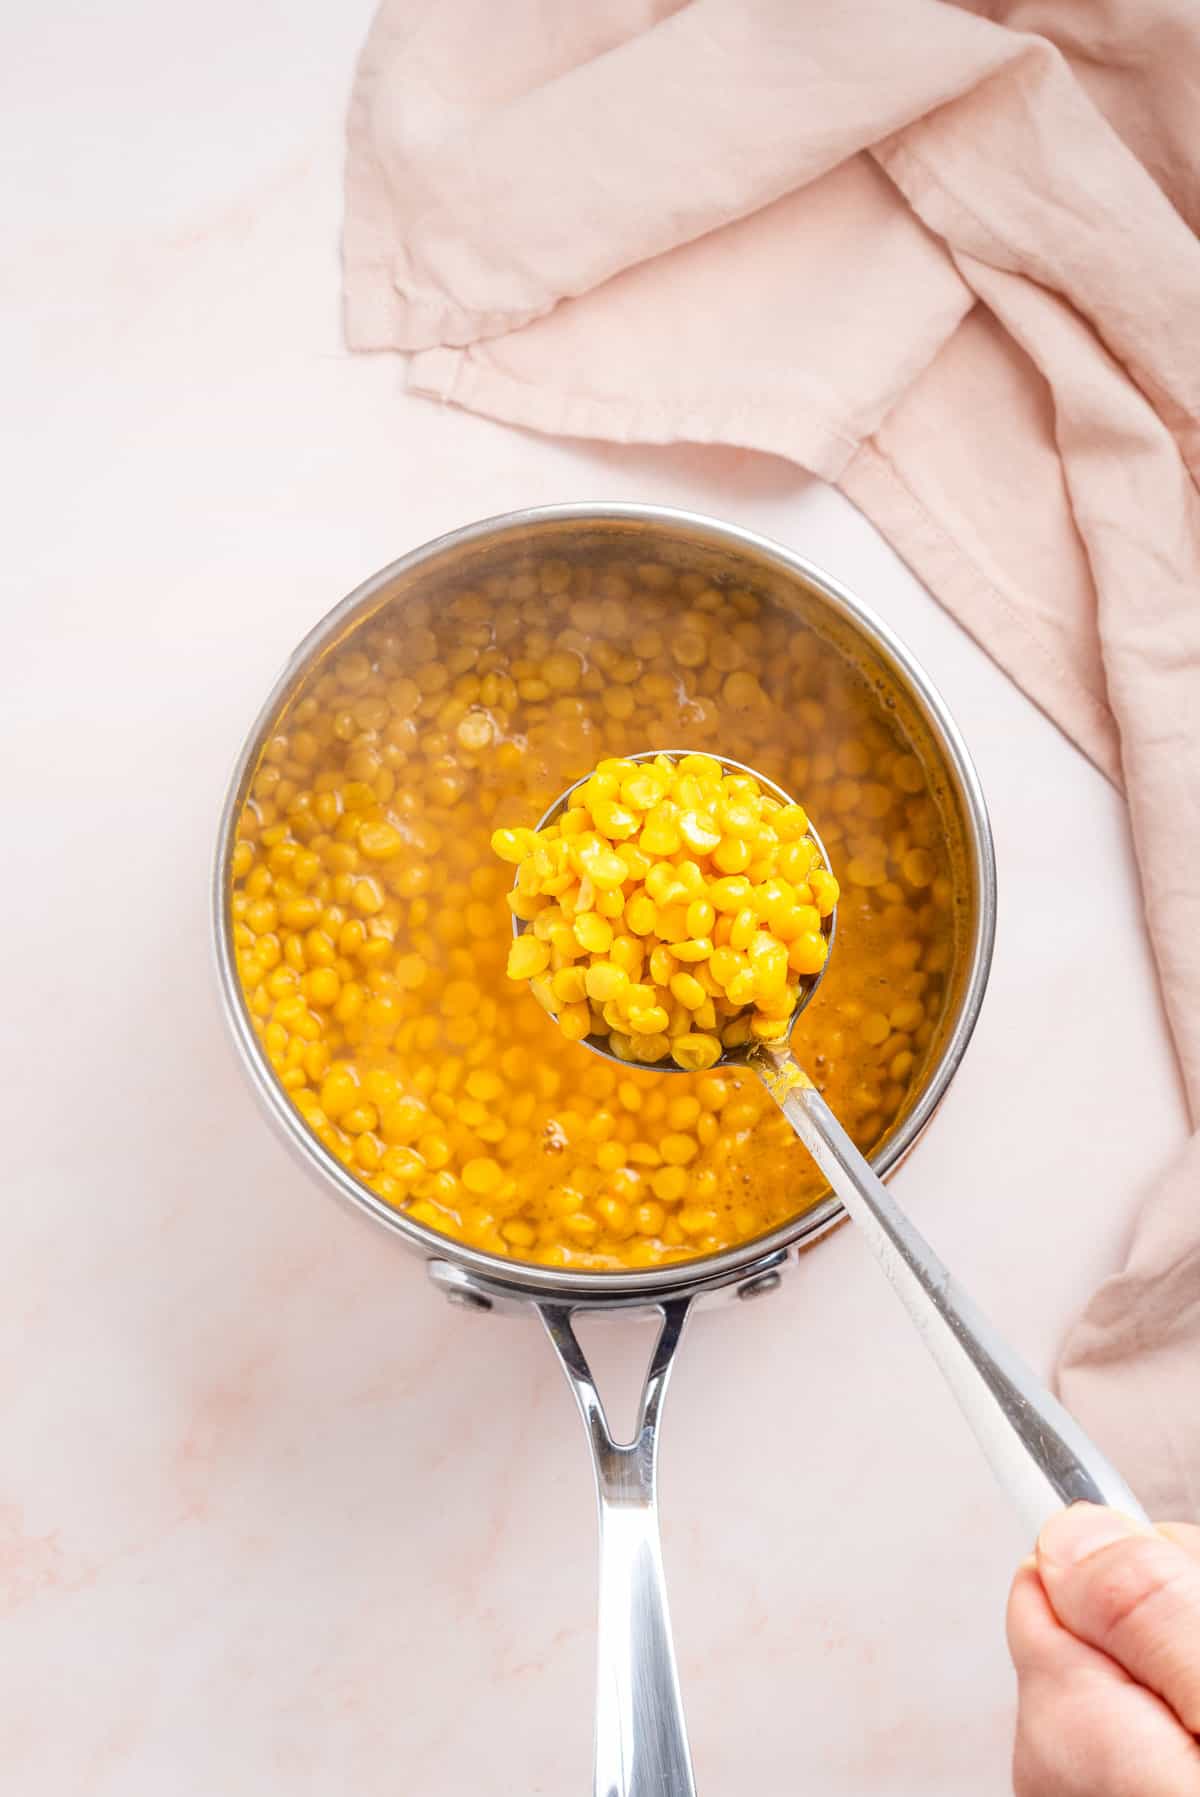
When it’s done cooking, lentils should be tender. If they look too or feel too “thick”, meaning it’s cooked through but not fluid, add a bit of water (~1/4th to 1/2 cup does the trick). This is also a personal preference: my mom loves her lentils to be very soft, but I like them to retain their shape a bit. Set this aside.
Make the base for dal (before the tadka)
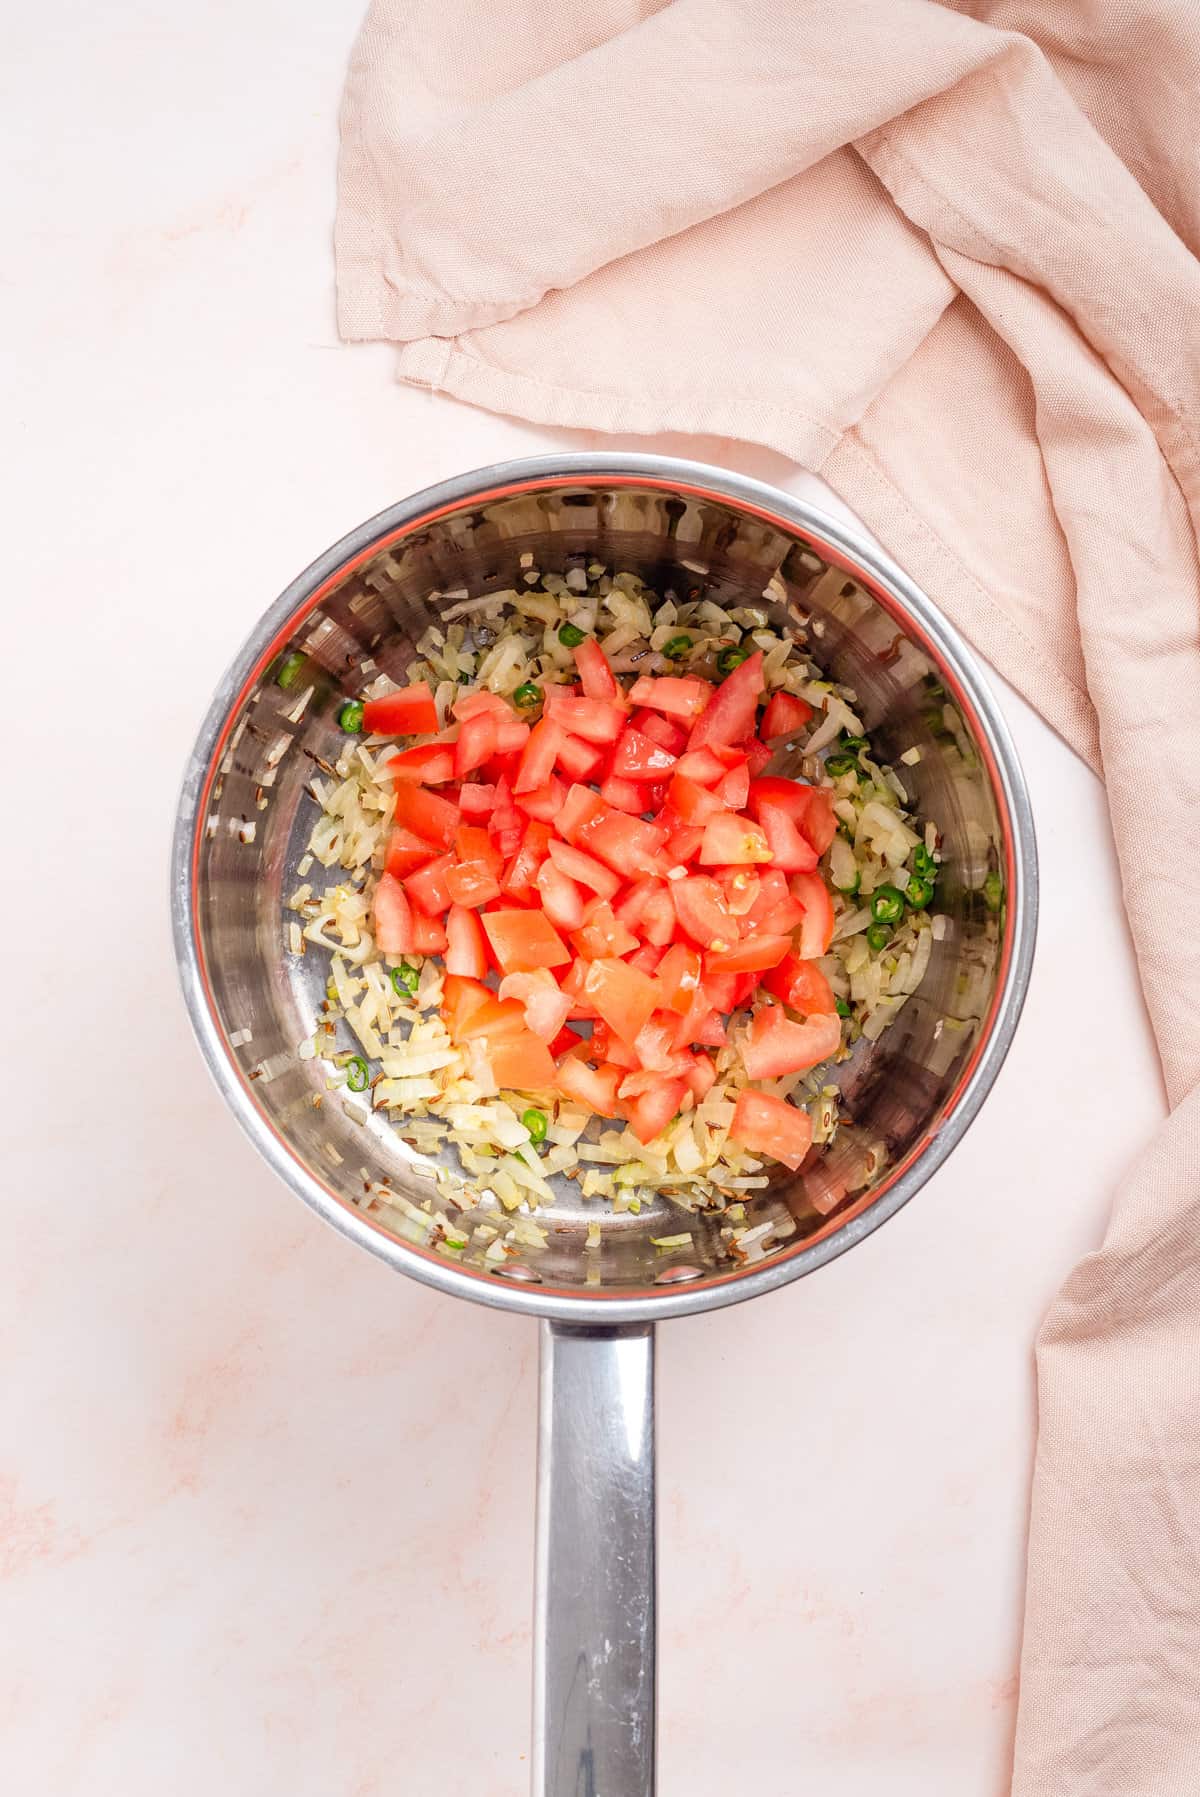
Add oil or ghee to the same pan. Add cumin seeds to the hot oil and toast them quickly until fragrant. Fry onions and green chili peppers
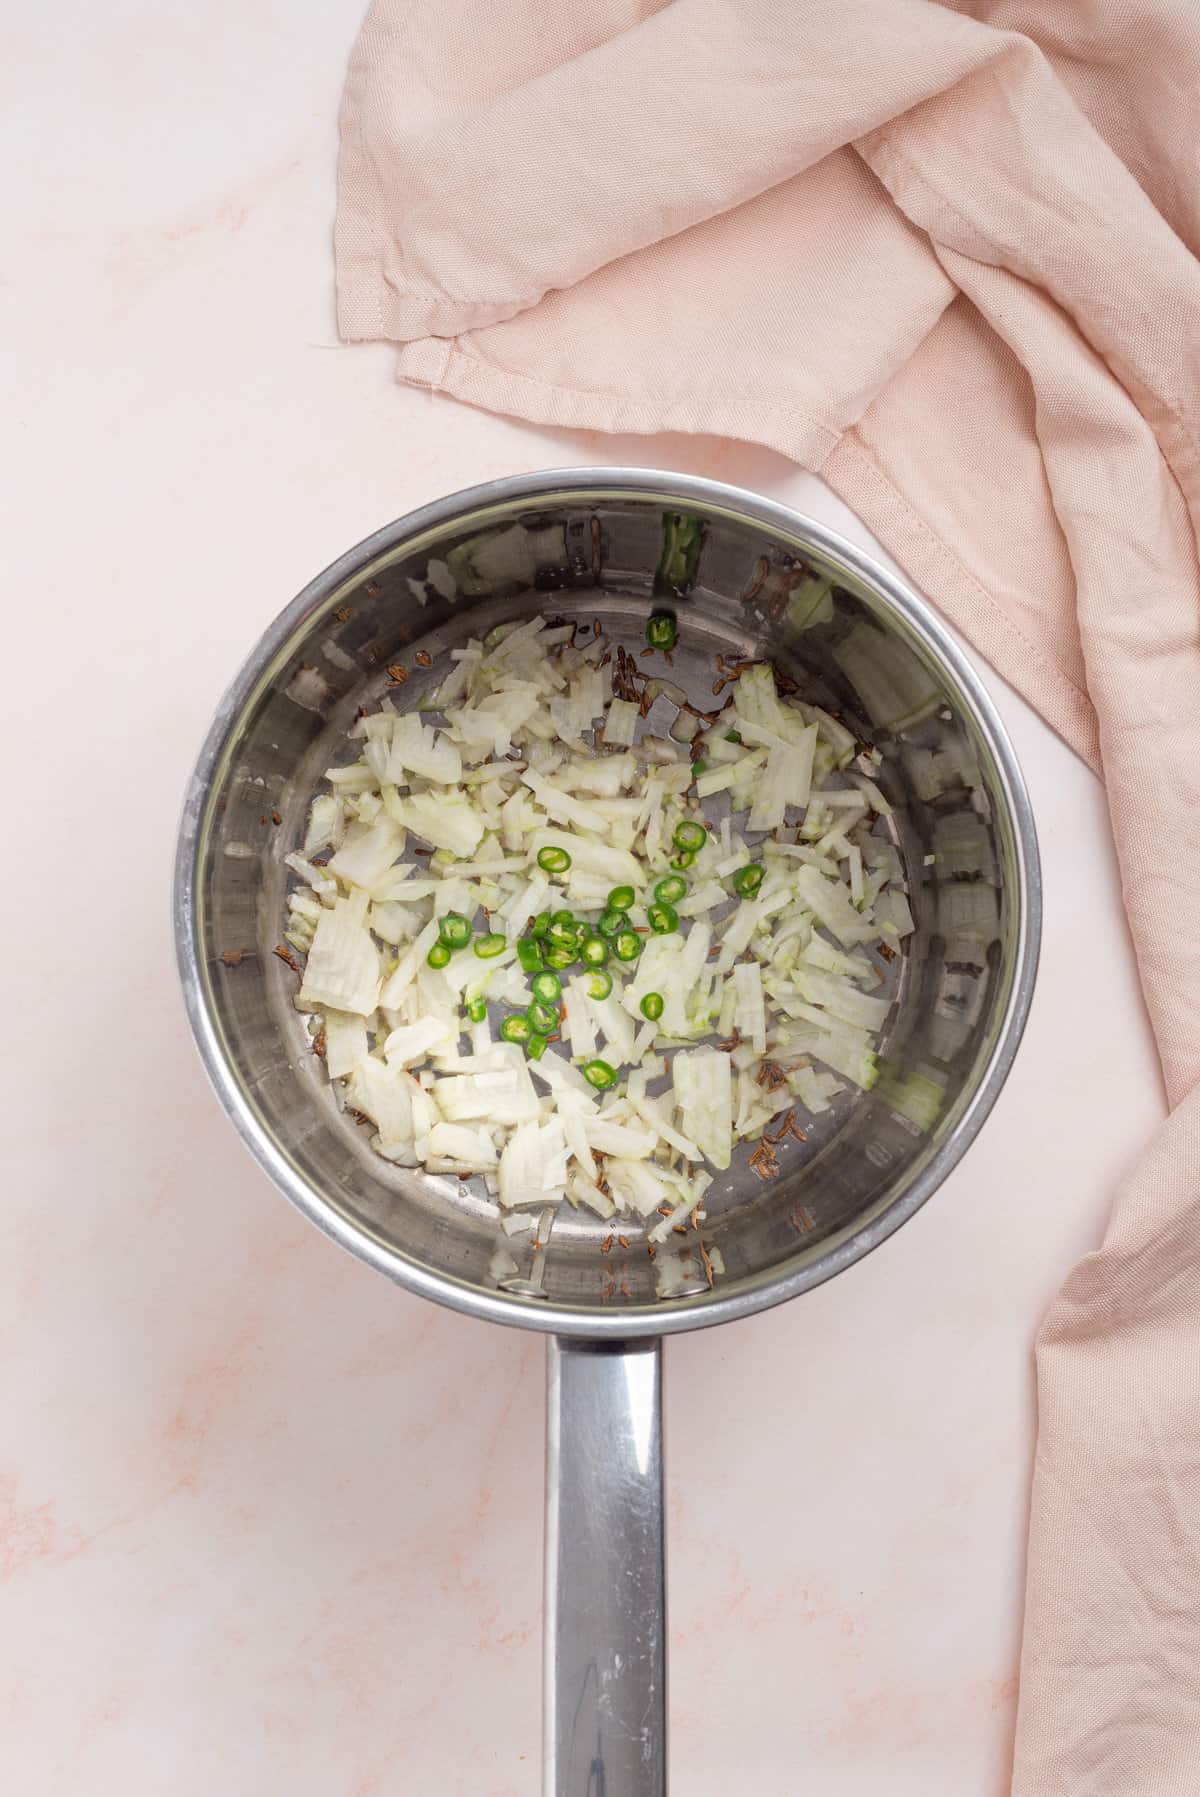
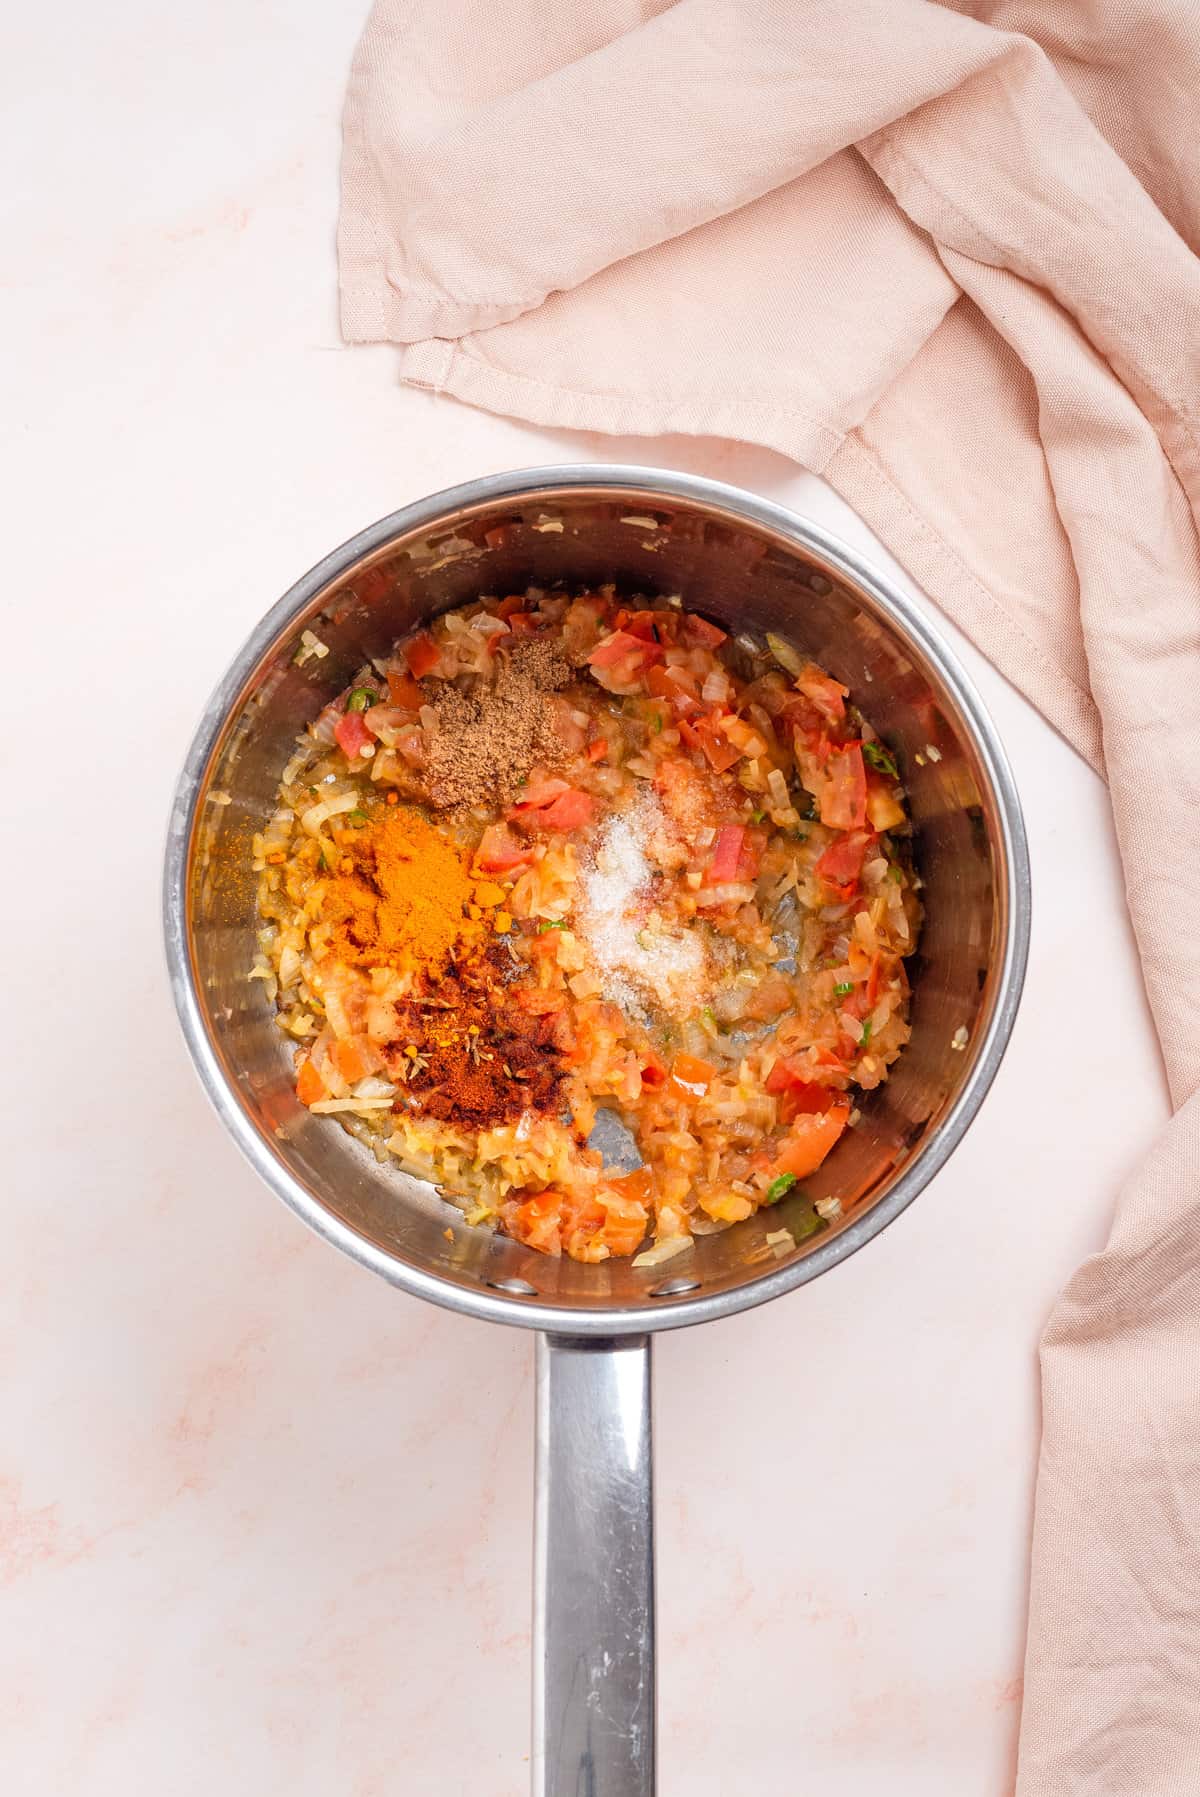
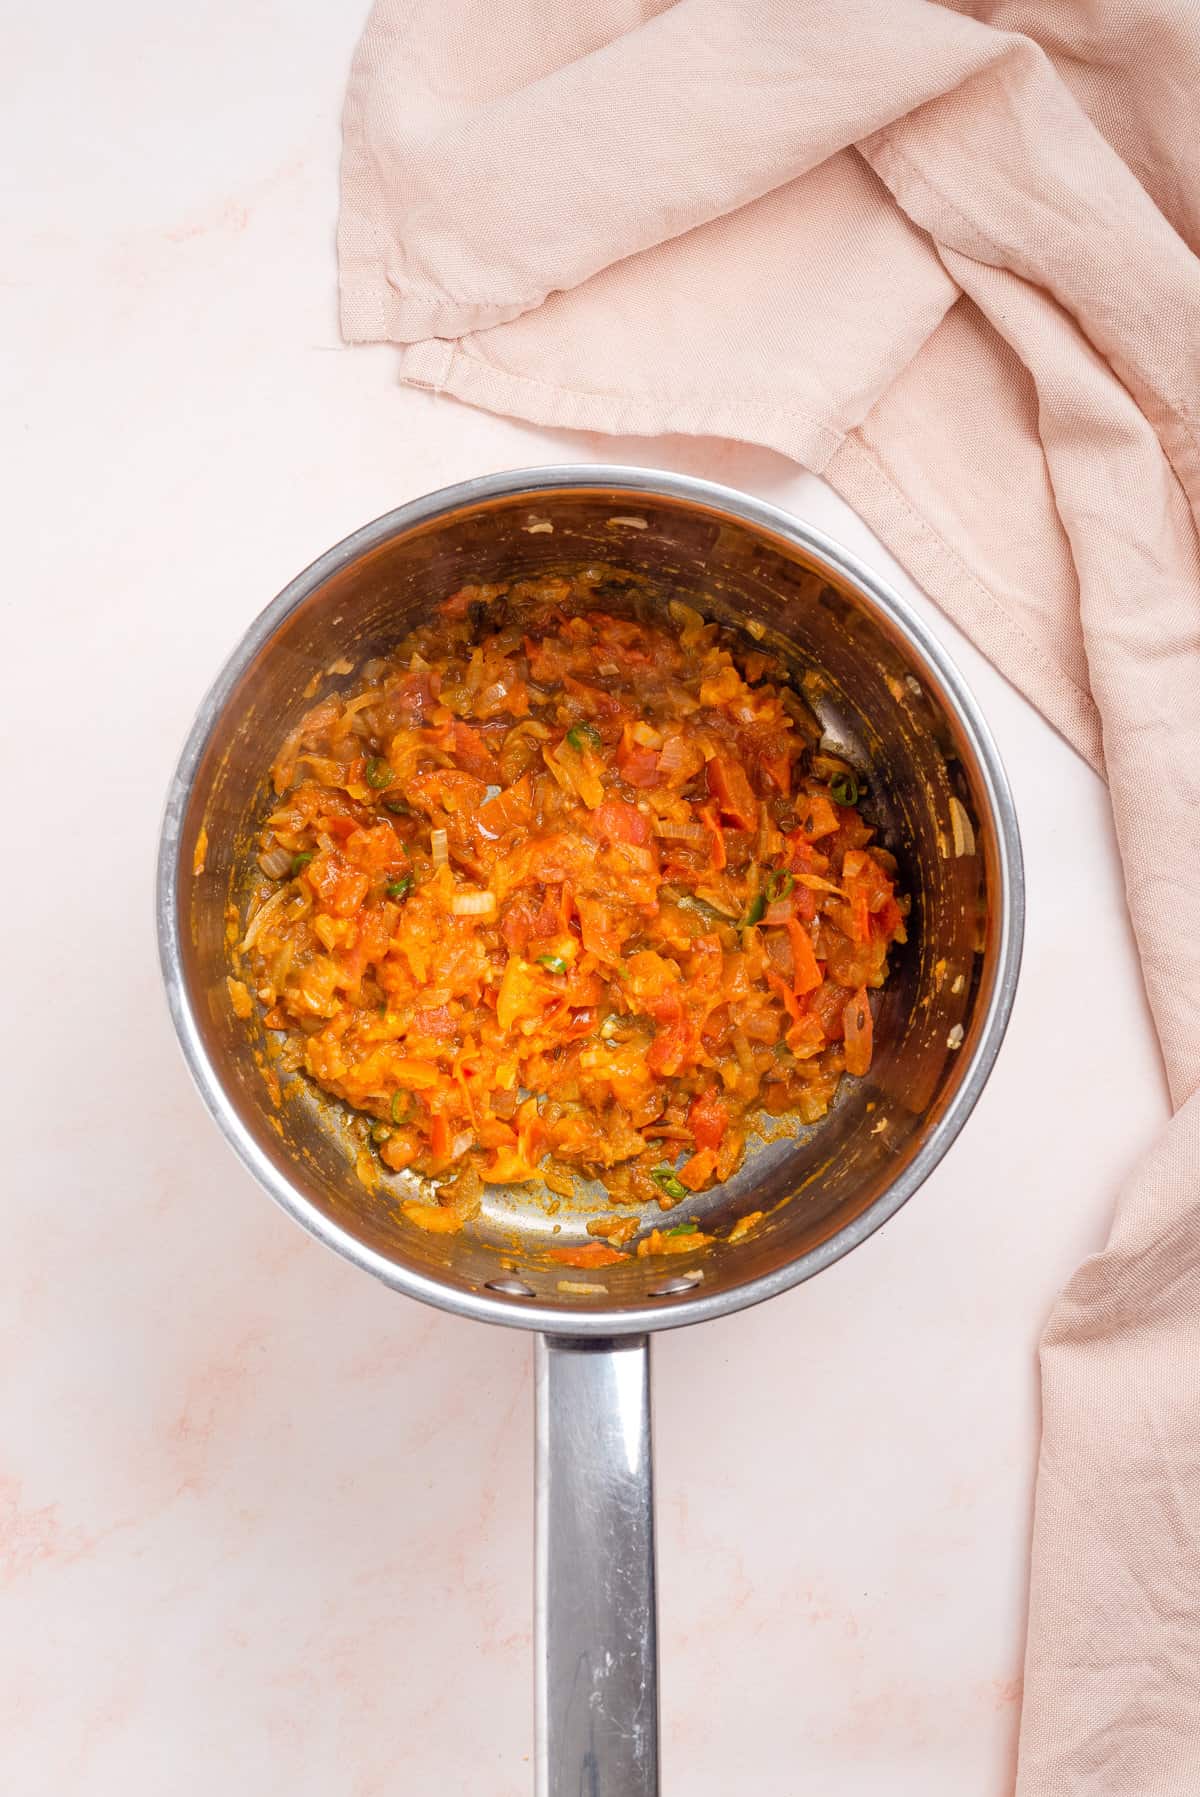
You could also add garlic at the end of this stage but this is optional. Then, add the chopped tomatoes, coriander powder, and Kashmiri red chili powder. Mix the spices well and fry until soft (about 5-8 minutes). If you’re vegan, you can use avocado oil in place of the ghee. Paprika works well as a substitute too.
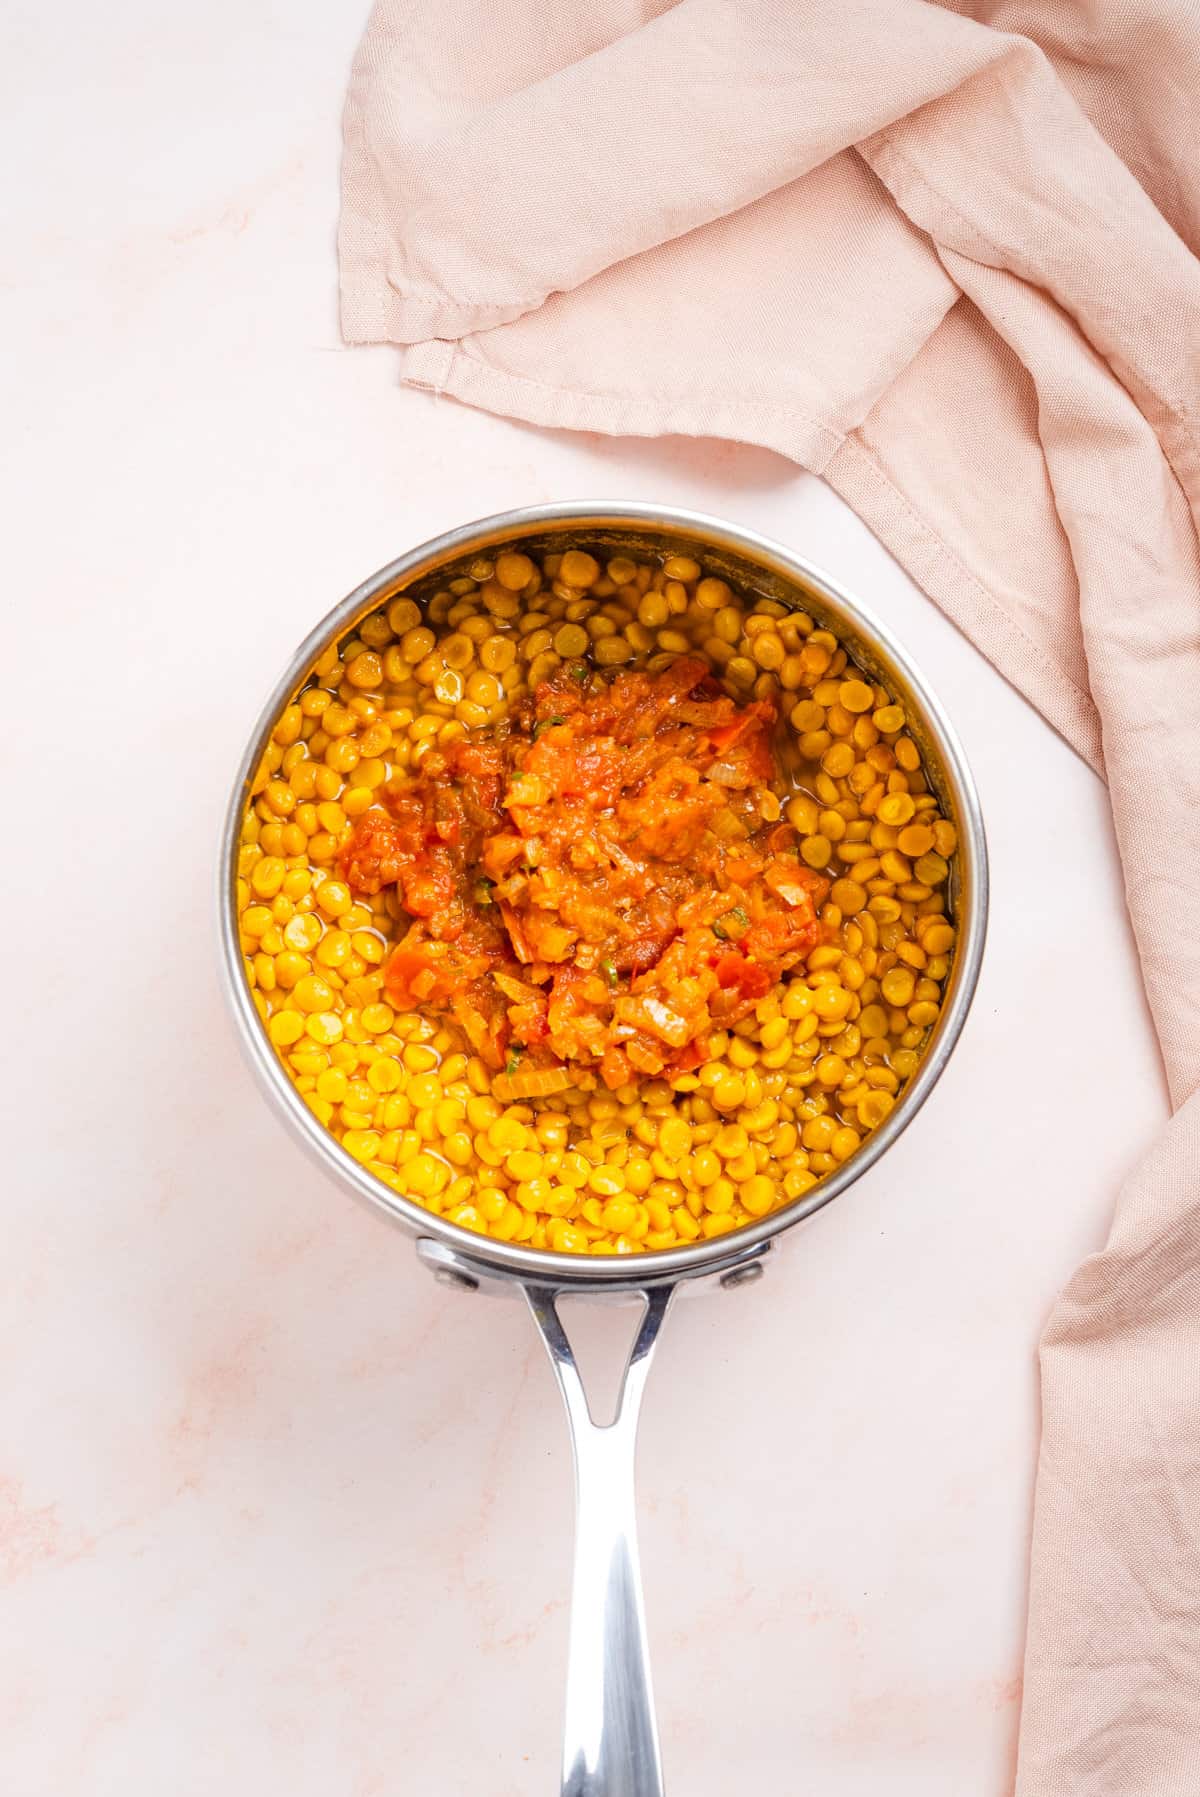
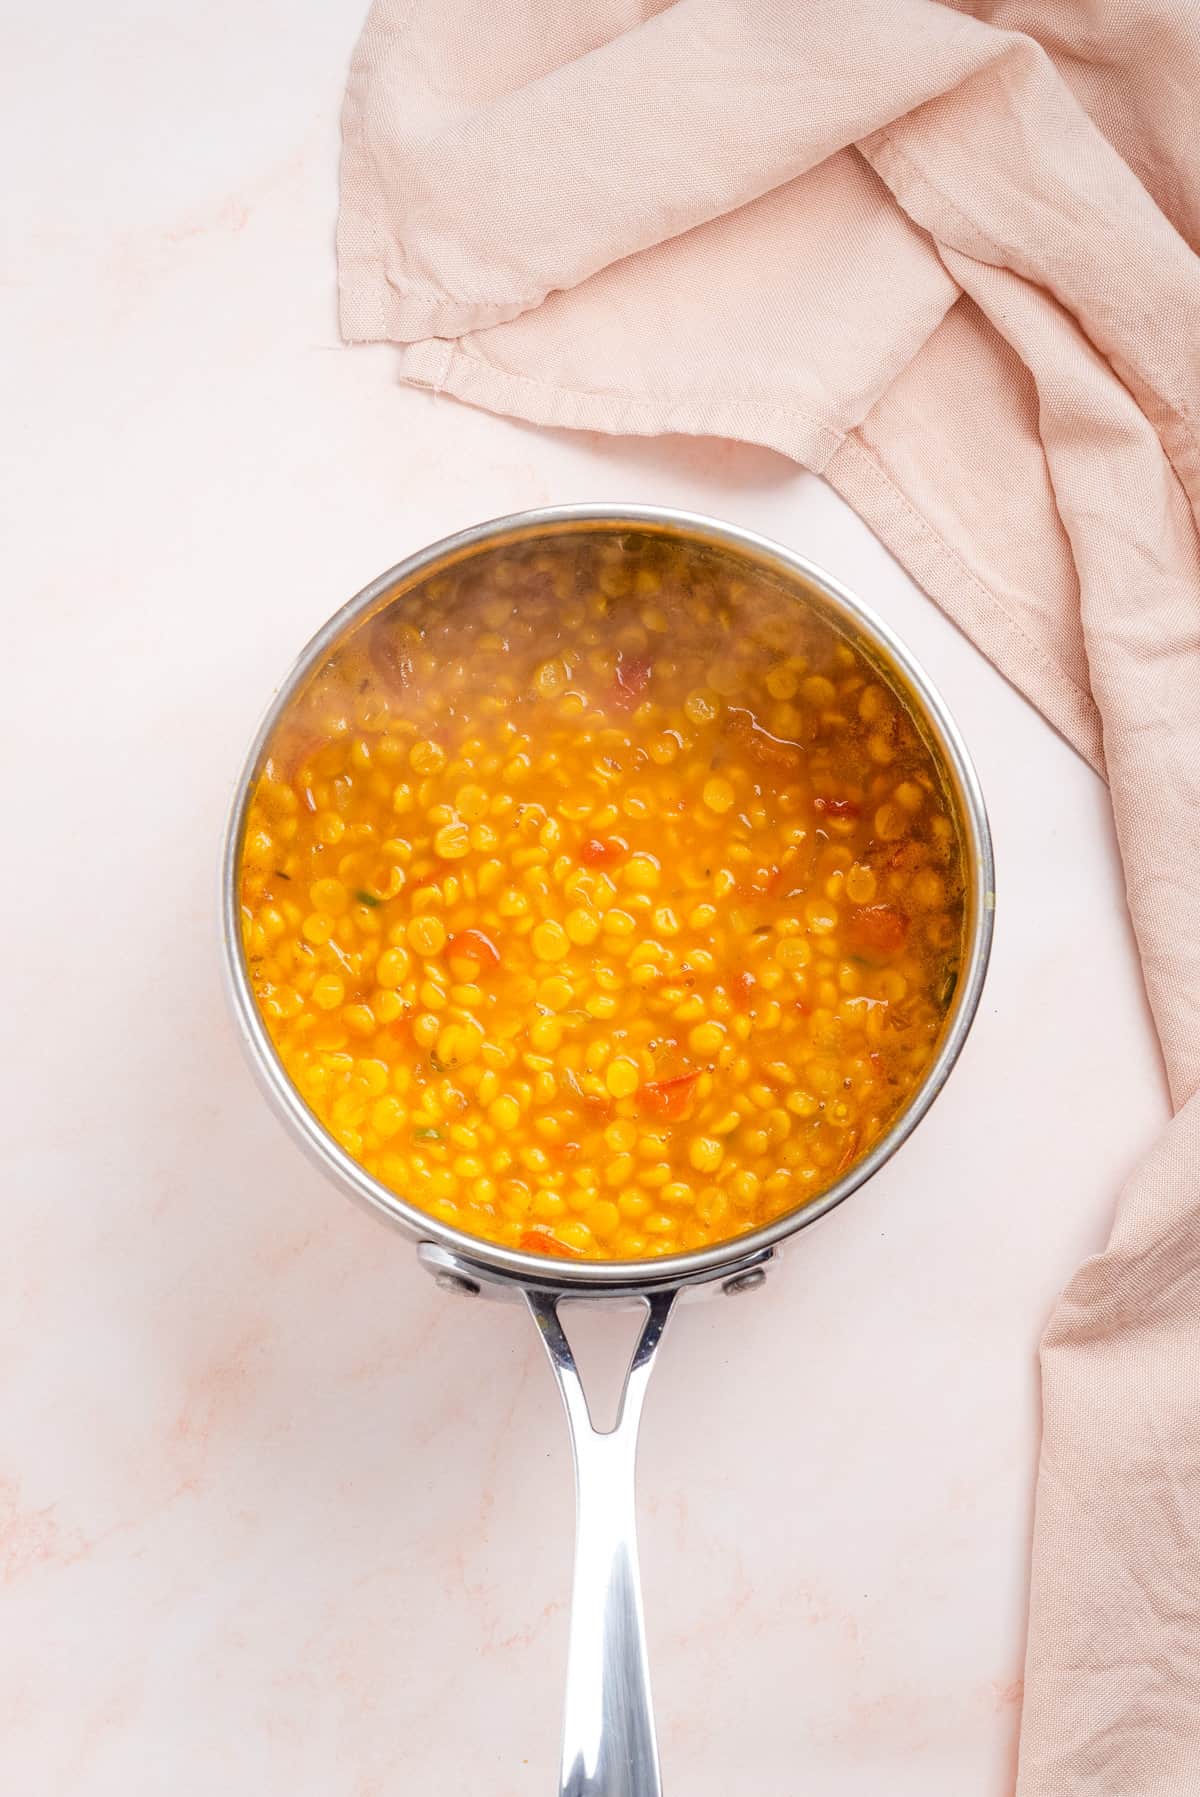
Add cooked lentils (along with water if you think it’s too “thick”). Let it cook on a simmer for 3 to 5 minutes. While the dal is cooking, make the tadka!
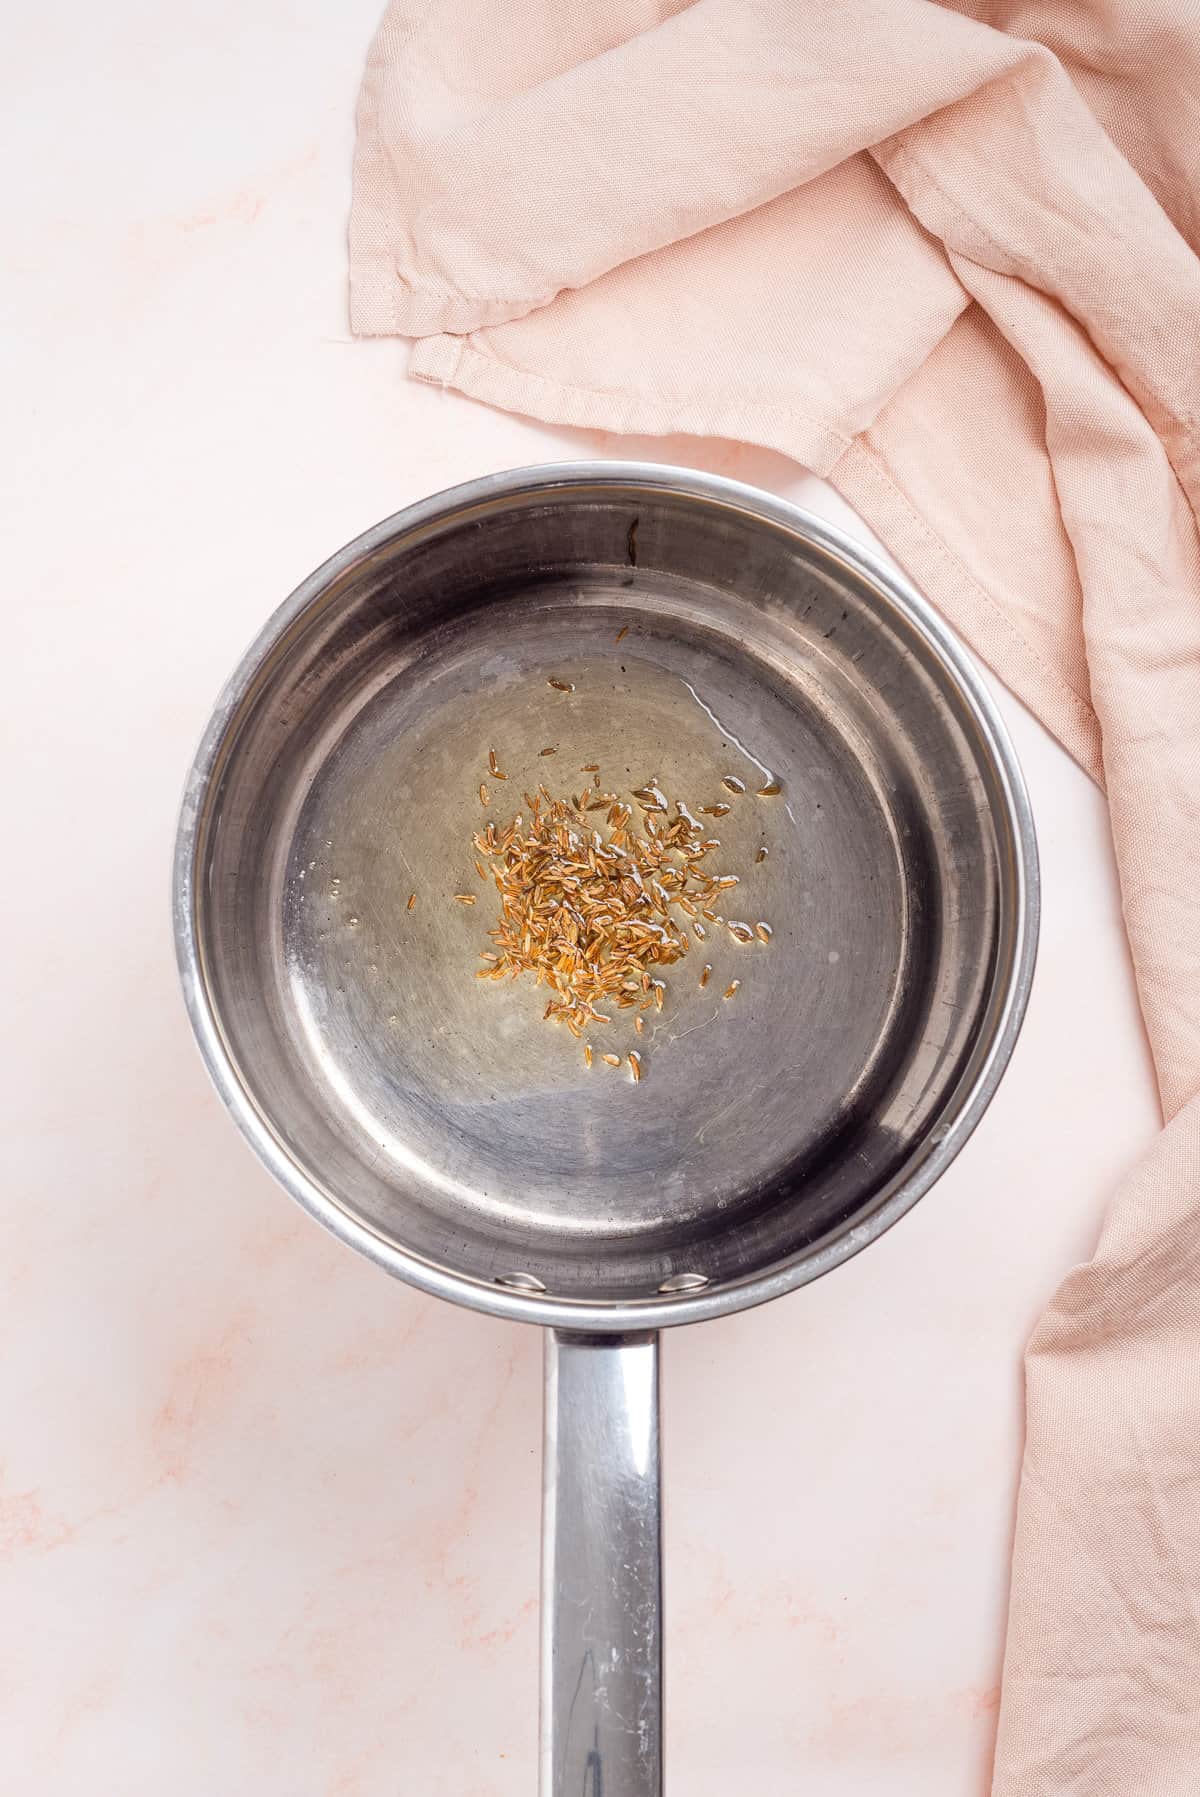
Tadka (i.e. tempering with spices and aromatics)
Tadka or tarka is the tempering process that is critical while making this recipe. I typically use ghee to temper since it really brings out the flavors. However, avocado oil works just as well if you’re vegan. The steps are different for fresh spices vs. ground spices.
If you’re using fresh spices, heat the oil or ghee first. Then, add mustard seeds, and cumin seeds and Indian dried red chili if you’re using that. Then, add the red chili powder. Saute together and set aside. This is how I’ve made it.
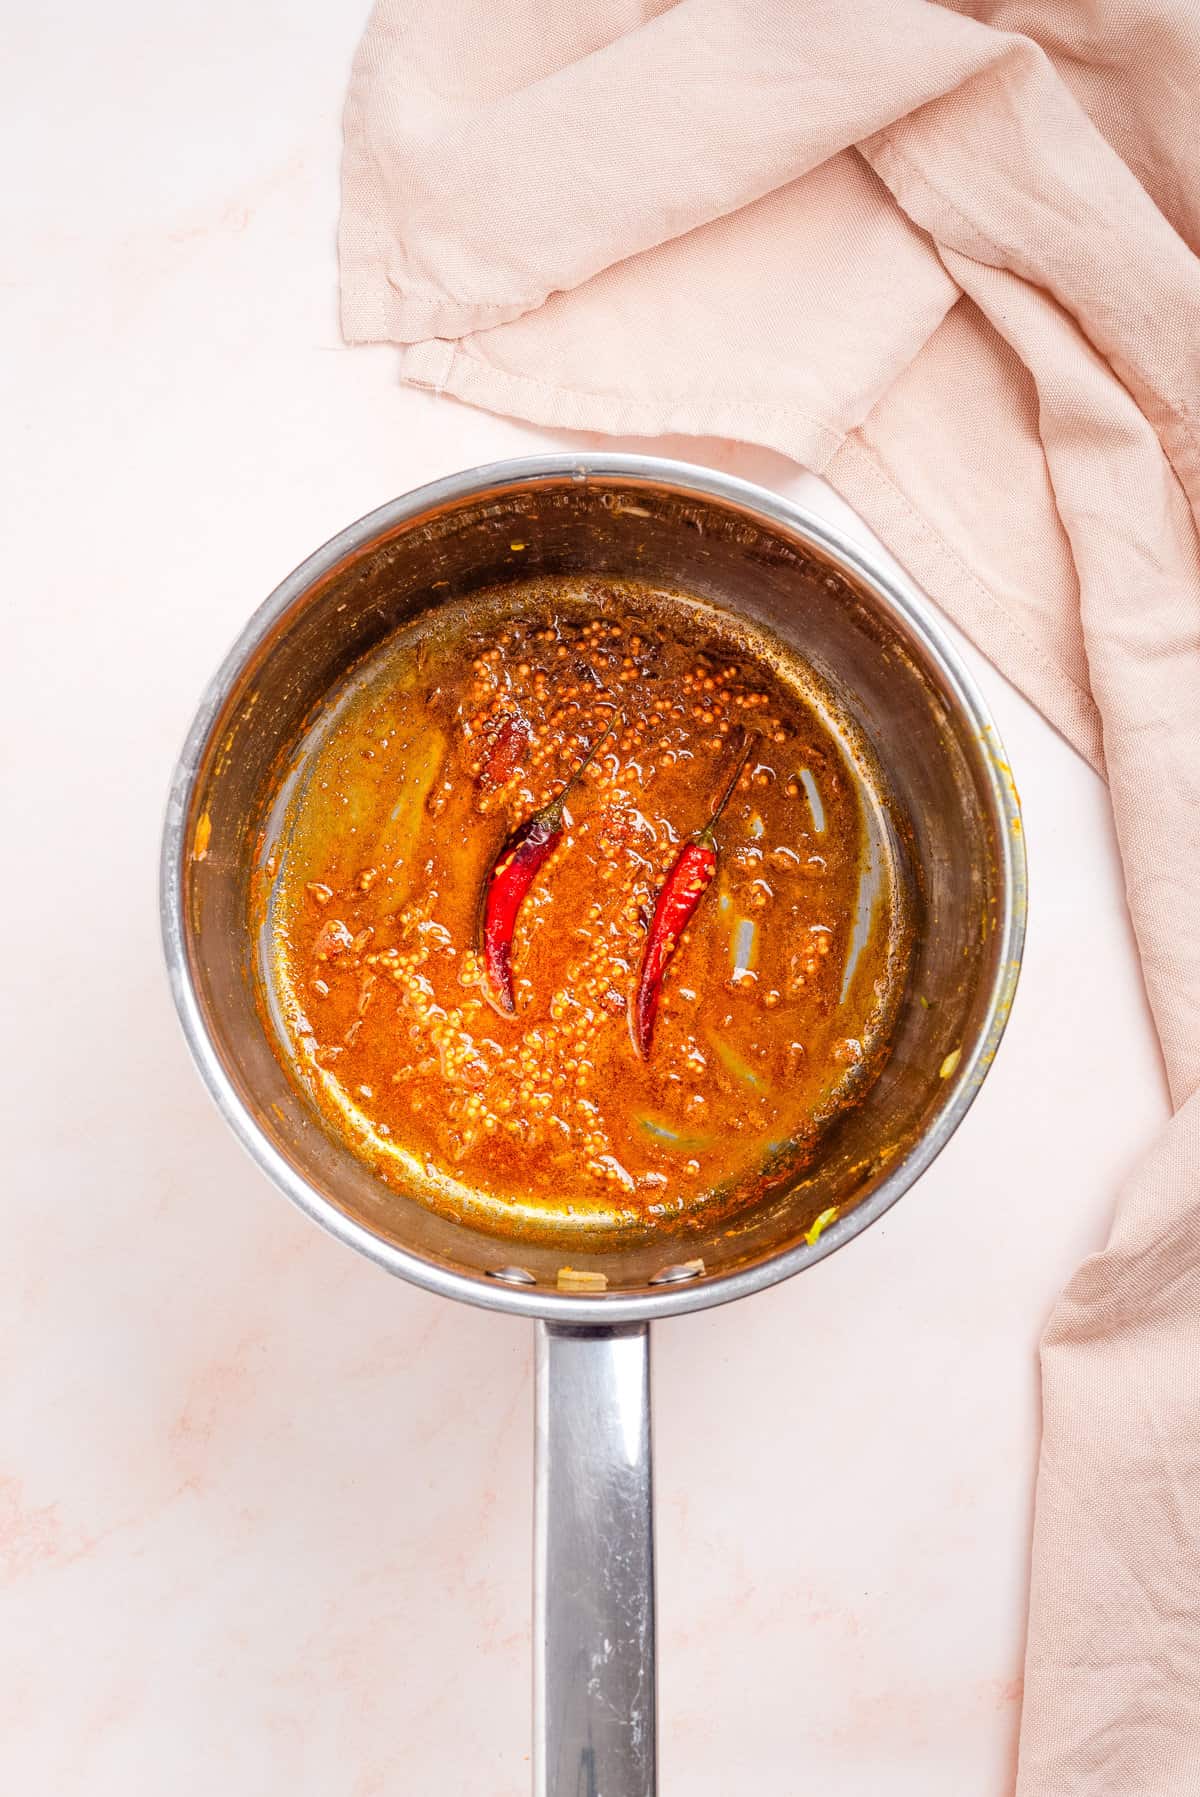
If you’re using ground spices, heat the oil or ghee. Then, add mustard seeds, and all ground spices together – cumin, and chili powder. Cook until this is thick and saucy. The finished product might look spicy, but it’ll just add depth to the dal. You can also skip this step if you don’t want to (or need to cook quickly!)
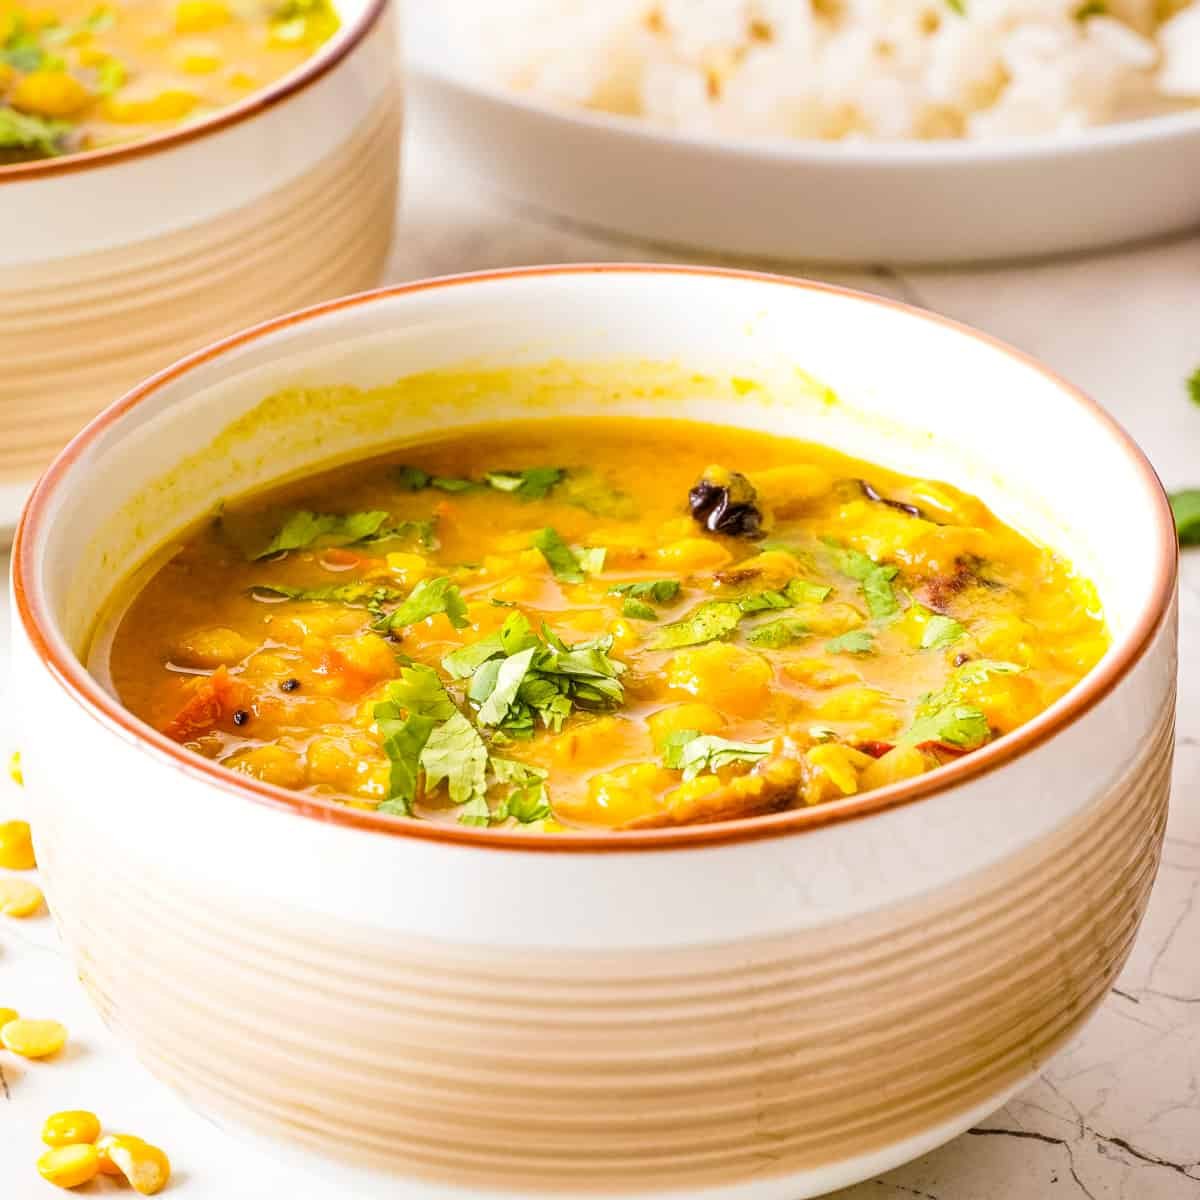
When the base is done cooking, add the tadka on top the cooked dal, and mix well. Garnish with fresh cilantro and serve hot with rice or flatbread.

Instant Pot Dal Tadka Recipe
Most of the steps here are the same.
- First, rinse and clean the lentils. You also don’t need to soak the lentils beforehand if you’re going this route.
- Add cleaned lentils along with 2.5 cups of water to the pressure cooker or Instant Pot and cook on high to pressure cook lentils.
- With an Instant Pot, cook on high pressure for 10 minutes. Allow natural pressure release for 10 minutes, and use manual valve to release the rest.
- If you pressure cook, release after 7-8 whistles for optimal texture.
Besides pressure cooking dal, follow the same steps as the stovetop recipe.
Tips for the best dal tadka
This homemade dal tadka is authentic, time-tested and easy. Following the tips below will help you get it right each time, whether it’s your first or hundredth!
Cook time for lentils depends on type, age and method:
- Type of lentils: Moong dal takes 20 minutes, toor dal about 30 minutes, and masoor dal takes about 45 minutes (on stovetop).
- Age of lentils: Fresh lentils take ~20 – 45 minutes to cook stove-top. But the older they are, the longer they take to cook. If lentils are not soft when you’re done cooking, allow them to cook a bit longer. Add boiling hot water to pot if needed, you can drain later!
- Method used: In a pressure cooker or an Instant Pot, all the lentils take roughly 8-9 minutes. With a pressure cooker, wait 3 whistles for moong dal, 5 for toor dal, and 7 for masoor dal.
Other tips for cooking lentils just right:
- Use good quality lentils. The quality of the lentils you use will make a big difference in the taste of your dal tadka. Look for lentils that are plump and have a bright color.
- Soak the lentils before cooking. Soaking the lentils before cooking will help them to cook more quickly and evenly. Soak the lentils in water for at least 30 minutes, or up to overnight. If you don’t have time to soak the lentils, you can still make a delicious dal tadka. Just increase cooking time by 10-15 minutes.
- Adjust the consistency. The consistency of your dal tadka is up to you. If you like it thick, cook it for a longer period of time. If you like it thinner, add more water or broth.
Create the right flavor profile:
- Use the right spices. The spices are what give dal tadka its characteristic flavor. Be sure to use a good quality garam masala and turmeric powder. You can also add other spices to taste, such as cumin, coriander, and chili powder.
- Don’t skip the tempering process! Tempering the spices is a process of cooking them in oil until they become fragrant. This adds a depth of flavor to your dal tadka.

Storage & serving suggestions
Serve: Dal tadka is the best comfort food on a cold day. So I love to eat it with jeera rice (Indian cumin rice) or with a simple flatbread like roti, chapati, or my favorite homemade naan.
Store: You can store the dal in the fridge in an airtight container for up to 5-6 days. Reheat only the portion you want to eat, and not the whole container.
Freeze: If you want to freeze it, portion into airtight containers and pop in the freezer. When ready to eat, just thaw first for 30 minutes. Then, heat on stove top or microwave until its piping hot, and enjoy! It saves for up to 3 months!
Other hearty Indian recipes:
Or check out even more Indian curries or Indian street food recipes.

Simple Indian Dal Tadka
Ingredients
For the lentils:
- 1 cup toor dal, split yellow pigeon peas
- 4 cups water, use 2½ cups for Instant Pot or pressure cooker
- 1 teaspoon ground turmeric
For the dal base:
- 1 teaspoon ghee, or avocado oil for vegan
- 1 teaspoon cumin seeds
- ½ medium onion, finely chopped
- 1 –2 Thai green chilies, finely chopped (or serrano)
- 2 medium tomatoes, chopped
- 1 teaspoon ground cumin
- 1 teaspoon ground coriander
- ¼ teaspoon Kashmiri chili powder, or paprika
- 1½ teaspoons kosher salt
- 2 tablespoons fresh cilantro, chopped, for garnish
For the tadka (tempering):
- 1 tablespoon ghee
- 1 teaspoon black mustard seeds
- 1 teaspoon cumin seeds
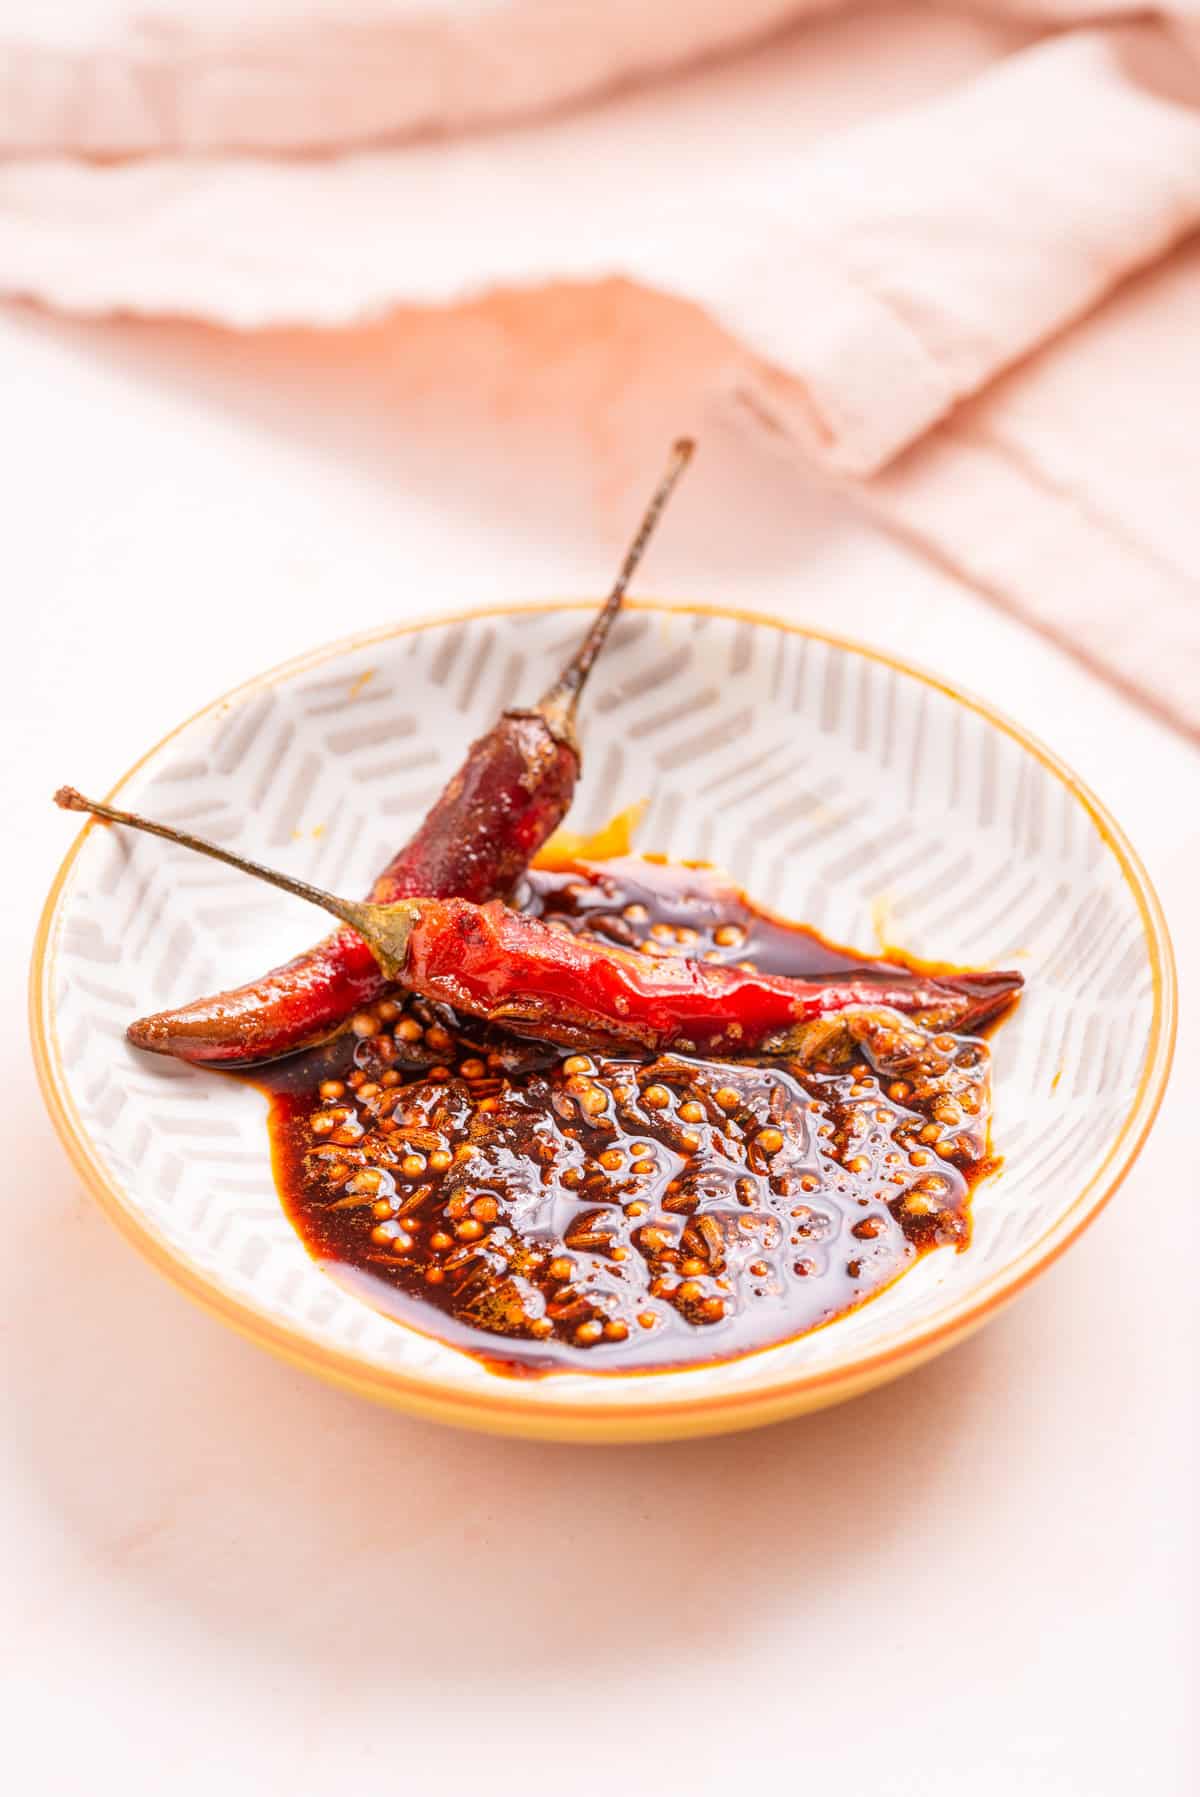
- 2 –3 dried Indian red chilies, optional
- ¼ teaspoon Kashmiri chili powder
Instructions
- Rinse the toor dal in cold water until the water runs mostly clear. Soak in fresh water for 15 minutes, then drain.
- Add the drained dal, 4 cups water, and turmeric to a large pot. Cover and bring to a boil over high heat (2–3 minutes). Reduce heat to low and simmer for 30 minutes until the dal is soft and breaking apart. If it still feels hard, cook another 5 minutes. Some liquid should remain — if there’s too much, drain and reserve it for later.
- About 5 minutes before the dal is done, heat 1 teaspoon ghee in a medium skillet over medium heat. Add the cumin seeds and toast for 30 seconds until fragrant.
- Add the chopped onion and green chili. Sauté for about 3 minutes until the onion is soft and fragrant.
- Add the tomatoes and press them with a spoon to release their juices. Add the ground cumin, ground coriander, Kashmiri chili powder, and salt. Stir well and cook for 3–5 minutes until the tomatoes break down into a thick base.
- Add the dal base to the pot of cooked lentils. Stir to combine, cover, and cook together for 5 minutes. Add up to ½ cup of reserved cooking liquid to reach your preferred consistency.
- In the same skillet (no need to wash), heat 1 tablespoon ghee over medium heat. Add the mustard seeds. When they begin to sputter and pop, add the cumin seeds and dried red chilies if using. Let them sizzle for 20 seconds, then add the Kashmiri chili powder and stir for 5 seconds — remove from heat immediately so the ground spice doesn’t burn.
- Pour the hot tadka directly over the dal — it will sizzle and crackle on contact. Garnish with chopped cilantro and serve hot with rice or flatbread.
Notes
- Toor dal is the standard, but moong dal (30 min cook time) or masoor dal (20 min) both work. Adjust simmering time accordingly.
- The tadka goes on last and should sizzle when it hits the dal. If it doesn’t sizzle, the ghee wasn’t hot enough — the sound is the flavor.
- Raw whole spices (mustard, cumin seeds, dried chilies) go into the hot ghee first. Ground spices (chili powder) go in last and cook for seconds, not minutes — they burn fast.
- Instant Pot: Use 2½ cups water. High pressure for 10 minutes, natural release. Proceed with the dal base and tadka as written.
- Storage: Refrigerate up to 4 days. Dal thickens as it sits — add water when reheating. Freezes well up to 3 months
Nutrition
Nutrition information is automatically calculated, so should only be used as an approximation.


I am new to mustard seeds. I have seen yellow and black varieties. Does one work better here?
Hi there, yes, traditionally we use black mustard seeds!
Wonderful recipe, Shruthi! I just made it and it tastes so good I hope there are left overs for lunch tomorrow! The spices are rich, aromatic and soothing. I can see how this will be my go to comfort dish. I can’t wait to try more of your recipes.
Tried this out last night and it was fantastic! My first time making a dish like this but it was wonderful. Everyone enjoyed!
I made the recipe exactly as written and it was fantastic! I made it for my parents and wasn’t sure if they’d be into it (they’re used to the same old things), and they asked for the recipe. Yay! Thanks.
Your recipe was easy to follow and delicious. Thank you! The next time I make it, I want my 4 year old son to try it as well so maybe I’ll just drop the chillies then.
Love this recipe! It’s my go to when I want an authentic Dhal that is also very quick and easy to make. I keep making it again and again!
Thank you so much! This is one of my favorite comfort (but also healthy!) recipes to make on rotation at home 🙂 I’m glad you love it too.
I have to tell you this is the best Dahl recipe I’ve tried and I’ve had so, so many. I usually have to add a bunch of seasonings including salt but your mix and method was perfect. I will be using it from now on. In addition, I have to note that you’re one of the only recipes ( at least published online accessible in U.S.) that uses tadka. Everything else either has base added in as per your recipe or cooks base into the Dahl as it’s cooking from the beginning. it shockingly to me makes a huge difference to wait until lentils are done 5 minutes out as you have instructed. Flavor much better. Thanks again
Thank you so much, Melanie – really appreciate your comment! So glad that you loved the recipe.
Loved learning how to make this. Was very simple, hearty and filling. Thank you. I will be making it again.
Turned out better than I thought I was capable of !
So glad to hear that! 🙂
Absolutely delish! I love the taste and smell of cumin.. thank you for this simple recipe! Saving it..
Thank you! So glad you enjoyed it 🙂
Love this recipe so much! I have added variations to it including cooking the dal in coconut milk and also adding additional veggies to simmer such as cauliflower, kale and carrots. This is a staple for me now – thank you!
Oh love both those ideas! So glad you like it – thank you for sharing 🙂
Thank you for your recipe and the added comments to help people who may not have all the ingredients on hand a.k.a cumin SEED. It turned out great and I served with an extra long grain rice and garlic naan bread. So good!
So glad to hear it worked out well for you, Mike! Totally get that folks might not have all the ingredients on hand – but the recipe is definitely adaptable! Garlic naan, rice and dal is a winning combination – might make it myself tonight 🙂
For the dal base, the recipe lists as ingredients both cumin seeds and cumin powder, and both are mentioned in the recipe instructions. However, the main post does not mention cumin powder when describing the making of the dal base. I just want to be sure that both are required and not one or the other, especially since elsewhere you discuss using whole vs ground spices.
Hi Howard! Thank you for raising this question. The recipe card contains the comprehensive recipe with all ingredients, while the main post highlights a simpler version to show how you can make it without the cumin powder as well! Cumin seeds are typically used at the beginning, when you add them to the ghee or oil, whereas the cumin powder is added into the base itself. You can use whichever one you have on hand (either cumin seeds at the beginning or cumin powder into the base) or alternatively, if you have both, then you can use them both to enhance the flavor even more. The recipe tastes great regardless of whether you use just cumin seeds, just cumin powder, or both! Hope that helps.
I just tried it today , it turned out so good . Thanks 🙂
I hardly get time to cook and have been surviving on takeouts , this today was a welcome change .
Thank you so much – I’m so glad it turned out great for you!
This is so good. I think my daughter had at least 4 bowls. My son said it was good and he rarely says that about food I cook. Thank you for a great recipe. I did use just jalapeño for the peppers since that’s what we had and we don’t like a lot of spice.
What a lovely note, Beth – thank you. Jalapenos work great in the recipe in lieu of other peppers!
What is special in your recipe?
Hey Jagdish – my dal tadka recipe is inherited from my family and I try to optimize for folks who might want to try a new Indian recipe but don’t want to buy special ingredients just for a single time use. So, the recipes are simplified without compromising flavors. I hope that helps.
I like your receipie thanks
Thank you Anthony!