6 Ingredients | 1 Hour | Healthy air fryer / baked samosa recipe, filled with potato and peas. Perfect for a rainy day!
Chances are, if you've eaten at an Indian restaurant, you've had samosas. They might look complicated to make, but they've become a household staple these days. And they're delicious because they're flaky and flavorful.
That said, too often samosas are also oily. So, I set out on a mission to develop a healthy, Indian samosa recipe, so I can enjoy the snack without worrying about the fried goodness too much. So, here we are with the greatest Indian, plant-based snack. This page has recipes for both air fryer samosas and for baked samosas.
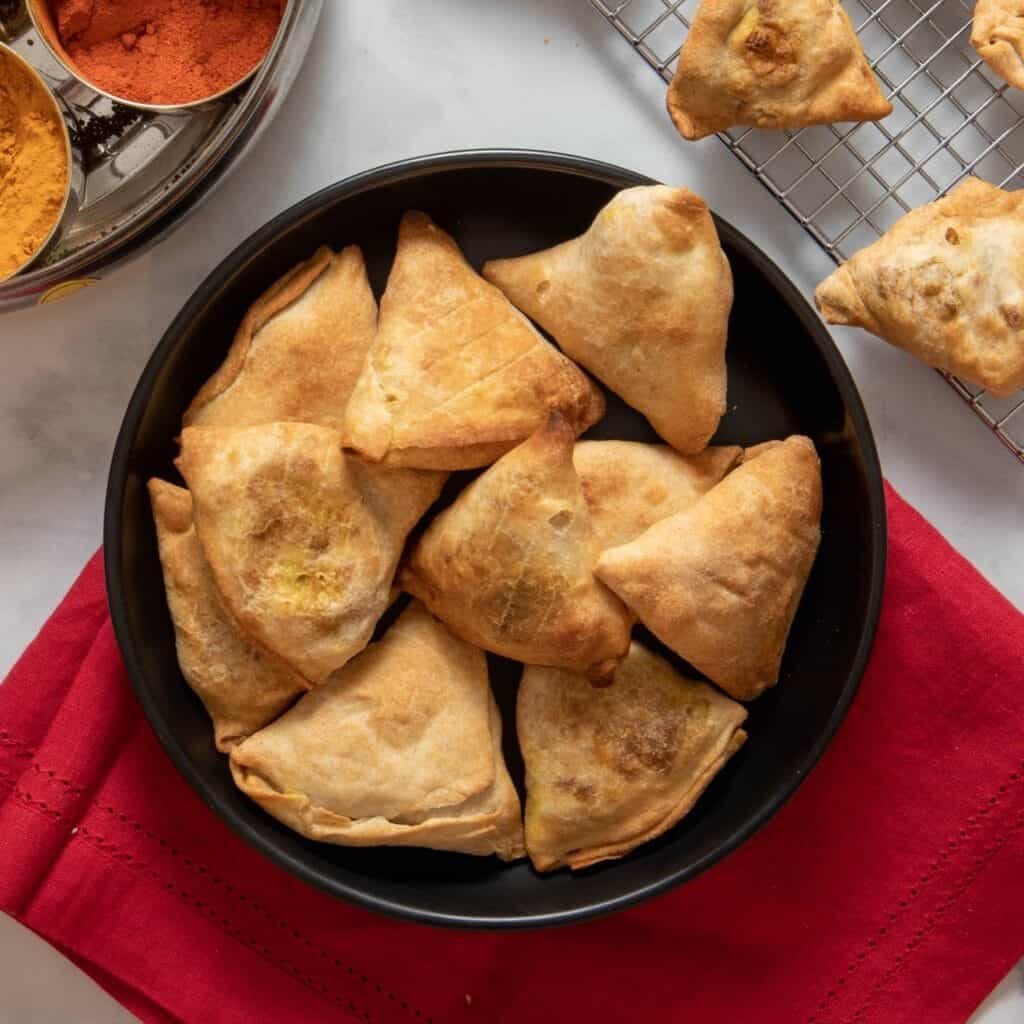
What are samosas?
Samosas are savory, typically deep-fried fritters, typically with spiced potatoes as a filling. Though I've also seen them made with meat, cheese or lentils. They also come in a few different shapes, just like us - the triangular ones are most popular, but I've also seen cones and half-moons. They were brought to East Africa by the migrant Indians during British colonization, and are often called "sambusa" there.
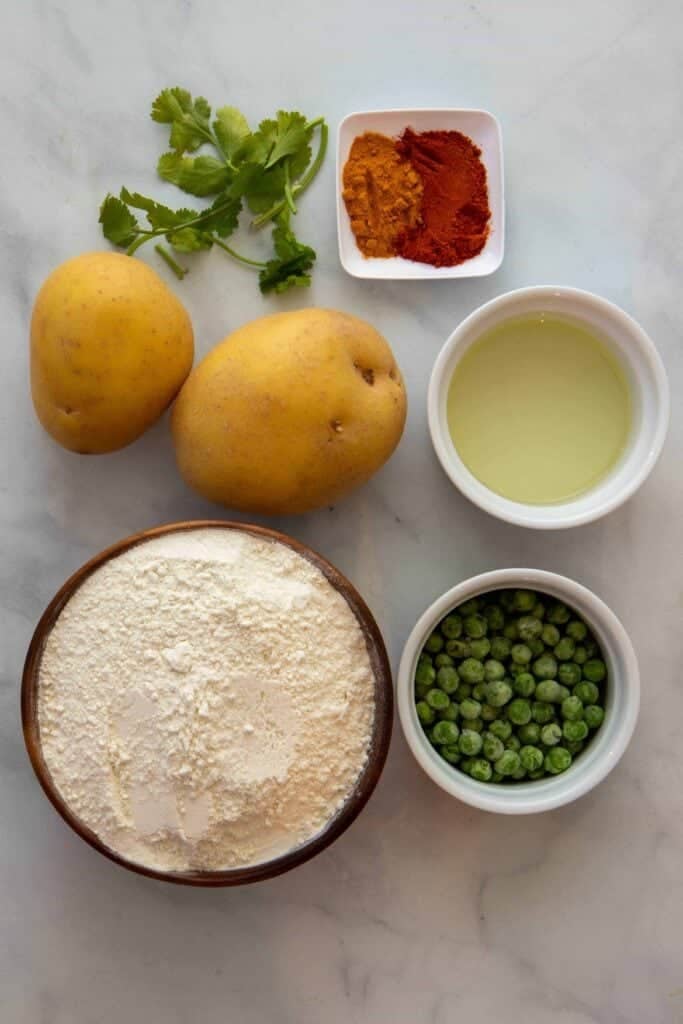
What ingredients do you need?
My recipe needs just six ingredients - flour, water, and oil for the samosa dough. Potatoes, peas and some spices for the filling. Technically, you can use almost anything for the filling. My recipe uses the traditional masala (potatoes, peas, turmeric, salt and chili powder). The best thing about this is that you can always use any leftover filling on bread as a sandwich and any leftover dough to make Indian flatbread. I'm also working on a cheesy samosa, so stay tuned for that!
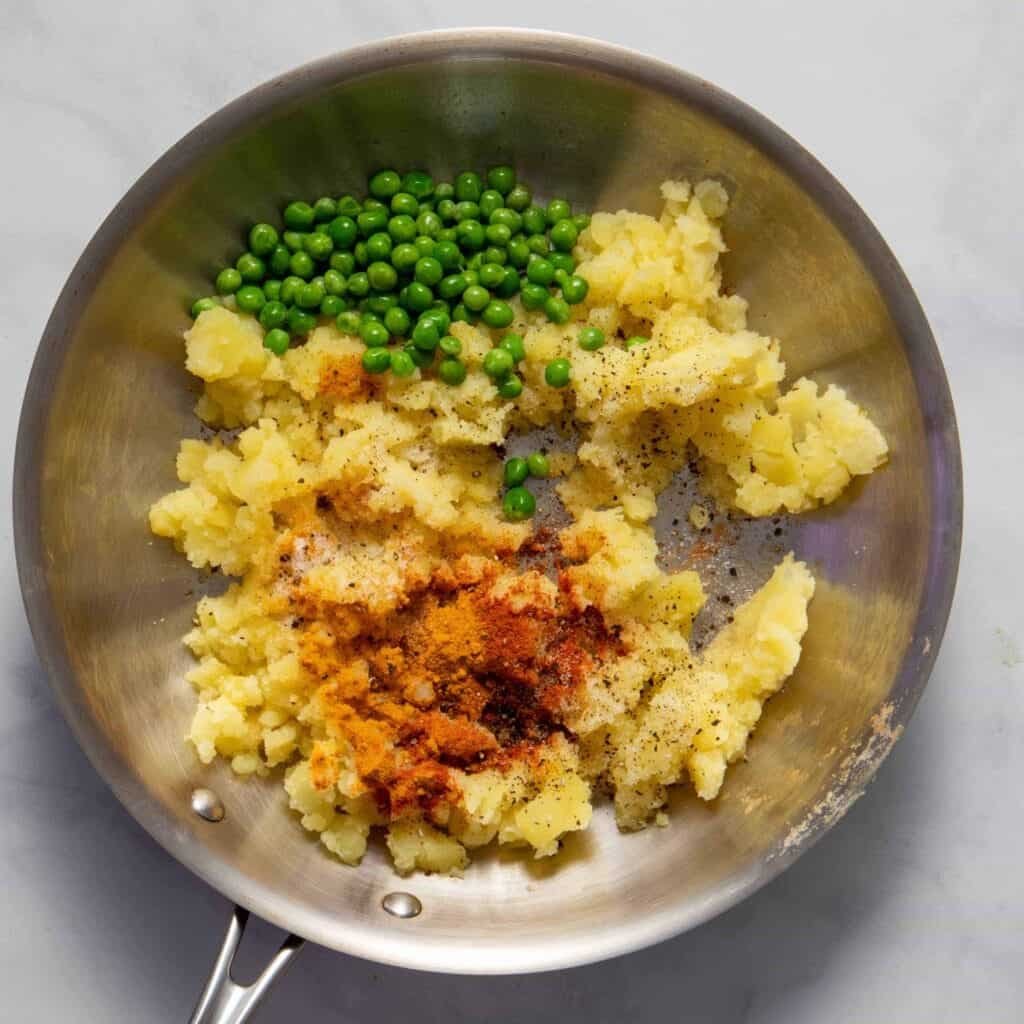
How do you bake samosas? Can you make them in an air-fryer?
It's so easy to bake or air-fry samosas. Three things to keep in mind:
- Use a slightly higher fat to flour ratio. For instance, here, I use 2 tablespoon of oil per cup of flour
- Add a bit of baking soda to the dough when you knead if you want it ultra crispy (I haven't done that here, but it's an easy option)
- Coat them fully with oil and then bake at 400F for 35 to 40 minutes, turning over halfway through. Or, to air-fry, put them in at 380F for 15 minutes, also turning halfway through.
What is the difference between air fryer or baked ones and deep fried ones?
The main difference I noticed between air-fryer or baked samosas and deep fried ones is that the pastry is often not as flaky in the former. A simple trick to ensure extra crispiness is to add a pinch of baking soda when you make the dough. I've also found that AP produces flakier results than using atta (i.e. whole wheat flour). That said, you're trading off 5-6 cups of oil for a tablespoon or two when you bake or air-fry samosas. Totally worth it.
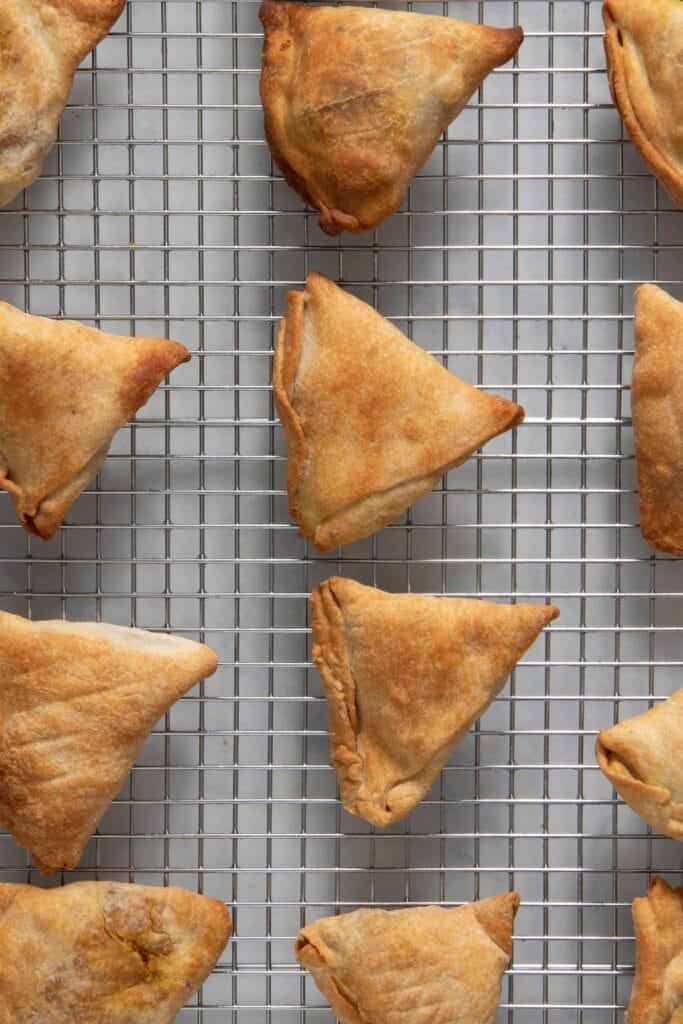
I honestly didn't notice any difference between the baked and air-fried versions. In the picture below, the top part is the baked samosas and the bottom part is the air-fryer samosas. They both tasted just as delicious!
How do you fold samosas? Can you do that at home?
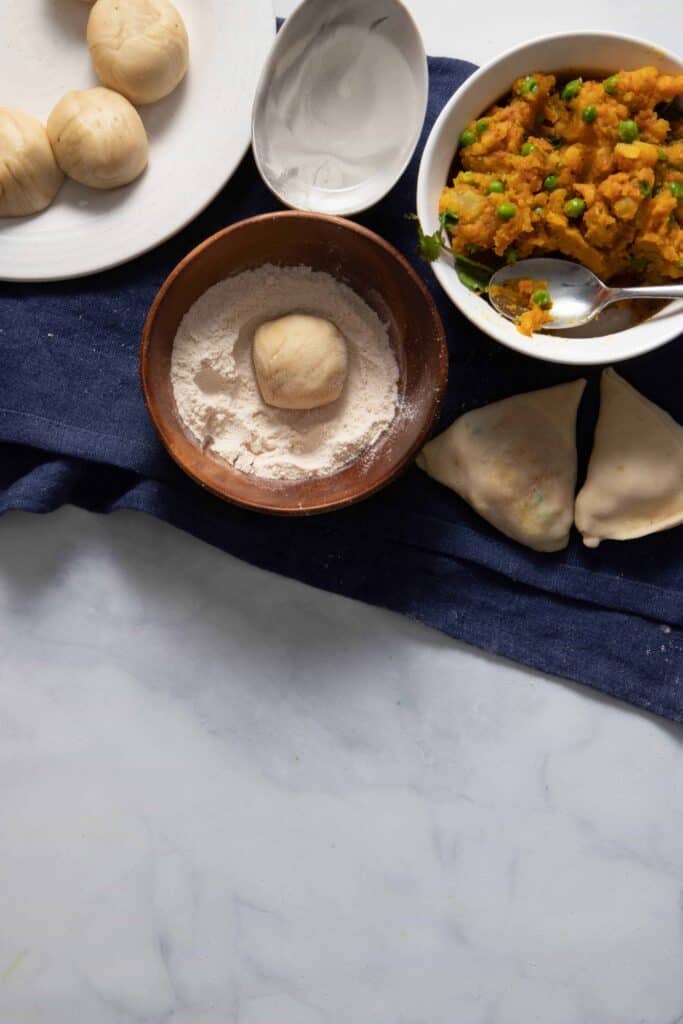
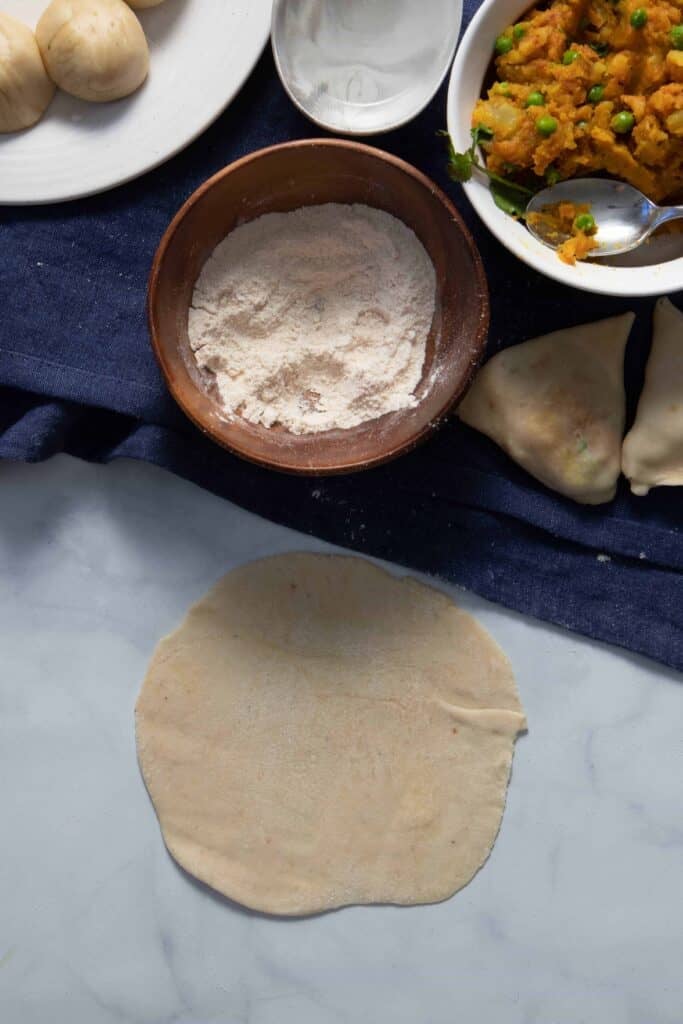
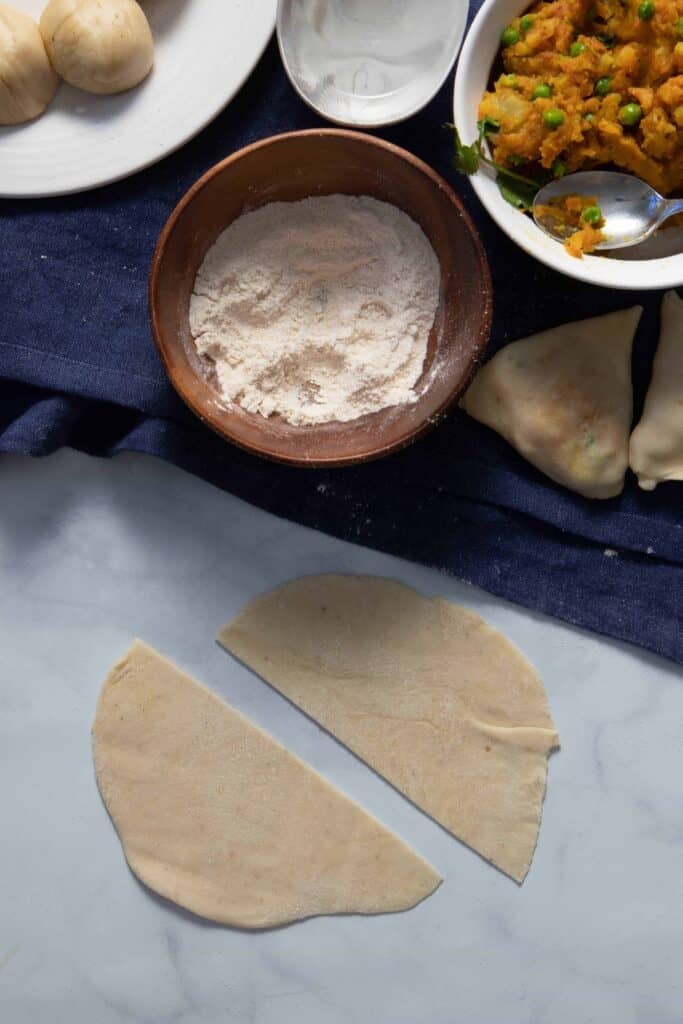
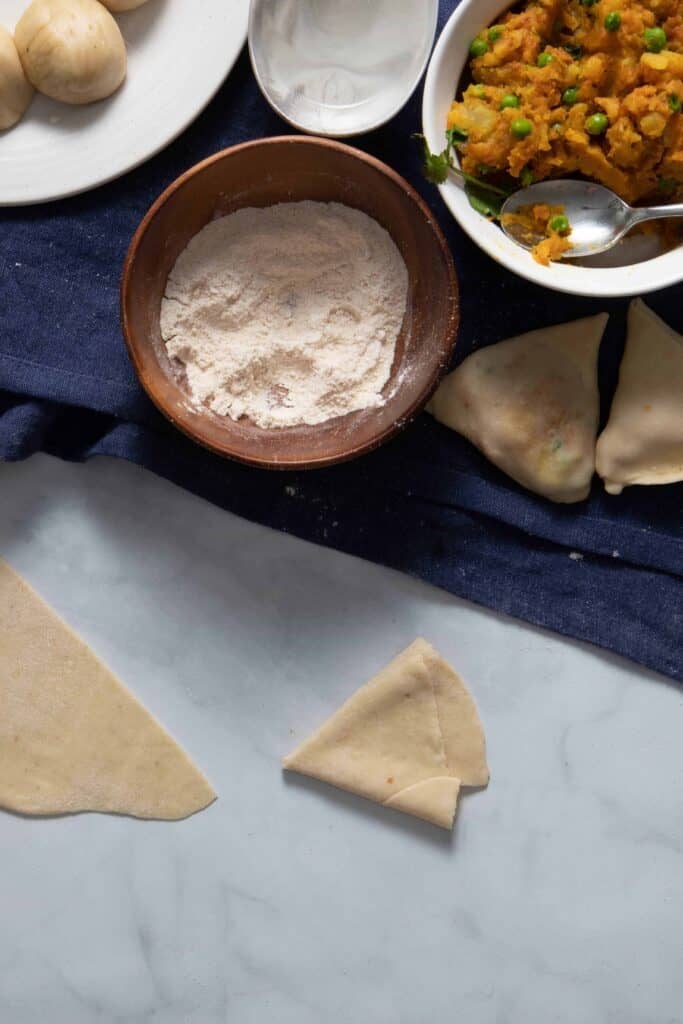
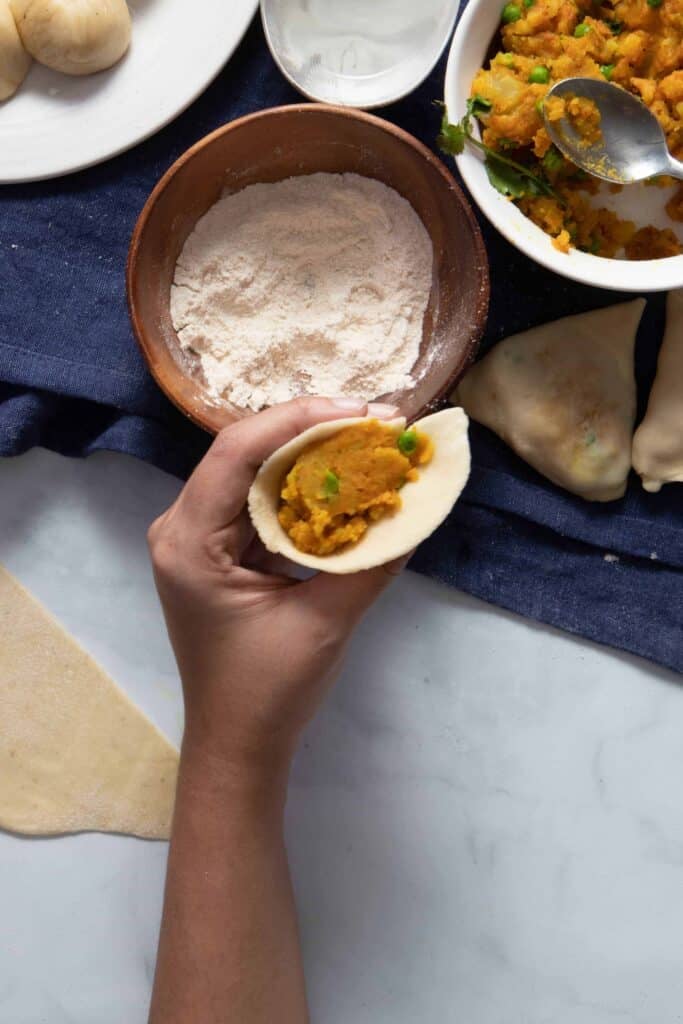
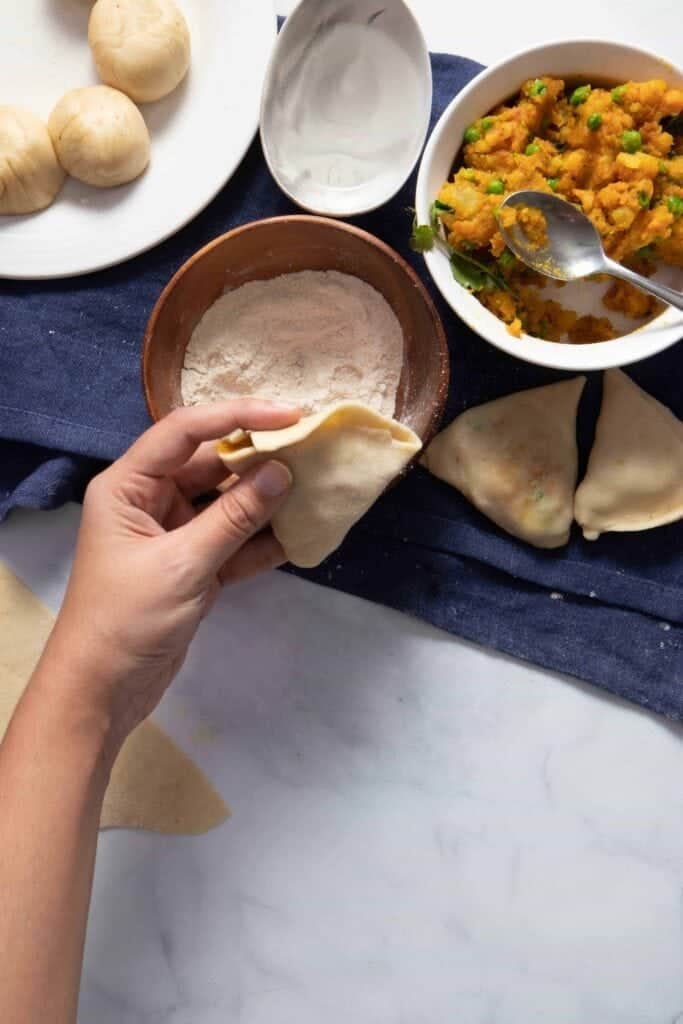
This was probably the one question that I was most worried about when I set out. But I found that it was actually quite easy once you get a hold of it. I was inspired by Richa, over at My Food Story, but still had to try it a couple of times to get it right. The method that worked for me is highlighted in the illustration below. Check out the video in the recipe card for more details. Step-by-step listed below as well.
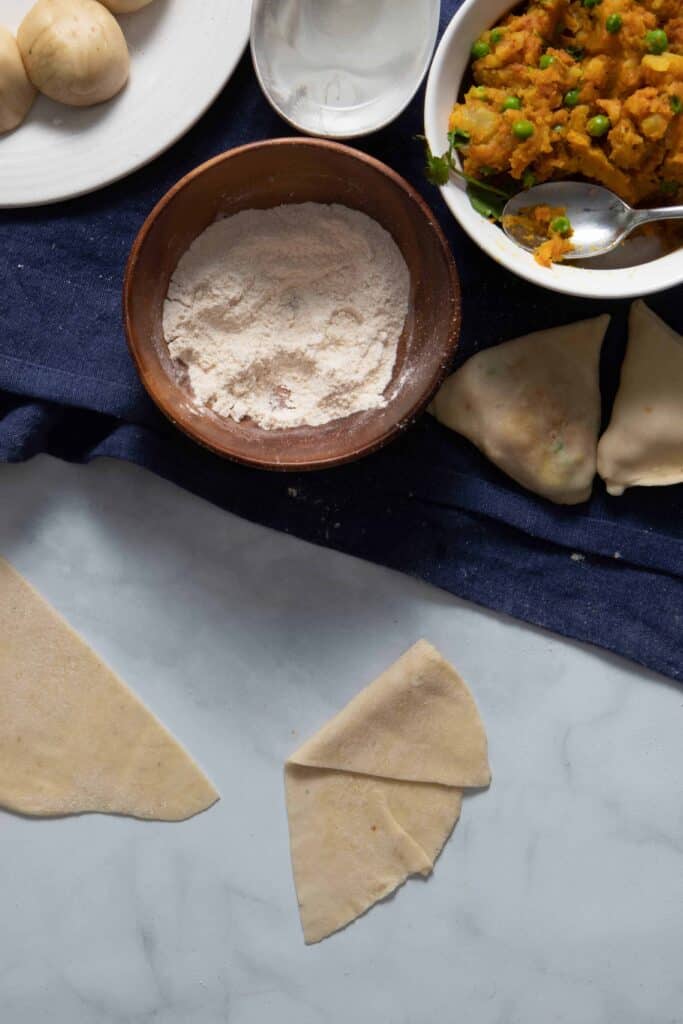
Dust dough with flour Roll into a circle Slice into two semi circles

Can you make gluten-free samosas?
Yes, you can! So, you can do one of two things to make these gluten free:
- Use a gluten free flour mix instead of the all purpose flour when making the samosa dough (this gives the closest texture)
- Use rice paper wrapper instead of using any flour at all. This obviously has the added advantage of being a lot faster to make, but might not be available in all grocery stores
When this quarantine is over, I'll pick up both of these options, and test the recipe again and post any adaptation tips. In the meantime, please let me know if you try a gluten free version and how it goes!
How do you store them? How long do they last? Can you freeze them?
I typically tend to keep my samosas for a day or two after I've made them. Just like any other pastry, the longer you keep it, the less flaky it gets. I don't recommend eating a samosa 1-2 days after it's been made. To store, I wrap them in foil and then reheat them in the oven at 350F for 5-10 minutes if I intend to eat them soon thereafter.
You can freeze samosas for up to three months but I don't recommend doing this. It's so easy to make them fresh, but if you do need to freeze samosas, make sure to wrap them in foil, then seal them in plastic. Make sure to thaw frozen samosas in the fridge before reheating them.
Alternatively, instead of reheating them, you can break them up and make samosa chaat, a delightful Indian street snack. Chaat uses broken samosas as a base, layered on with yogurt, mint dressing, and if you're in the mood for it, chickpeas (like this delicious Indian chickpea dip). Wins all around. Oh, and if you want to check out another easy Indian street snack, check out my savory Bombay French Toast!
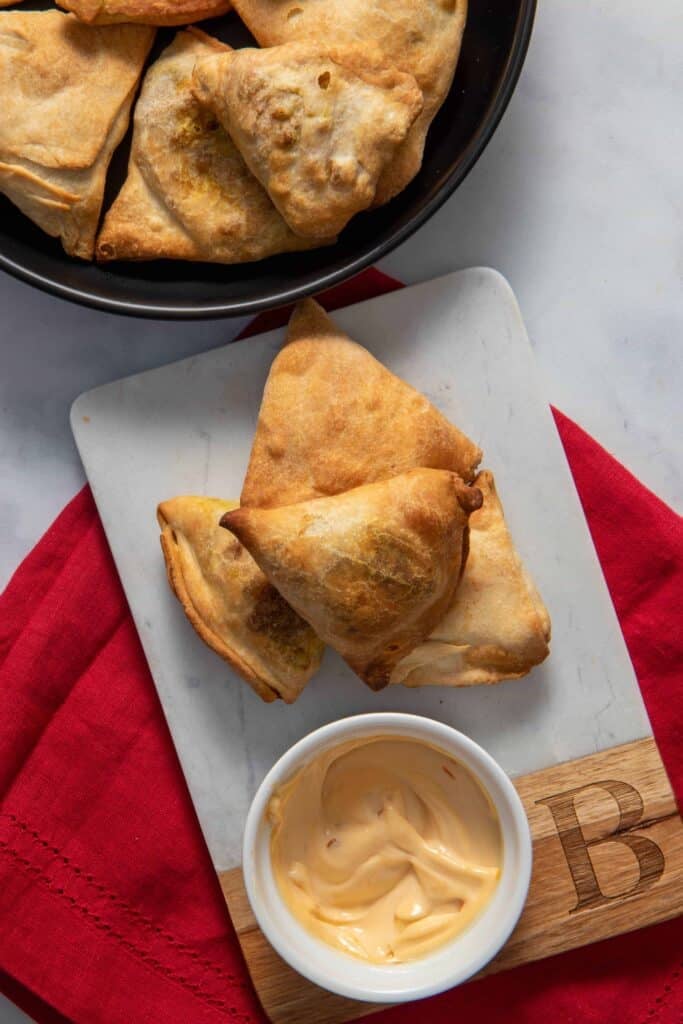
📖 Recipe
Healthy Samosas (Air-Fried or Baked)
Ingredients
For Samosa Dough
- 2 cups all purpose flour
- 2 tablespoons oil, can be substituted with ghee
- ¾ cup water
- ¼ teaspoon salt
For Samosa Filling
- 2 potatoes, medium to large size, prefer Yukon Gold
- 2 tablespoon vegetable oil, divided: 1 tablespoon for masala, 1 tablespoon for baking or air frying
- 1 teaspoon turmeric powder
- 1 teaspoon red chili powder
- 1 teaspoon salt
- 1 cup frozen peas
- 1 teaspoon chopped cilantro, optional
Instructions
Start by boiling the potatoes
- Bring a pot of water to a rolling boil on a high heat. In the meantime, quarter the potatoes. Once the water has boiled, turn down to medium heat, add potatoes and cover with a lid. Cook for 20-25 minutes until fork inserted goes in smoothly and comes out clean.
While potatoes are boiling, prepare samosa dough
- Add flour, salt, 1 tablespoon of oil to a mixing bowl and mix using a fork.
- Slowly add water and knead slowly into a ball. Add ¼ cup at a time, until the dough falls into a neat ball. If you have a stand mixer, you can dump all the ingredients in the mixing bowl and use the paddle attachment to get it to the right consistency. Note: You can add baking soda if you'd like to make it crispier!
- Dab the rolled dough with a little bit of oil, and set aside for at least 15-20 minutes so the dough can rest while the potatoes are boiling.
Prepare the samosa filling
- Once the potatoes have boiled, drain the water, remove the peels and then mash the potatoes with a spatula or masher
- In a medium skillet, add 1 tablespoon of cooking oil and turn the stove to medium heat
- Add the mashed potatoes, salt, pepper, turmeric, and red chili powder. Stir the spices to evenly coat the potatoes and cook for 2-3 minutes, tasting and adjusting along the way for your preference.
- Add peas and stir them into the mix for about 30-45 seconds. Turn off the heat, and add a few sprigs of cilantro (if you choose to include them). Transfer to a bowl and set aside.
Folding the Samosa (aka, the fun part!)
- Take the kneaded dough and roll it out into a long cylinder, roughly as long as your two hands side-to-side (~7-8 inches long)
- Using a knife or sharp edge, portion this cylinder into 8-9 smaller pieces. Take one of the pieces and roll into a smooth ball (while you set the others aside)
- Now, dust this ball with a bit of flour, and then using a rolling pin, roll it into a circular shape, roughly 6-7 inches in diameter (for reference, the rolled out dough should be slightly larger than the size of your hand)
- Slice this dough diagonally so you get two (roughly) semi-circular pieces. Pick up one of these pieces and lay it on your left hand so the straight edge lines up against the left side of your hand (it should look like the letter D on your hand).
- Wet the straight edge with some water and form a cone so that the top is wider and also open for you to stuff the filling. Add ~2 heaped teaspoons of filling per samosa and push it in so it evenly fills out (but only till about ¾ of the cone). You might end up adding a bit more depending on how big you rolled the dough out.Note: Please check the post for detailed instructions on how to fold the samosas (or watch the linked video below!)
- Add a bit of water to the edge of the cone and seal it shut (either by pressing together or folding one edge over the other)
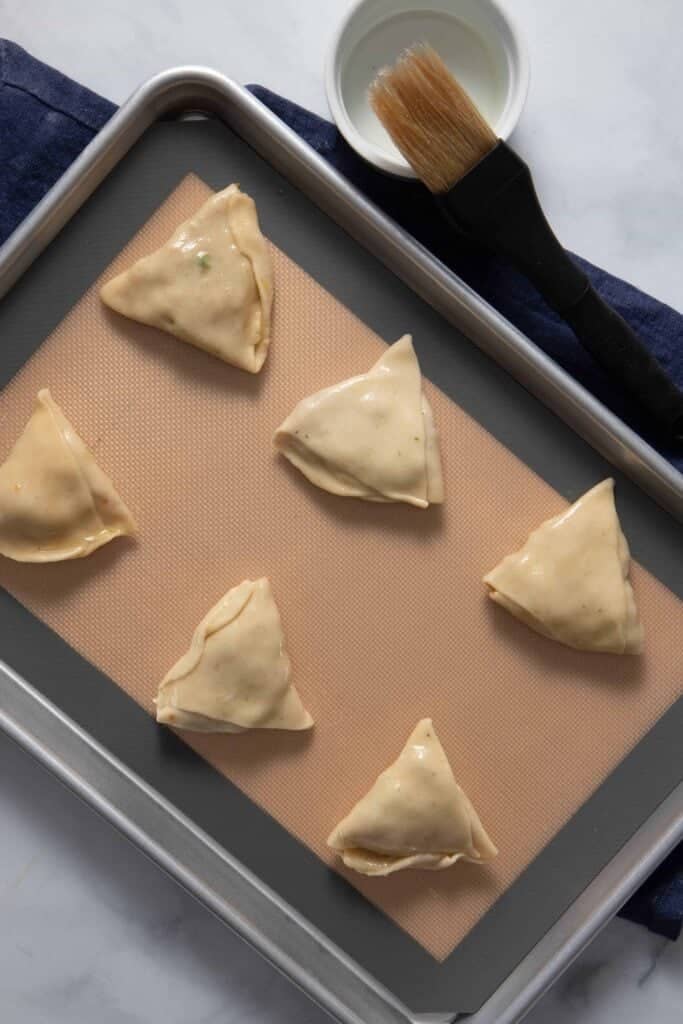
- Coat with enough oil to cover all the sides and place aside. Repeat for the rest of the samosas.
Option 1: Air Frying Samosa!
- If you’re air-frying, after you’re done folding the first samosa, pre-heat to 425 F. Depending on the size of your air-fryer, you might need to make a couple of batches – take care not to overcrowd the samosas since that will prevent the dough from cooking properly
- Place the samosas carefully in the air fryer and cook for 10 to 12 minutes, and then flip the sides and cook for another 5 to 7 minutes. Depending on your air fryer, you might need to add a few extra minutes. When it's done, the samosas should be crisp on the outside and a nice golden brown color on both sides.Note: Air fryers are quite different, so the temperatures might vary. Mine takes 18 minutes total to cook. But yours might take longer or shorter depending on the size, power, etc. I suggest checking after 10 minutes to see if one side is done, and then checking again after the 5-7 minutes. You might need to add 5-10 more minutes depending on the fryer!
Option 2: Baking Samosa!
- If you’re baking samosas, after you're done folding the first samosa, preheat oven to 400F.
- On a sheet pan lined with a silicon liner or parchment paper, place each samosa roughly 2 inches away from each other
- Bake for 20 minutes and check on the color – if golden brown, flip to the other side and bake for another 10-15 minutes
- Remove and serve with ketchup, a nice aioli or a chutney!
Video
Notes
- Timing is everything for this recipe. Make sure to start by boiling the potatoes; once they’re in the pot, knead the dough and set aside. Once the potatoes are out, make the filling; and by the time the filling is done, the dough is ready to be shaped. The whole process should take roughly an hour for about 15-16 samosas. Please check the post for more details and step-by-step instructions / pictures for folding samosas (I promise you, you won't regret it!)
- You can use phyllo pastry sheets instead of the dough as the base if you don’t want to make the dough from scratch. Also, if you want your samosas to be extra crispy, you can add a pinch of baking soda to the dough.
- Depending on the size of your cone, you might need more than just 2 teaspoons of filling. Go with the flow!
- To make a more "restaurant" style samosa (versus the version in the main recipe card, which is quite simple and super easy) - I suggest the following spice modifications: once your potatoes are cooked, heat some oil in a skillet and add half a teaspoon each of cumin seeds and black mustard seeds. When they splutter, add a teaspoon each of ginger and garlic paste as well as finely chopped Indian green chili peppers (or jalapenos!) Then, potatoes along with red chili powder, and the two "key" ingredients that flavor most Punjabi samosas: a tablespoon of amchur powder (aka dried mango powder, which you can find in most Indian grocery stores) as well as a half teaspoon of garam masala. Mix that all together, and finish with some cilantro. Restaurant-style samosas are ready!




I loved how easy it was to make these samosas in the air fryer. They tasted great too.
I have always struggled with folding samosa but thanks to your instructions everything went well. My samosas tasted amazing, I cannot thank you enough!
First time making samosas and wow! Love the flavors and how easy it was in my air fryer!
Many thanks. In the UK they are not common appliance. I had never heard of them but now read 40% of US homes have one! I did make some but need to follow your recipe closer next time!
I'm confused; where are the spices that usually make a samosa taste like a samosa? I definitely have noted the presence of strong spices besides red pepper and turmeric in every samosa I've had at Indian restaurants...and I'm seeing much more spices in regular samosa recipes as well. I'd use one of those except that there seem to be few options that use the air fryer...also, have you tried this with rice paper wrappers? I'm really hoping for a way to make a samosa that's quick and easy, gluten free, and with a crispy, relatively thin wrapper. 🙂
Hey Laurel! Thanks for writing. I try to keep my Indian recipes quite simple for the average home cook who might not want to use a ton of single use spices and still want to "dip their toes" into Indian cooking so to speak (and often, my recipes reflect what my mom usually makes at home). I'll add this as a note to the recipe card as well, but if you want a more restaurant-like flavor profile, I'd recommend the following modifications: once your potatoes are cooked, heat some oil in a skillet and add half a teaspoon each of cumin seeds and black mustard seeds. When they splutter, add a teaspoon each of ginger and garlic paste as well as finely chopped Indian green chili peppers (or jalapenos!) Then, potatoes along with red chili powder, and the two "key" ingredients that flavor most Punjabi samosas: a tablespoon of amchur powder (aka dried mango powder, which you can find in most Indian grocery stores) as well as a half teaspoon of garam masala. Mix that all together, and finish with some cilantro. I think you'll find the flavor a lot closer to what you find in restaurants.
On your second point: I have! It turns out quite well but it's a lot crispier (closer to a turnover in consistency than a samosa, but delicious nonetheless!) Hope this helps - let me know how it goes!
I am confident this will work out well but wondered if I can fry them in a wok? Unsure what the term air fryer means. I make flat breads so I guess it's the same dough but just more oil. Also am thinking cumin seeds could work? Looking forward to making them here in Bath (UK)
They're basically convection toasters - cumin seeds will work! 🙂
Hi! I've been looking for a baked samosa recipie for a while, and this looks delicious! I was wondering on two things, is it 2 tablespoons of oil per cup of flour, or 2 tablespoons of oil per 2 cups of flour? Both are mentioned. And would you have an estimate of exactly how much baking soda to add into the dough for that crispy finish? Thanks so much, I can't wait to try this!
Hey! It depends a bit on your oil preference! 2 tablespoons per cup typically results in a flakier pastry. I typically add 1/4 teaspoon of baking soda for the extra crispy finish! Hope you love it.
Thanks for sharing this recipe, it looks simple enough and absolutely delicious! I read below that you tried the rice paper version. Did you air fry those as well? If so, same time and temperature? Thanks again😊
I did! It was a lot quicker to air fry. I did about 5 minutes at 380F and it came out super crispy!
Could you make this dough the day before?
Hi Ashley - yes, you can store the dough in the fridge for a night. Just make sure you completely let it come to room temperature before making the samosas. Alternatively, one thing that works better is if you can actually make the samosas ahead of time and then freeze overnight (and then thaw an hour or so before baking / air-frying). But both methods work!
Can you make the dough with whole wheat flour instead of all purpose?
Hi Lydia - yes, you absolutely could! If using whole wheat flour, I'd suggest adding a pinch of baking powder and rolling the dough as thinly possible (but strong enough to hold the filling). This will ensure that the end result is flaky. The reason is because whole wheat flour tends to be a bit more dense. Hope that helps.
Thank you for your quick response. I'm going to try these this weekend. I love the Samosa's I get from my local vegan restaurant and wanted to be able to make them at home.
Can I use chickpeas and onions and maybe mushrooms instead of potatoes (avoiding carbs) and I do not like peas and carrots
Hey Sabrina! Yes, you could use chickpeas and onions, I've also made samosas with mushrooms and cheese before. The key is to make sure it's a "mash" like consistency and not too watery (because it'll bleed through otherwise). So if you're using chickpeas, I'd drain it fully. Saute some onions, then add the chickpeas along with some tomato paste, turmeric, red chili powder and salt. Mash them up and make sure to cook it dryly and then you can use that as a filling. Hope that works for you!
What would you recommend for making ahead? Bake and re-heat or put in the fridge unbaked then bake when ready? Could they be frozen unbaked?
Thanks!
Hey Michelle! You can totally make them and then freeze them before baking them! Just make sure to thaw before you put them back in the oven. I typically suggest moving them to the fridge the night before if possible 🙂 In case you want to bake it already, make sure to reheat them in the oven instead of the microwave, I find that it preserves the texture outside better in that case! Let me know how it goes!
Frozen un-cooked, thawed over night and baked the next day worked out great! Kids suggested next time (yay! they want a next time!) adding yam!
Thank-you!
That sounds great, Michelle - thanks for the tip on yam as well! 🙂
We loved these Samosas. Wish they lasted longer 😀. I baked them in the oven and it was just as good and delicious as the fried ones you get from a restaurant, but way healthier. Thank you for sharing your recipe!
I definitely agree with the lasting longer comment 🙂 Thanks so much!
Made these with the additional spices and the flavour was excellent. However the pastry was a bit tough when baked; not as flaky as I had hoped. My dough was a little soft, could that have been the problem!
Sorry to hear the pastry was a bit tougher than you expected - sometimes adding baking soda really helps. It also depends on how thin you roll the dough out (I used to really worry about tearing the dough by rolling it too thin initially, but then got more comfortable with it over time!)
Thanks for that. I did make a second batch and reduced the amount of water to a minimum. I also rolled them much thinner and they were gorgeous. Supplied for an event and people were asking for the recipe!
I am so glad it worked well! Thanks for writing back to let me know!
Thank you for such a detailed instruction and recipe! Now I feel confident I can make samosas at home!
I always adored samosas but haven't been able to have them in the last few years because I can no longer eat wheat. So thank you for including the gluten-free recommendations. I can't wait to try!
I love the idea of doing these in an air fryer. They sound delicious.
I love samosas! And I’m so glad to have found a healthier version. Thanks so much for sharing!
Just wow! I love how detailed and easy to make this recipe look. You get me thinking about Samosas, and I want to have some. I will make this and let you know how it went.
These are probably the best samosas I've ever had... not because of my cooking skills by any means, but because of this recipe. I've never attempted Samosas because they can be SO complicated and most recipes are like "fold the dough" instead of actually SHOWING how to do it... but this made it SO easy to actually accomplish. A few things that I noticed - we made both baked/air fried to test the difference. Our air fryer is a different brand so we had to fry ours significantly longer than this recipe calls for - but I will say that I think the air fried vs. baked are almost identical when it finishes (so we will be baking them from now on). We paired with an onion/chili mix from Trader Joes and the outcome was to die for. We also tried it with a different variety of hot sauces and each had a blend of flavor that accompanied the samosas nicely. This will definitely be a new party-friendly recipe that we make!
Made these today and they came out so good!! I substituted carrots for peas as I did not have any peas on hand. I sauteed the peas with some onions before adding the mashed potatoes to the pan. I baked at 400 and they are perfect, nice and crsipy on the outside with the soft potato on the inside. Folding them was tricky for me, but I followed the images you posted and they helped greatly. Thanks for the recipe, these so fun to make!
These were really good and not as hard as I thought they would be! Thank you for the courage to try. I added 1 tsp garam masala and if you have that I recommend, was a lovely addition. Otherwise, we baked them and my husband said they were as good as a restaurant other than they weren't as greasy! What a compliment!!
Thanks so much for the compliment, Maureen! So glad you got to try, and great idea to add garam masala if you have some at home!
I haven’t tried before but am anxious to,just wondering,I have regular chili powder ,a good quality,and it’s red ,will that do if the label doesn’t say Red Chili Powder?
Hi Dianna, that should work - would just recommend adding a little bit to make sure you're comfortable with the spice level and the then adjusting!
This recipe turned out great! Really fast and easy to make. The folding doodles and time management instructions were awesome. I didn't have peas, so I made mine with frozen corn and okra. Pay attention to which chile powder you used. I used kashmiri and a little bit goes a long way.
Thanks, Chloe! Definitely agree on the point around the type of chili powder you use. Kashmiri chili is quite potent, so I've now added a note to adjust this based on spice tolerance. Thanks!
Thank you for an excellent instructions including amounts, temperatures and times. Many current recipe writers omit important info all the time. These came out great!