
I set out on a mission to develop an easy baked samosa recipe so I can enjoy the snack without worrying about the fried goodness too much. Chances are, if you’ve eaten at an Indian restaurant, you’ve had samosas. They might look complicated to make, but they’ve become a household staple these days. And they’re delicious because they’re flaky and flavorful. You can make them in an air fryer or in your oven, so get ready for your new favorite snack obsession!
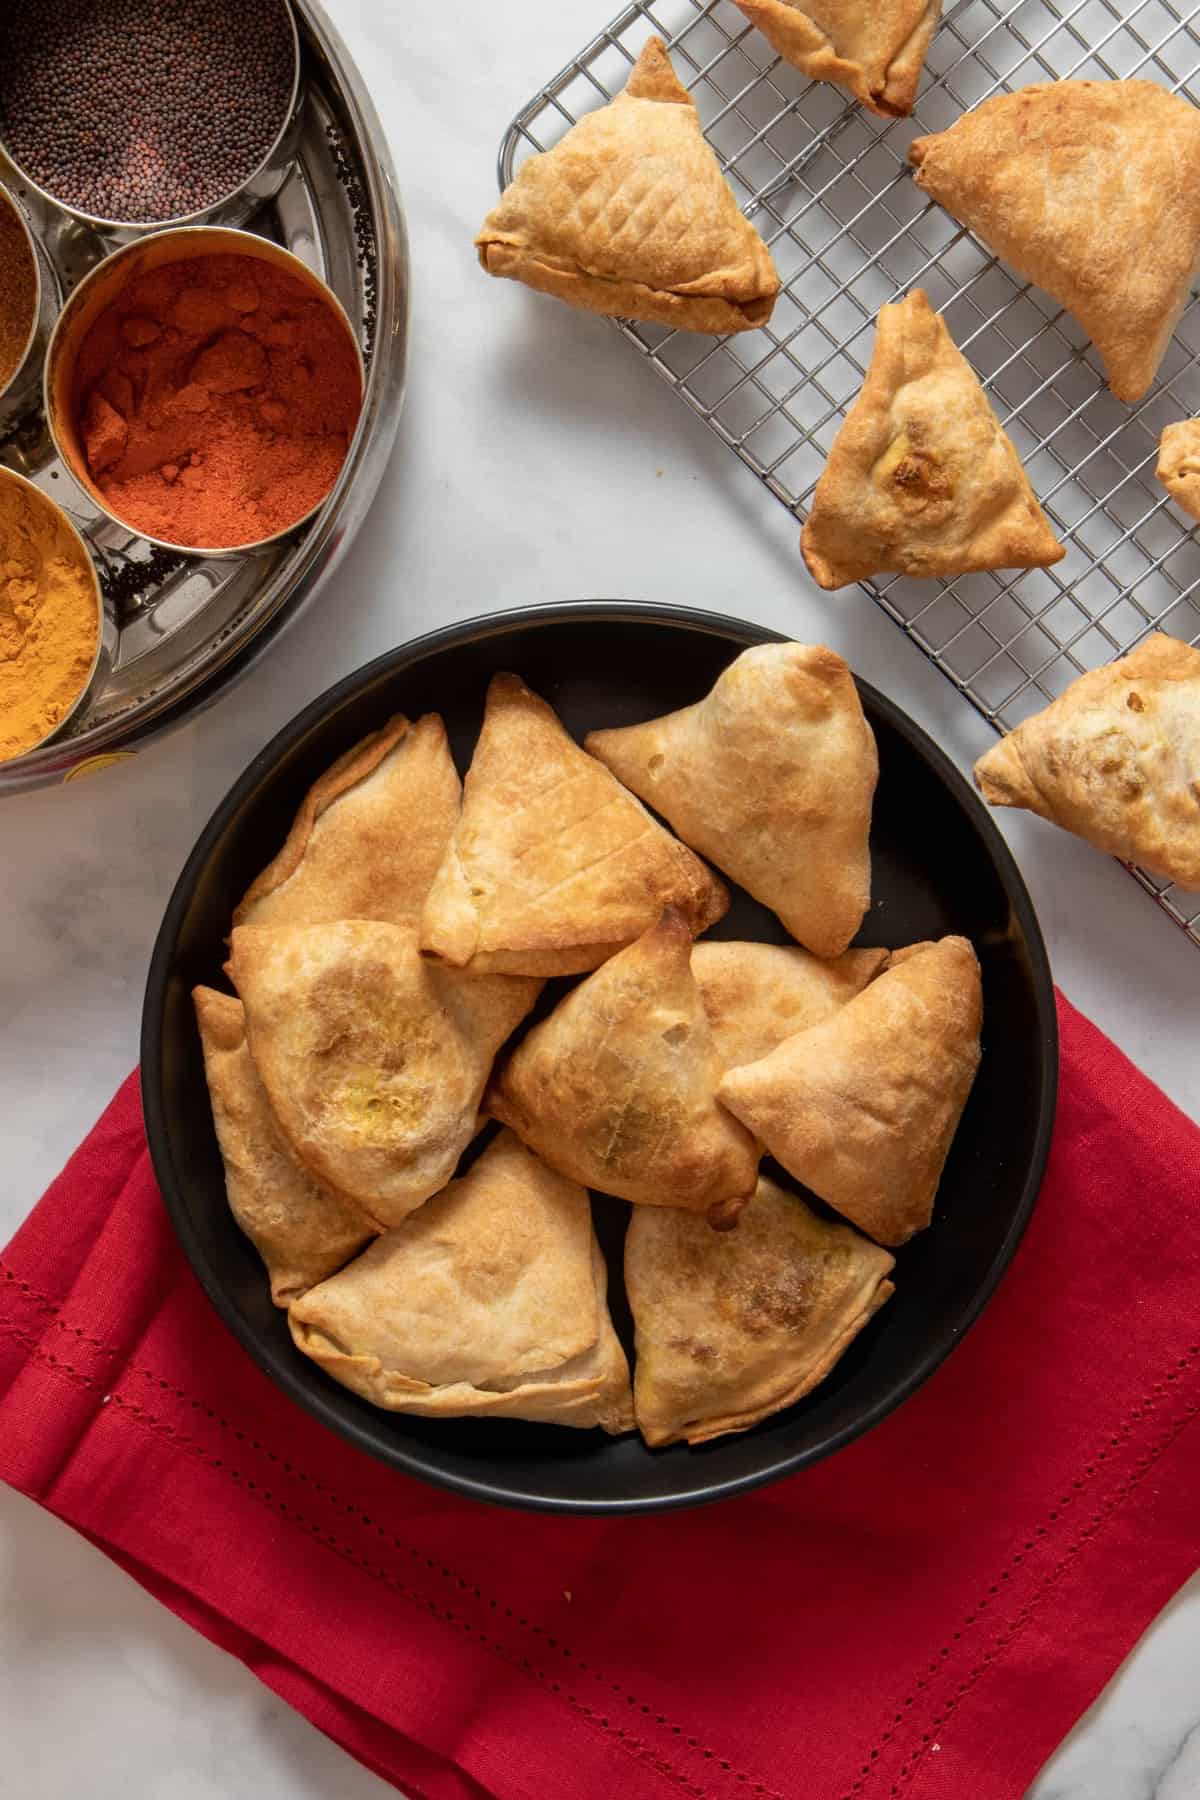
Just as delicious as grandma’s samosas, but baked!
Let me tell you, these baked samosas are a total game changer for anyone who loves the crispy, spiced goodness of traditional samosas but wants to skip the whole frying process. I’ve always been a fan of samosas—there’s something so comforting about that golden crust and the hearty, flavorful filling—but I also wanted a version I could whip up without making a mess of my kitchen.
Enter: baked samosas. They’re light, easy, and still full of all the deliciousness you’d expect. The best part? You don’t even miss the deep fry! Plus, they’re perfect for prepping ahead, which is a lifesaver when you want to serve them fresh out of the oven for a crowd. Trust me, these are a must-try if you’re looking for a snack that feels special but doesn’t take forever to make.
Ingredients and notes
To make this recipe, you’ll need potatoes, all purpose flour, turmeric, red chili powder, salt, frozen peas and cilantro. You’ll also need water for the dough and some vegetable oil to coat the samosa for baking or air-frying. Other spices are totally optional!
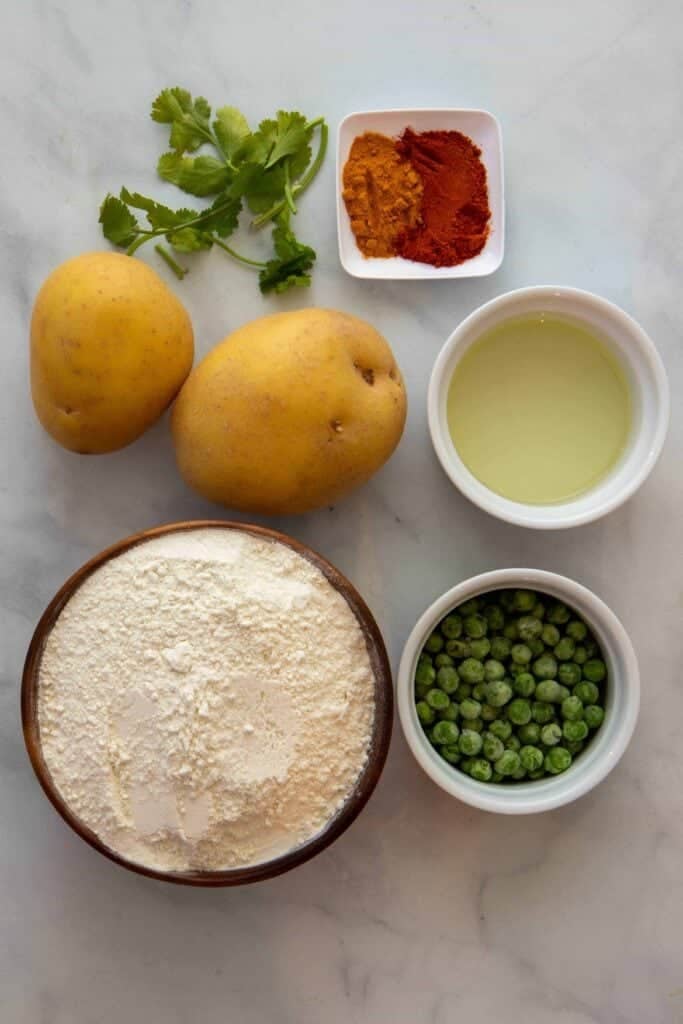
My recipe needs just six ingredients – flour, water, and oil for the samosa dough. Potatoes, peas and some spices for the filling. Technically, you can use almost anything for the filling. My recipe uses the traditional masala (potatoes, peas, turmeric, salt and chili powder). The best thing about this is that you can always use any leftover filling on bread as a sandwich and any leftover dough to make Indian flatbread. I’m also working on a cheesy samosa, so stay tuned for that!
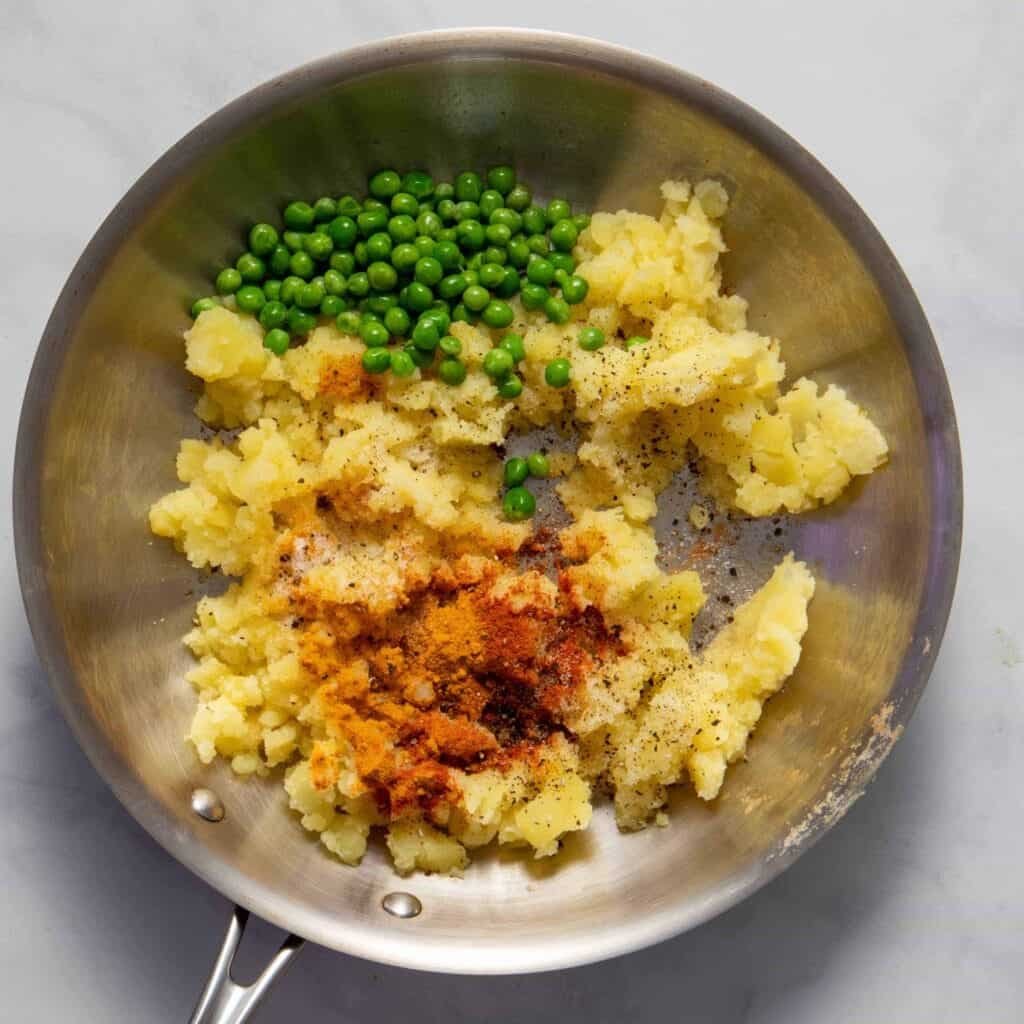
How to make the perfect baked samosas
First, you start by making the potato filling. Have leftover mashed potatoes? Use them right up. Or else, make some mashed potatoes, and then add them to a pan with turmeric, red chili powder, salt. Finish with some frozen peas and cilantro. If you want a restaurant style samosa, then follow the instructions in the recipe card notes.
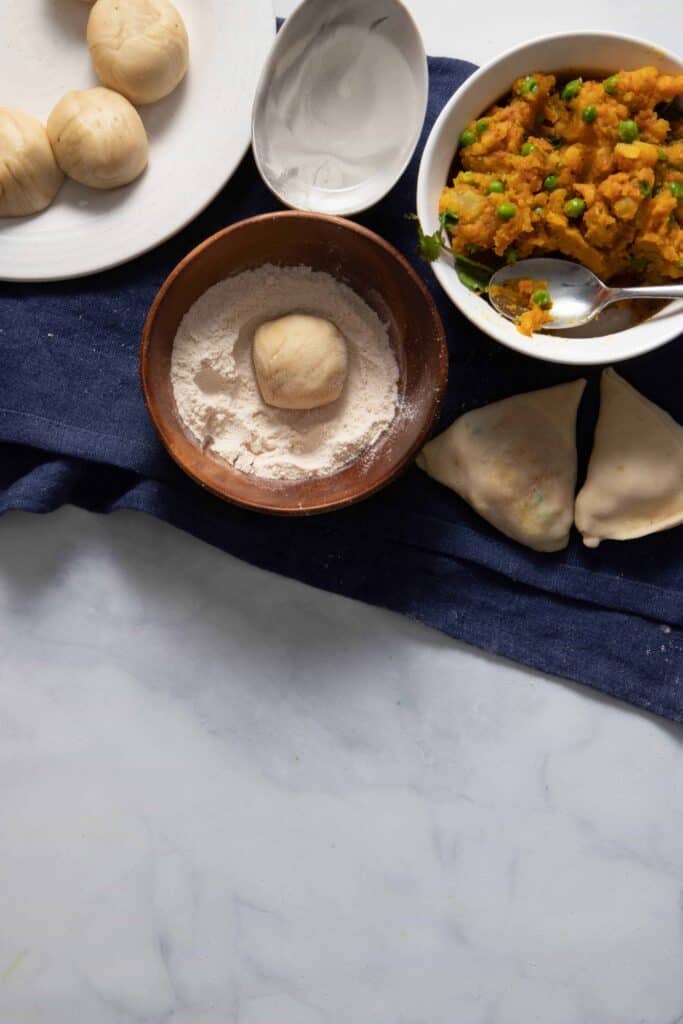
Fold those samosas!
This was probably the one question that I was most worried about when I set out. But I found that it was actually quite easy once you get a hold of it. The method that worked for me is highlighted in the illustration below. Check out the video in the recipe card for more details.
Step-by-step listed below as well.

How do you bake samosas? Can you make them in an air-fryer?
It’s so easy to bake or air-fry samosas. Three things to keep in mind:
- Use a slightly higher fat to flour ratio. For instance, here, I use 2 tbsp of oil per cup of flour
- Add a bit of baking soda to the dough when you knead if you want it ultra crispy (I haven’t done that here, but it’s an easy option)
- Coat them fully with oil and then bake at 400°F for 35 to 40 minutes, turning over halfway through. Or, to air-fry, put them in at 380°F for 15 minutes, also turning halfway through.
What is the difference between air fryer or baked ones and deep fried ones?
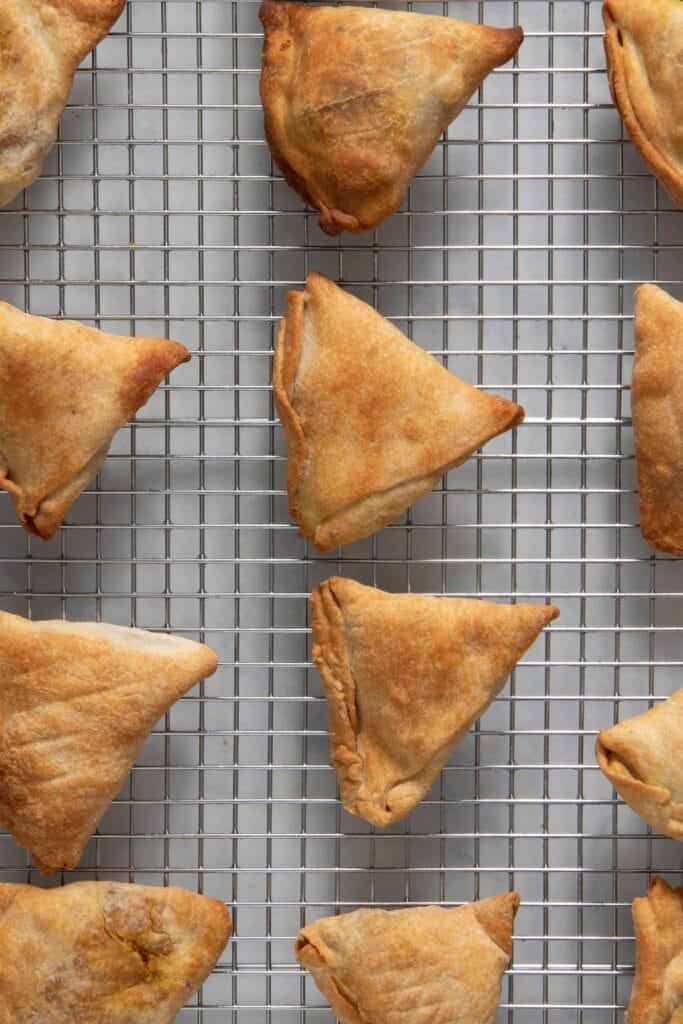
The main difference I noticed between air-fryer or baked samosas and deep fried ones is that the pastry is often not as flaky in the former. A simple trick to ensure extra crispiness is to add a pinch of baking soda when you make the dough. I’ve also found that AP produces flakier results than using atta (i.e. whole wheat flour). That said, you’re trading off 5-6 cups of oil for a tablespoon or two when you bake or air-fry samosas. Totally worth it.
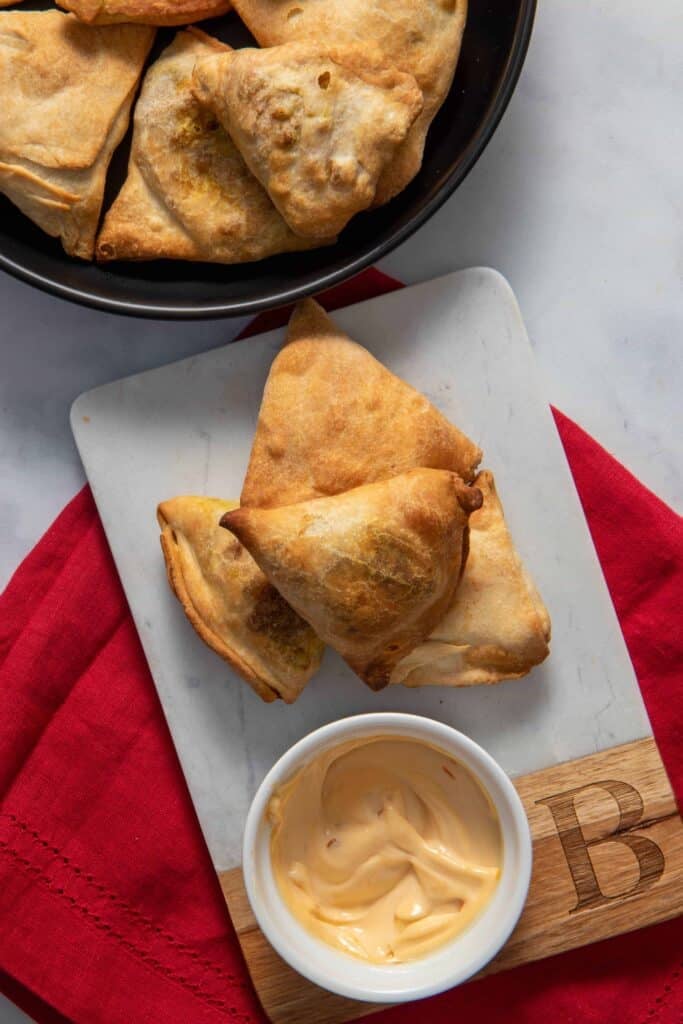
I honestly didn’t notice any difference between the baked and air-fried versions. In the picture below, the top part is the baked samosas and the bottom part is the air-fryer samosas. They both tasted just as delicious!
Can you make gluten-free samosas?
Yes, you can! So, you can do one of two things to make these gluten free:
- Use a gluten free flour mix instead of the all purpose flour when making the samosa dough (this gives the closest texture)
- Use rice paper wrapper instead of using any flour at all. This obviously has the added advantage of being a lot faster to make, but might not be available in all grocery stores
When this quarantine is over, I’ll pick up both of these options, and test the recipe again and post any adaptation tips. In the meantime, please let me know if you try a gluten free version and how it goes!
Storage instructions
I tend to keep my samosas for a day or two after I’ve made them. Just like any other pastry, the longer you keep it, the less flaky it gets. I don’t recommend eating a samosa 1-2 days after it’s been made.
To store, I wrap them in foil and then reheat them in the oven at 350F for 5-10 minutes if I intend to eat them soon thereafter.
I don’t recommend freezing samosas after you’ve baked them. Instead, make them all the way until the baking step, and then freeze them by placing them on a baking sheet first to flash freeze them. Then you can place them all in a freezer safe container.
When you have leftover samosas (which I honestly give you props for, we never have any left) – you can break them up and make samosa chaat, a delightful Indian street snack. Chaat uses broken samosas as a base, layered on with yogurt, mint dressing, and if you’re in the mood for it, chickpeas (like this delicious Indian chickpea dip). Wins all around. Oh, and if you want to check out another easy Indian street snack, check out my savory Bombay French Toast!
If you tried this recipe, don’t forget to comment and rate! ⭐⭐⭐⭐⭐

Easy Baked Samosas
Ingredients
For Samosa Dough
- 2 cups all purpose flour
- ¼ teaspoon salt
- 2 tablespoons oil, can be substituted with ghee
- ¾ cup water
For Samosa Filling
- 2 tablespoon vegetable oil, divided: 1 tbsp for masala, 1 tbsp for baking or air frying
- 2 potatoes, medium to large size, prefer Yukon Gold
- 1 teaspoon salt
- 1 teaspoon turmeric powder
- 1 teaspoon red chili powder
- 1 cup frozen peas
- 1 teaspoon chopped cilantro, optional
Instructions
Boil potatoes
- Bring a pot of water to a rolling boil on a high heat. In the meantime, quarter the potatoes. Once the water has boiled, turn down to medium heat, add potatoes and cover with a lid. Cook for 20-25 minutes until fork inserted goes in smoothly and comes out clean.
While potatoes are boiling, prepare samosa dough
- Add flour, salt, 1 tablespoon of oil to a mixing bowl and mix using a fork.
- Slowly add water and knead slowly into a ball. Add ¼ cup at a time, until the dough falls into a neat ball. If you have a stand mixer, you can dump all the ingredients in the mixing bowl and use the paddle attachment to get it to the right consistency. Note: You can add baking soda if you'd like to make it crispier!
- Dab the rolled dough with a little bit of oil, and set aside for at least 15-20 minutes so the dough can rest while the potatoes are boiling.
Prepare the samosa filling
- Once the potatoes have boiled, drain the water, remove the peels and then mash the potatoes with a spatula or masher
- In a medium skillet, add 1 tablespoon of cooking oil and turn the stove to medium heat
- Add the mashed potatoes, salt, pepper, turmeric, and red chili powder. Stir the spices to evenly coat the potatoes and cook for 2-3 minutes, tasting and adjusting along the way for your preference.
- Add peas and stir them into the mix for about 30-45 seconds. Turn off the heat, and add a few sprigs of cilantro (if you choose to include them). Transfer to a bowl and set aside.
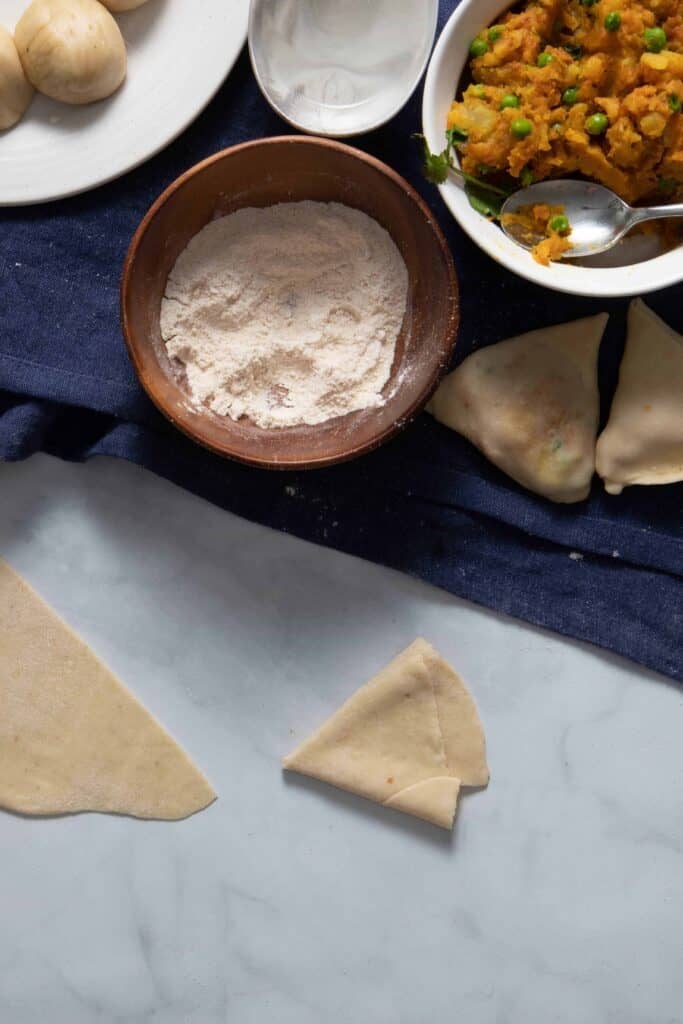
Folding the Samosa (aka, the fun part!)
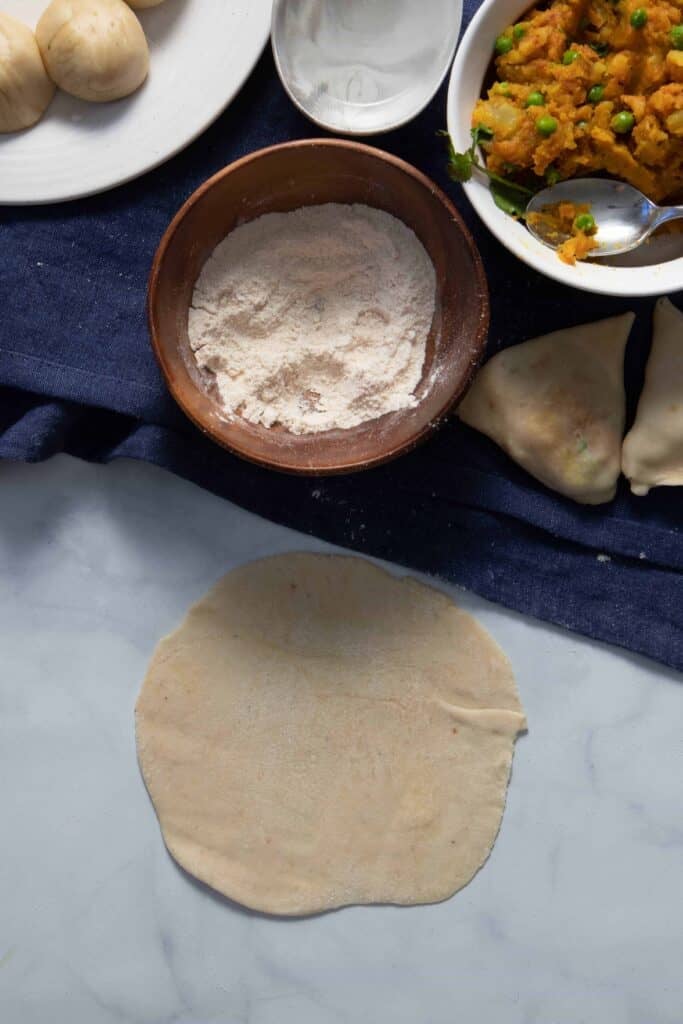
- Take the kneaded dough and roll it out into a long cylinder, roughly as long as your two hands side-to-side (~7-8 inches long)
- Using a knife or sharp edge, portion this cylinder into 8-9 smaller pieces. Take one of the pieces and roll into a smooth ball (while you set the others aside)
- Now, dust this ball with a bit of flour, and then using a rolling pin, roll it into a circular shape, roughly 6-7 inches in diameter (for reference, the rolled out dough should be slightly larger than the size of your hand)
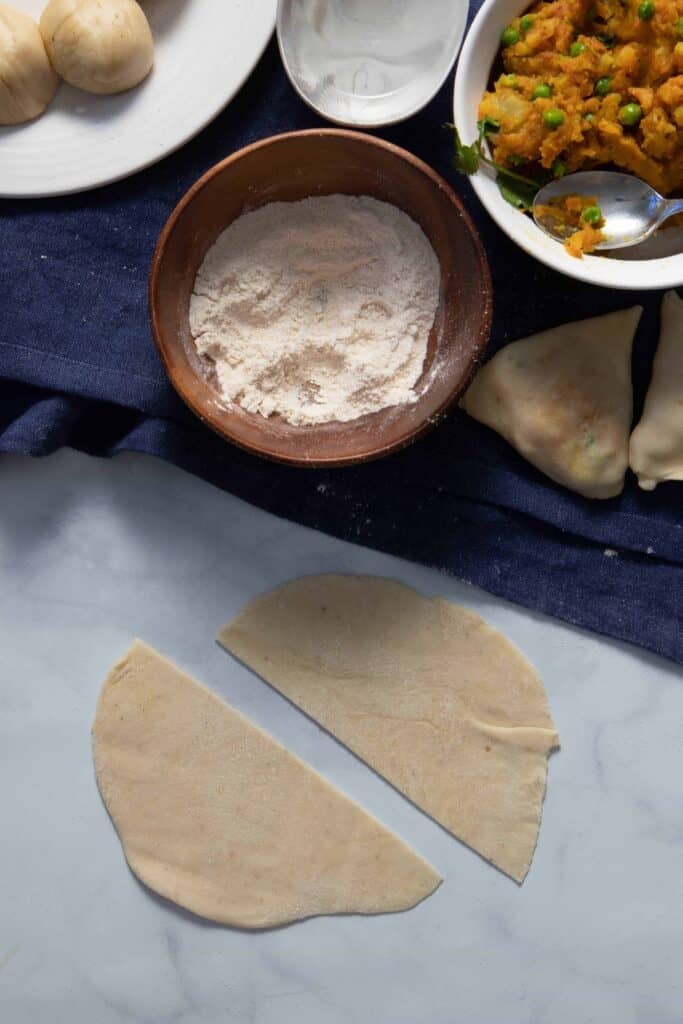
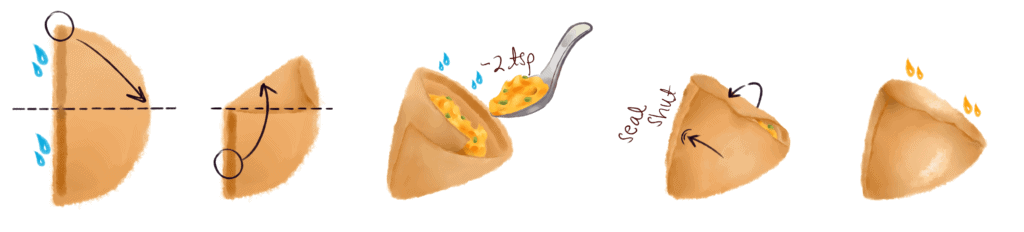
- Slice this dough diagonally so you get two (roughly) semi-circular pieces. Pick up one of these pieces and lay it on your left hand so the straight edge lines up against the left side of your hand (it should look like the letter D on your hand).
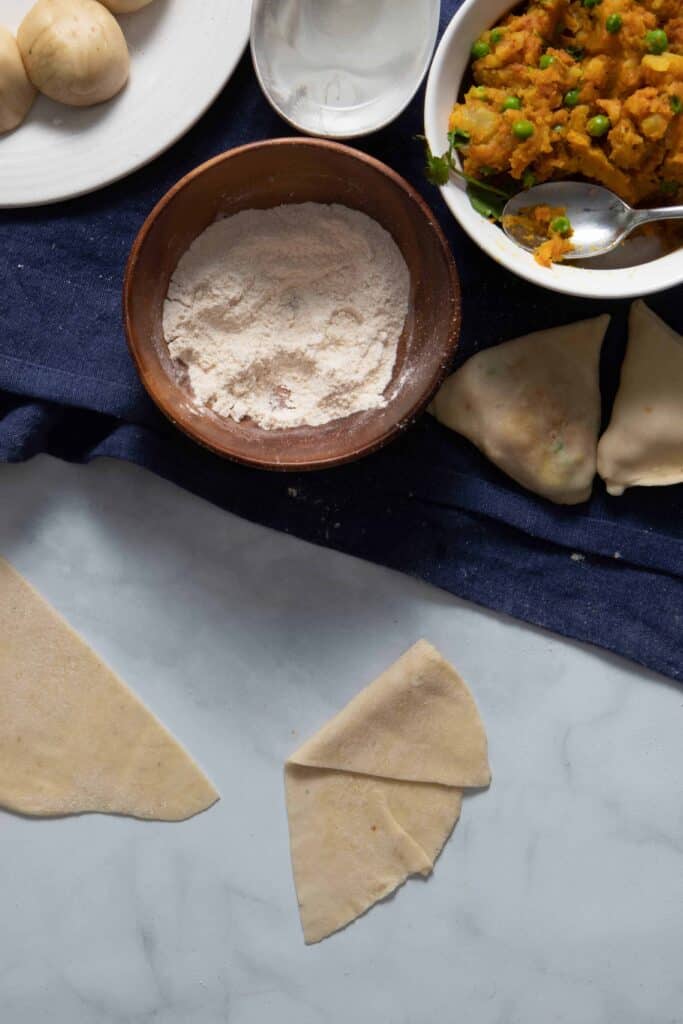
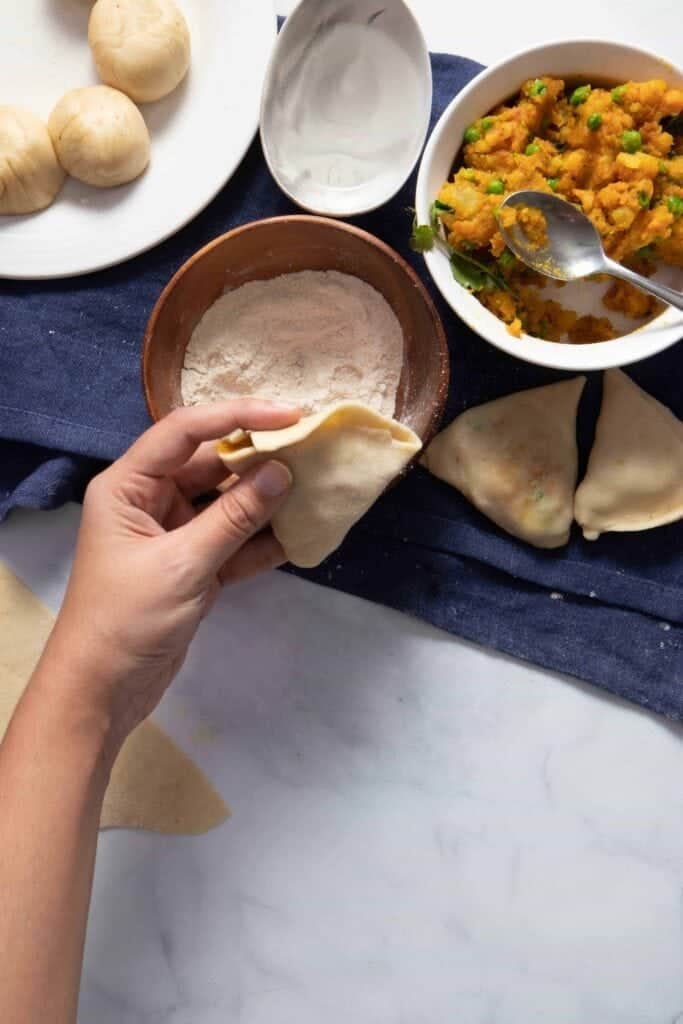
- Wet the straight edge with some water and form a cone so that the top is wider and also open for you to stuff the filling. Add ~2 heaped teaspoons of filling per samosa and push it in so it evenly fills out (but only till about 3/4 of the cone). You might end up adding a bit more depending on how big you rolled the dough out.Note: Please check the post for detailed instructions on how to fold the samosas (or watch the linked video below!)
- Add a bit of water to the edge of the cone and seal it shut (either by pressing together or folding one edge over the other)
- If you’re air-frying, after you’re done folding the first samosa, pre-heat to 425 °F. Depending on the size of your air-fryer, you might need to make a couple of batches – take care not to overcrowd the samosas since that will prevent the dough from cooking properly
Option 2: Baking Samosa!
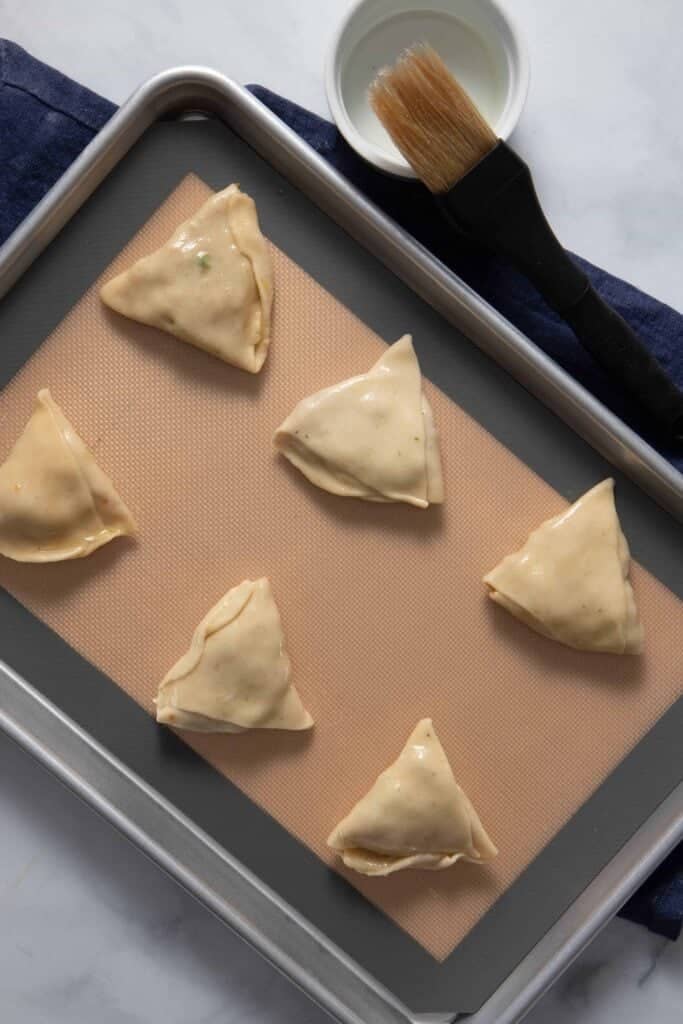
- If you’re baking samosas, after you're done folding the first samosa, preheat oven to 400°F.
- Coat with enough oil to cover all the sides and place aside. Repeat for the rest of the samosas.
- On a sheet pan lined with a silicon liner or parchment paper, place each samosa roughly 2 inches away from each other
- Bake for 20 minutes and check on the color – if golden brown, flip to the other side and bake for another 10-15 minutes
- Remove and serve with ketchup, a nice aioli or a chutney!
Option 1: Air Frying Samosa!
- Place the samosas carefully in the air fryer and cook for 10 to 12 minutes, and then flip the sides and cook for another 5 to 7 minutes. Depending on your air fryer, you might need to add a few extra minutes. When it's done, the samosas should be crisp on the outside and a nice golden brown color on both sides.Note: Air fryers are quite different, so the temperatures might vary. Mine takes 18 minutes total to cook. But yours might take longer or shorter depending on the size, power, etc. I suggest checking after 10 minutes to see if one side is done, and then checking again after the 5-7 minutes. You might need to add 5-10 more minutes depending on the fryer!
Video
Notes
- Timing is everything for this recipe. Make sure to start by boiling the potatoes; once they’re in the pot, knead the dough and set aside. Once the potatoes are out, make the filling; and by the time the filling is done, the dough is ready to be shaped. The whole process should take roughly an hour for about 15-16 samosas. Please check the post for more details and step-by-step instructions / pictures for folding samosas (I promise you, you won’t regret it!)
- You can use phyllo pastry sheets instead of the dough as the base if you don’t want to make the dough from scratch. Also, if you want your samosas to be extra crispy, you can add a pinch of baking soda to the dough.
- Depending on the size of your cone, you might need more than just 2 teaspoons of filling. Go with the flow!
- To make a more “restaurant” style samosa (versus the version in the main recipe card, which is quite simple and super easy) – I suggest the following spice modifications: once your potatoes are cooked, heat some oil in a skillet and add half a teaspoon each of cumin seeds and black mustard seeds. When they splutter, add a teaspoon each of ginger and garlic paste as well as finely chopped Indian green chili peppers (or jalapenos!) Then, potatoes along with red chili powder, and the two “key” ingredients that flavor most Punjabi samosas: a tablespoon of amchur powder (aka dried mango powder, which you can find in most Indian grocery stores) as well as a half teaspoon of garam masala. Mix that all together, and finish with some cilantro. Restaurant-style samosas are ready!
Nutrition
Nutrition information is automatically calculated, so should only be used as an approximation.


These sound great! Do you think I could make the samosas in advance, then bake them once guests arrive? If so, any storage advice for the interim period?
Yes, you can! I actually recommend freezing in this case, since it preserves the shape and then you can just take them out about 20 minutes before you need to bake.
How much baking soda do you add to make the extra crispy dough?
About 1/2 teaspoon should be more than sufficient!
I’m so excited to continue making these! I think I will experiment with adding cooked red or brown lentils to give it a bit of a protein boost – then I can justify eating it as a meal, right? 😉
Haha, for sure! I love adding lentils to samosas (they’re called sambusas in Ethiopia, and are quite similar that way!)
Made these a couple weeks ago for the first time. Turned out ABSOLUTELY AMAZING!! The family LOVED them so much that im making them again this weekend by request lol
Excellent recipe! Thanks for sharing! <3
Thank you so much, so glad you loved it!
Can theses be made ahead and/or frozen? Can I substitute GF flour?
Hi Gina – yes, you can make ahead and freeze for sure! Just make sure to flash freeze them first to avoid them sticking to each other. I’ve used a 1:1 gluten free mix in place of regular AP flour and it turns out quite well. Another alternative would be to use rice paper wrappers! Not the same texture, but it also tastes delicious!
Hello, there! I have a question, please. Can these also be deep-fried like traditional samosas? BTW, your “restaurant-style” recipe seems very authentic, which I really like. I can’t wait to try your recipe!
Yes! You can definitely fry the samosas!
It would roughly be 2 cups of mashed potatoes – please do let me know how this works out for you!
My son and I just made these, they’re so easy and delicious! My son has been a fussy eater recently and he’s wolfing these down! Thank you
That’s so great to hear, thank you so much for sharing back.
These were perfect! Your instructions were so detailed! Without them, I am sure they would not have turned out as good. I loved your details on how to stuff them and what to exactly do with the dough. Great recipe!
Loved this much healthier version of samosas — made it for a potluck and it was such a hit! Thanks for sharing your recipe.