Dill is a great herb that brightens up any meal. If you grow your dill or even buy it from the store, you might want to know how to store fresh dill! Here are a few tips on keeping fresh dill so that it will last longer, without wilting or losing its flavor.
This post contains helpful tips and tricks! If you’re in a rush, please use the Table of Contents to jump to a specific section!
This post might contain affiliate links. If you click on those and make a purchase, I earn a small commission at no extra cost to you. As an Amazon Associate I earn from qualifying purchases.
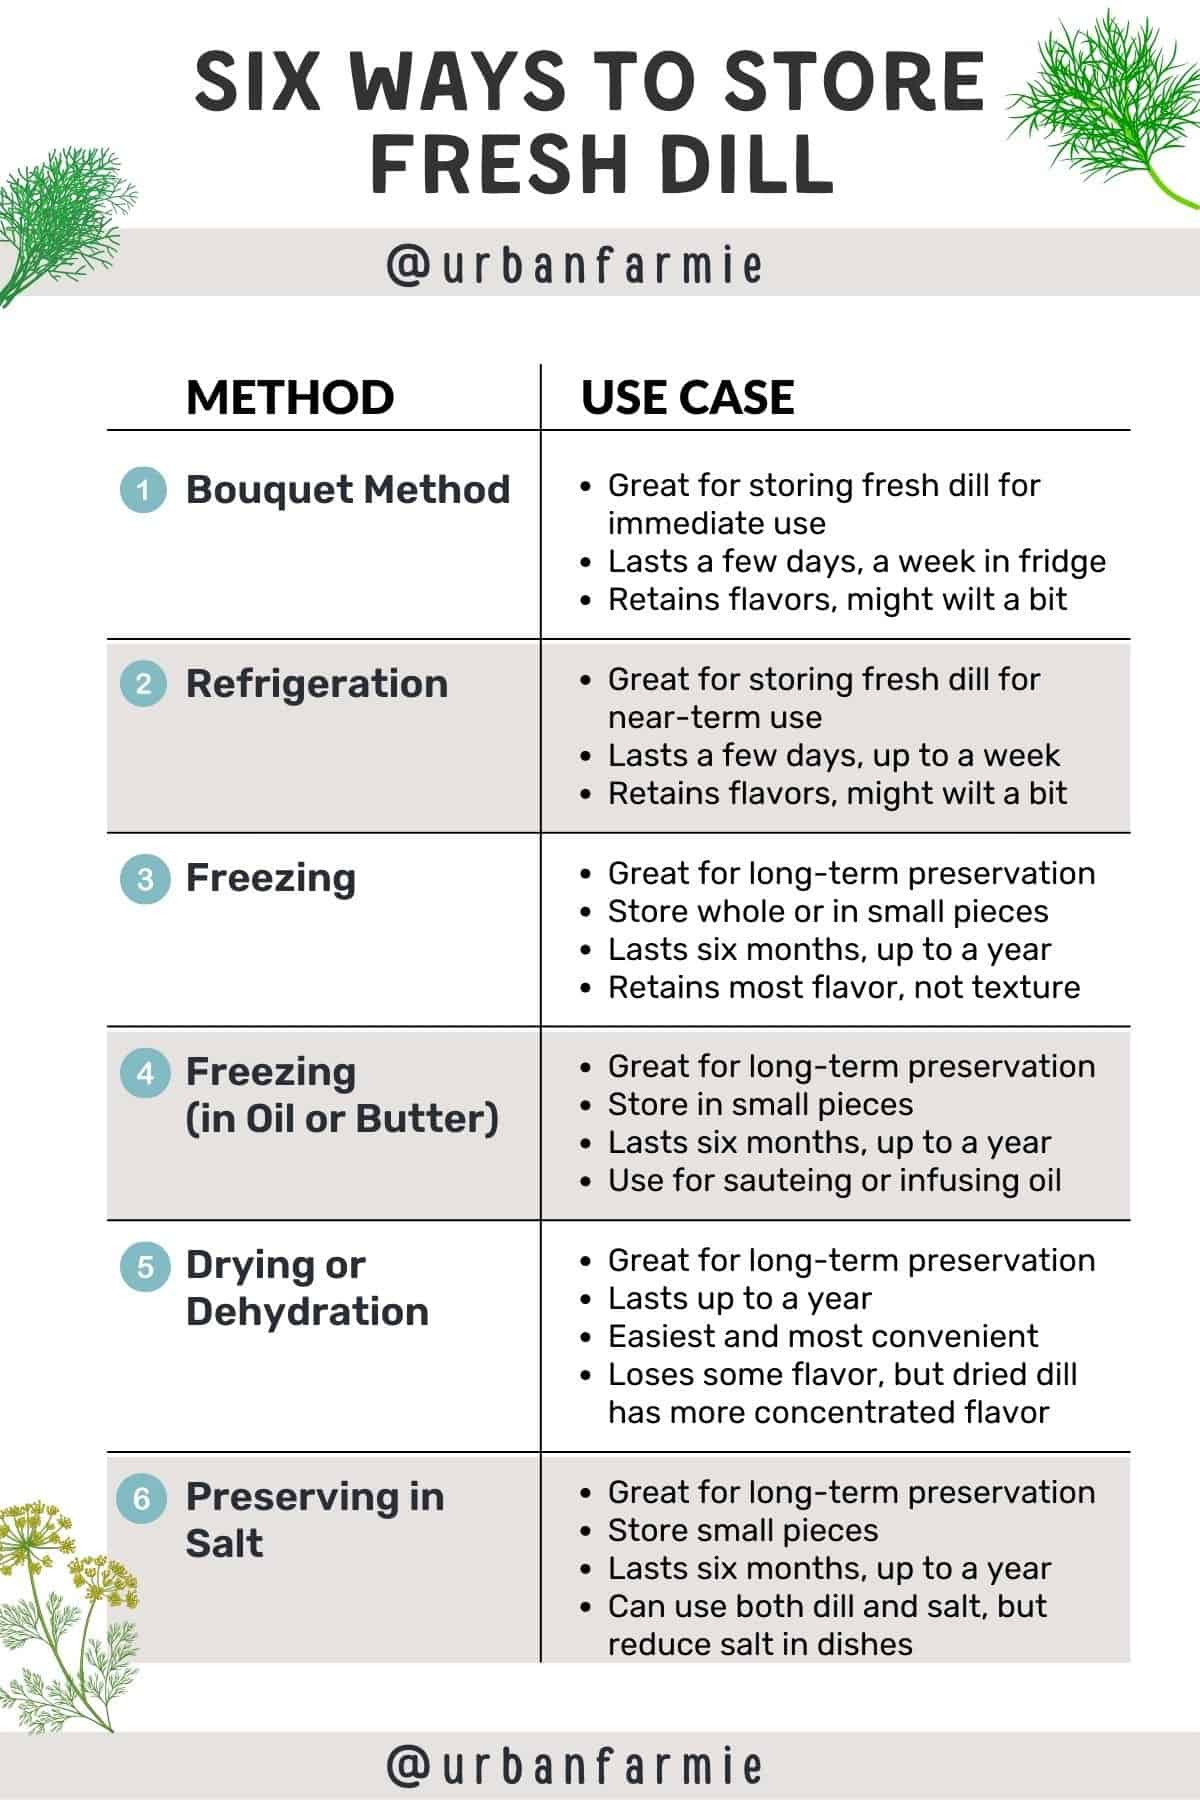
Six ways to store fresh dill
There are four ways of storing dill, depending on how you want to use it.
- Bouquet method (for immediate use as fresh dill)
- Refrigeration (most common, great when used fresh)
- Freezing (longer shelf life, great for soups and stews)
- Freezing in oil or butter (longer shelf life, great for sauteing)
- Drying or dehydration (longest shelf life)
- Preservation with salt (easiest, long shelf life, great flavor preservation)
Read on to find out about the different ways to store fresh dill below.
Bouquet
If you have fresh dill that you want to use soon, and want to preserve the freshness as much as possible, bundle it together and place it in a cup of water like a bouquet. Then, make sure you keep the water fresh as much as possible, changing it every time you use dill from the bouquet.
Making such a bouquet can help retain its freshness for up to a week! It requires no extra equipment beyond a vase or jar, and is super quick. However, the downside is that dill starts to wilt after a few days, making it unsuitable for long-term preservation.
Refrigeration
Refrigeration is the most common way of storing dill. Before you put the dill in the fridge, remember not to wash it. Instead, wash the dill right before you need to use it. This will help avoid a situation where the dill starts to wilt due to excessive dampness. Of course, if you grow your own dill and it has bugs or dirt, wash it, and then make sure to dry it fully.
Refrigerating the dill helps keep it fresh for longer, and preserves flavor much better. However, placing it directly in the refrigerator can make it quite limp, and the dill’s flavor may change slightly after being stored in the fridge.
Pro Tip: To avoid wilting, make a bouquet of dill, cover it with a plastic bag, and then place it in the fridge to extend shelf life!
Freezing
Freezing dill can help preserve the flavor for a much longer time. There are two ways to freeze dill without additional ingredients (okay, well, maybe water, but that doesn’t count right?!)
- If you choose to freeze it whole, after cleaning it, spread it out on a baking sheet and flash freeze it by placing it the freezer. This will help keep your dill crisp. After thirty minutes, remove the baking sheet from the freezer. Then, transfer all the dill into freezer bags for long-term storage. However, one drawback here is that the herb is difficult to chop and use in recipes.
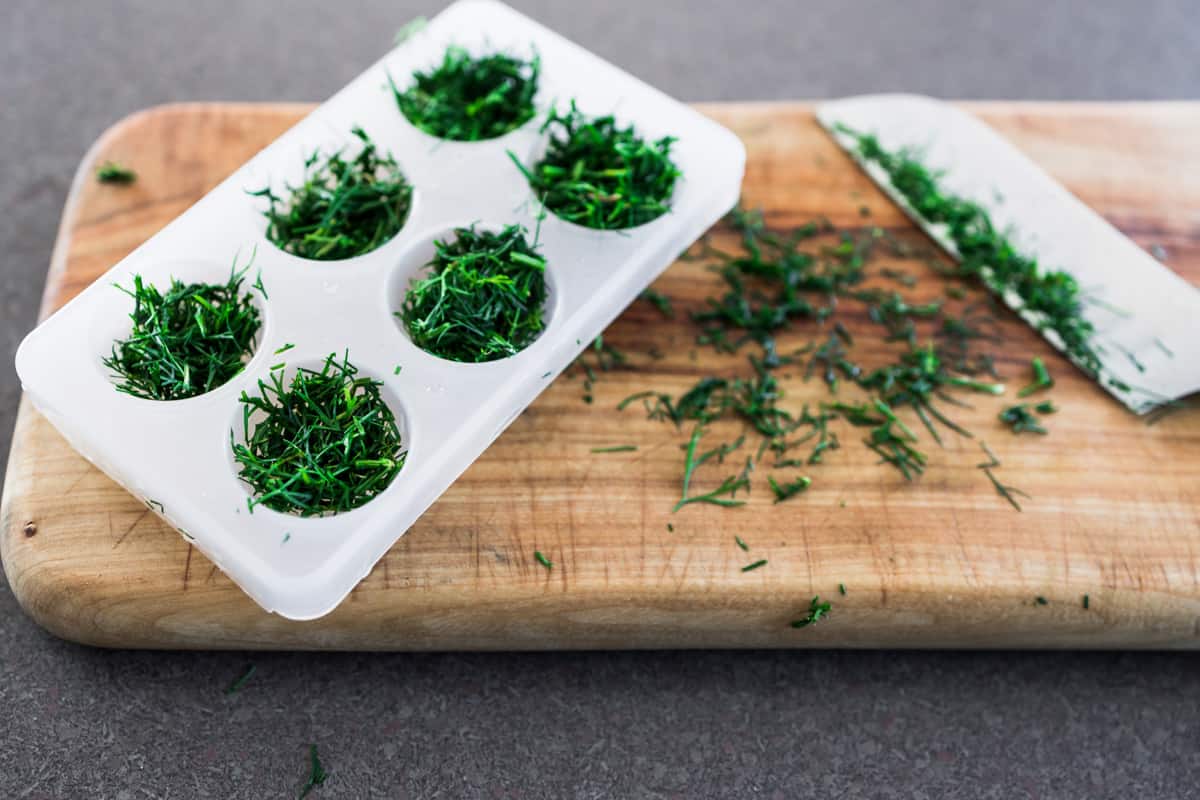
- If you want to freeze smaller pieces of dill, cut it into smaller parts and freeze them in an ice cube tray. Add a bit of water to each ice cube tray along with smaller pieces of dill. Freeze, then put the ice cubes in freezer-safe bags! This helps solve the previous problem, but you have to use it in a more “liquid” dish.
Freezing dill helps retains more flavor, so this method is great for soups and stews! This type of frozen dill can also last up to a year.
Freezing in oil or butter
Okay, this method is a bit of cheating! You can preserve dill by freezing it in oil or butter. This is great if you want to keep dill on hand for sauteing or infusing oil.
Chop the dill and place it at the bottom of an ice cube tray. Then add oil or melted butter to cover the tray (similar to the ice cube method above). Then, freeze the ice cubes. Once frozen, transfer to a freezer-safe bag. I really love using these ones because they actually stand up right in the freezer, which is great!
When ready to use it, thaw and use as desired. Preserving dill in this way will keep it fresh for several months. Freezing dill this way helps retain its flavor for a longer period of time and it’s a great way to infuse oil and really elevate dishes. However, it can get freezer burned, and it can be not easy to thaw out the dill once it is frozen. Plus, you can only use it in dishes where you are planning to use oil.
Drying or dehydration
This is probably the most “dependable” strategies for preserving or storing fresh dill in the long-term.
- You can go the food dehydrator route, which is great way for drying all kinds of things. However, you don’t need a dehydrator to dry dill.
- You can simply dry dill by hanging it upside down for several weeks if you don’t have access to a dehydrator.
- You can also dry dill using an oven (set the oven to the lowest setting possible if it’s under 200F, or preheat and then leave oven light on, and place the dill inside) or a microwave (microwave in bursts of 30 seconds).
Dried dill leaves may be kept in an airtight container or a glass jar for 1 to 3 years!
Dried dill has a far more concentrated flavor than fresh dill, so a little truly goes a long way. Additionally, it’s extremely easy and convenient to dry your dill at home (a great way to just save fresh dill for a long time).
On the other hand, it does lose some of its flavor and aroma (especially depending on what method you use to dry dill). If you’re planning to use dried dill in a recipe that calls for fresh dill, make sure to taste test!
P.S., check out this post on the best ways to dry dill if you want to do this.
Preserving herbs with salt
One inexpensive and easy way to preserve fresh herbs is to use salt! It can help your herbs lower the levels of bacteria and keep out moisture. It preserves the dill (and infused salt!) for several months. It’s not time-consuming, doesn’t need to be stored in a freezer, and salted dill retains better color and texture.
To do this, first, wash and dry your dill thoroughly. We typically wash them and lay them out to dry for about 15 minutes on a clean kitchen towel.
Remove unwanted stalks and thick stems, and slice the leaves into small pieces. Add salt to cover the bottom of a clean glass or ceramic jar.
My grandmother used large ceramic jars (the kind that we used to store pickles in) but glass jars are way easier to find in the US.
Note: We use sea salt at home, and here, I’ve found kosher salt works great. You can also use canning salt or pickling salt. You could use table salt, but please make sure it’s not iodized.
Add a layer of dill, then a layer of salt, and then repeat this again until the container is filled. If you want to make it more spicy or add more flavor, you can also include sesame seeds and red chili powder.
Cover with a tight lid and place in the fridge. The dill will start to dry out, and compress. There will be “dill juice” or “dill brine” at the bottom, but don’t worry about that. It’s just the moisture from the herbs accumulating at the bottom.
You can use this as you normally use salt or herbs in any recipe, but make sure you adjust the amount of salt in the recipe (the dill will already be quite salty!) You can also use the salt from the dill jar in cooking. However, you are limited in the number of recipes that you can use your dill on if you don’t intend to add salt to your dish.
My mother used this for making “suva ki bhaji” (i.e., dill curry) which I hated as a kid, but now don’t mind all that much. We also use it on carrots and radishes as well, because it imparts a nice flavor to the earthy notes of root vegetables.
Tips for preserving dill in salt:
- You don’t have to refrigerate the dill if you have a cool, dark place (e.g., a pantry, basement or cellar). But I live in a tiny townhouse in Seattle, so a fridge is my next best option!
- You can pack the herbs as much as you want within the jar. I always try to fill up my jar to the brim (it’ll keep compressing, but at some point, you simply won’t be able to add any more – then you’re done!) But you can fill it up as much as you want. Just make sure you salt the top layer.
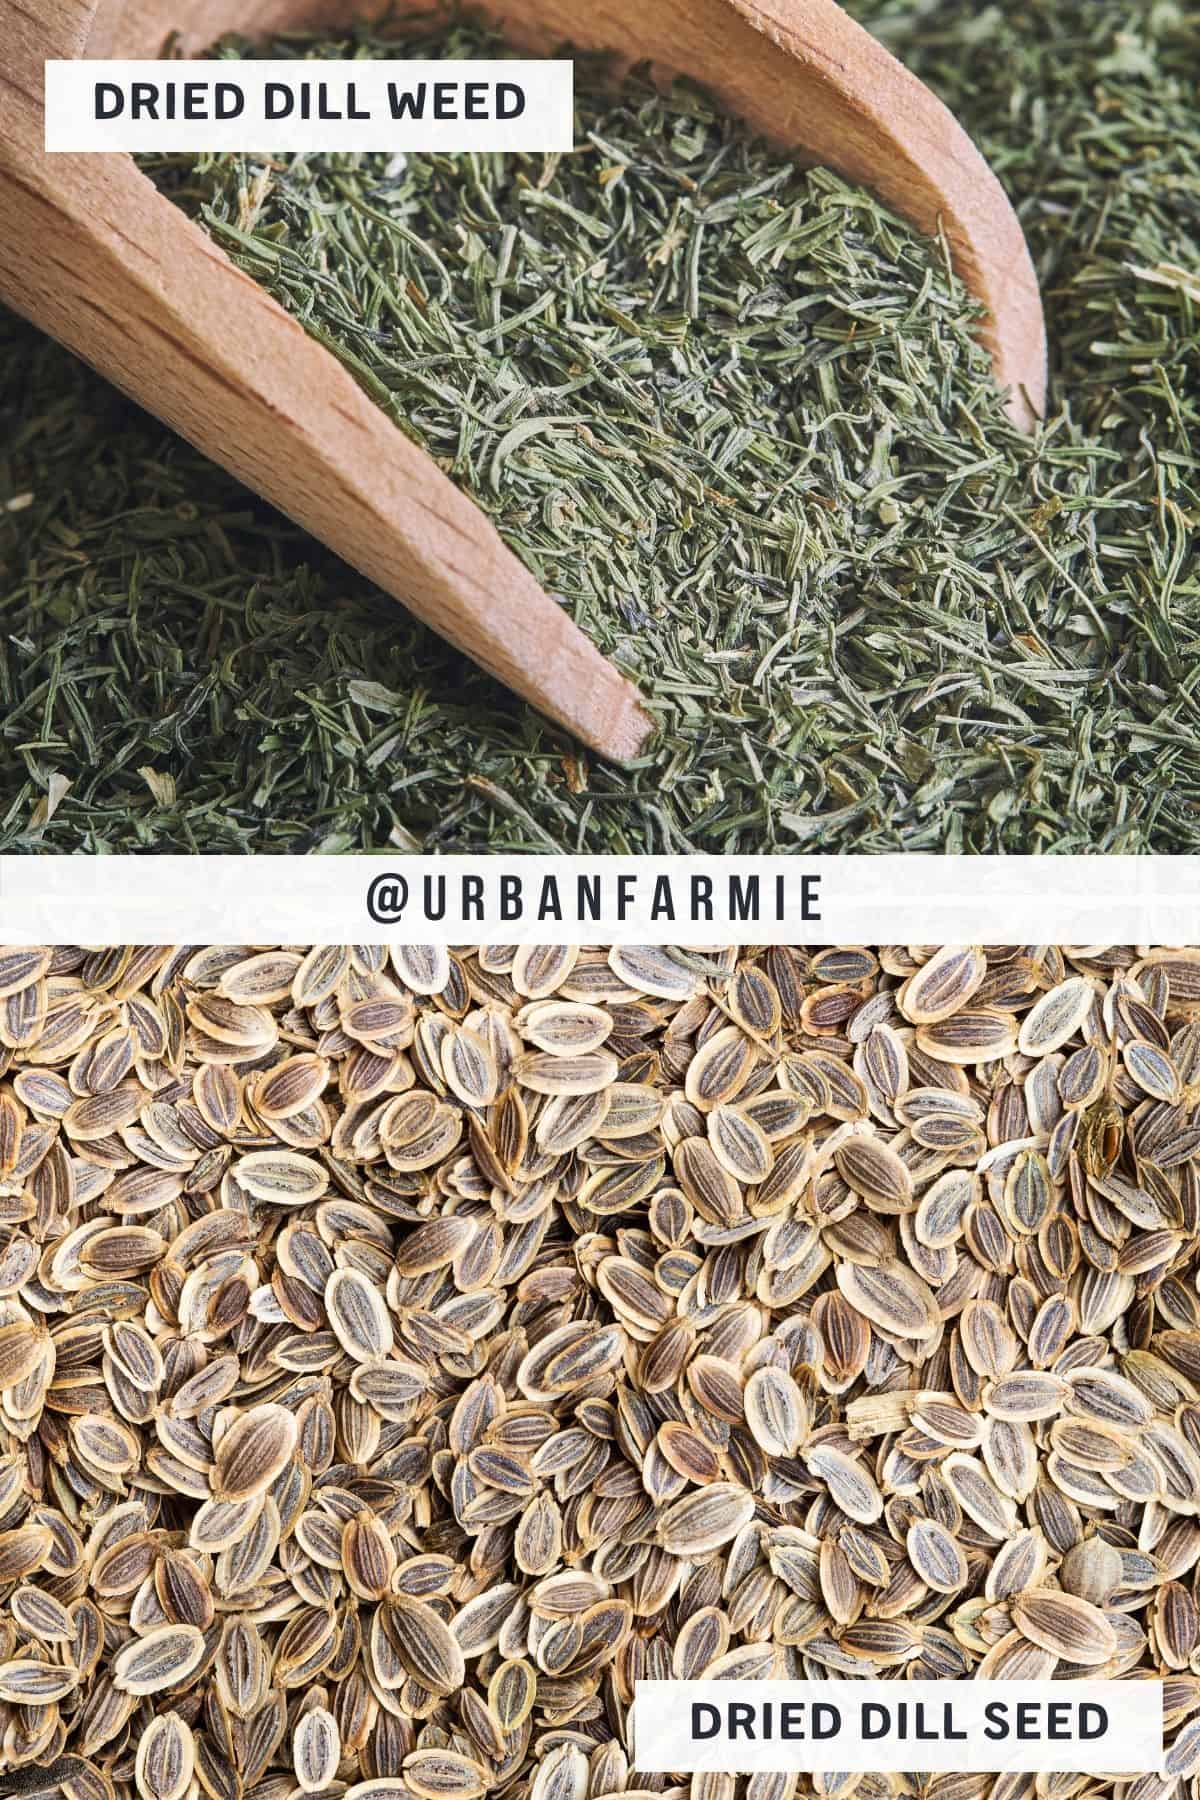
How to Store Fresh Dill Seeds
We talked a lot about dill leaves, but what about dill seeds? Dill seeds give soups and stews an amazing amount of flavor! So, don’t worry, we have you covered there too!
Once the seed on dill plants turn brown, you can collect them. Harvest the seed by cutting off the ripe seed heads from the dill plants. Place them in a brown paper bag in a warm, dry place, ideally upside down.
After a week, you’ll need to sift the seeds to eliminate any extra plant parts. Let the seeds stay in the paper bag for another week to dry. Then, simply place the dried dill seeds in a glass jar with a tight-fitting lid. Keep them somewhere cool and dry for up to six months!
FAQs
Freezing and drying dill is the most effective method of preserving its fresh flavor over an extended period of time.
Yes, you can freeze dill (either whole, or in water, or in oil) for later use! Read the post for more details.
When stored in the freezer, fresh dill will last for up to one year (or at least six months, depending on how you freeze it).
I do both! Dry dill can last 1-3 years, and is very versatile with more concentrated flavor. However, frozen dill tends to retain more of the “fresh” flavor and is much better in a lot of preparations. So, one is not necessarily better than the other! If you have limited freezer space, just go ahead and dry the dill!
Dill Recipes & Resources
If you’re looking for some great recipes to use fresh dill in, look no more.
- Use dill seeds to make this delicious, “everything” butter, that you can then promptly slather on … everything. Wink.
- Use fresh dill to make some amazing dill seasoning or this incredible egg salad with dill and rocket for a tangy treat!
Hope this post was helpful in answering all your questions on how to store fresh dill! If you have a moment, leave a comment on what your favorite method is, or if you have any additional tips to share!


Given that I can only find huge bundles of fresh dill at the grocery stores, this was a helpful read. I’m actually using the refrigeration method you mentioned but I’m going to try the freezer / oil & butter freezer method next time! 🙂