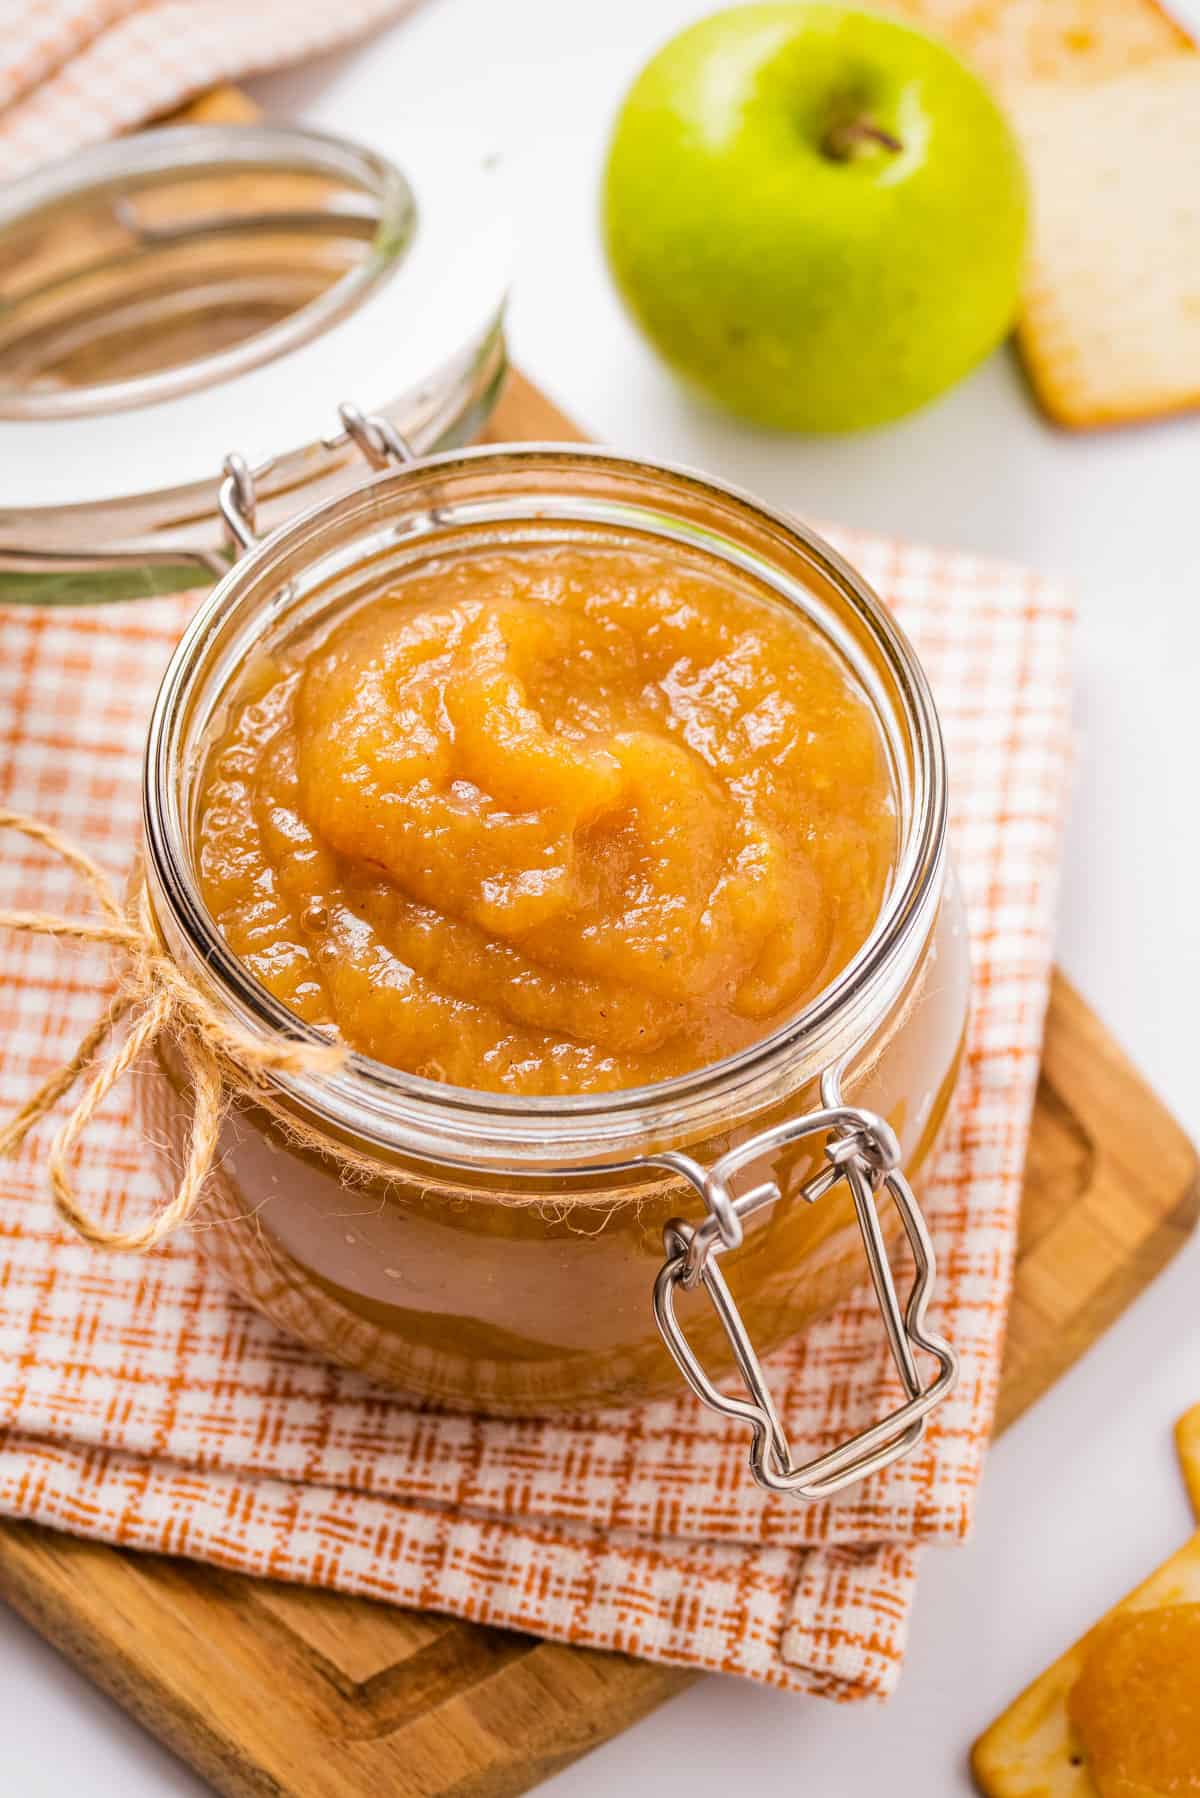
Apple butter is a Fall pantry staple that can be used in a million different ways. Unlike traditional methods, no apple peeling is required, and you have full control over the sweetness. Plus, my foolproof tips will ensure success with any apple variety or spice combination. This Instant Pot apple butter is all about convenience without sacrificing taste, and makes a great holiday gift as well!
This post contains helpful tips and tricks! If you’re in a rush, please use the “Jump to Recipe” above!
💭 Why you’ll love this recipe
Who doesn’t love a good apple butter recipe?
- Great way to use up Fall apples. If you just went apple picking or just have a lot of fresh apples in your kitchen from your harvest that is going to go bad then you can put them to good use by making Instant Pot apple butter. It’s also a great gift for the holiday season!
- Super versatile addition to any Fall meal. Whether you’re serving up pancakes for breakfast or pork chops for dinner, apple butter is a delicious spread to add a touch of fall flavor. Basically, if you can think of it, you can probably do it with apple butter for some delicious fall flavors!
- Set it and forget it. This recipe has minimal active prep – basically you just slow cook the apples until you get butter. Doesn’t get easier than that!
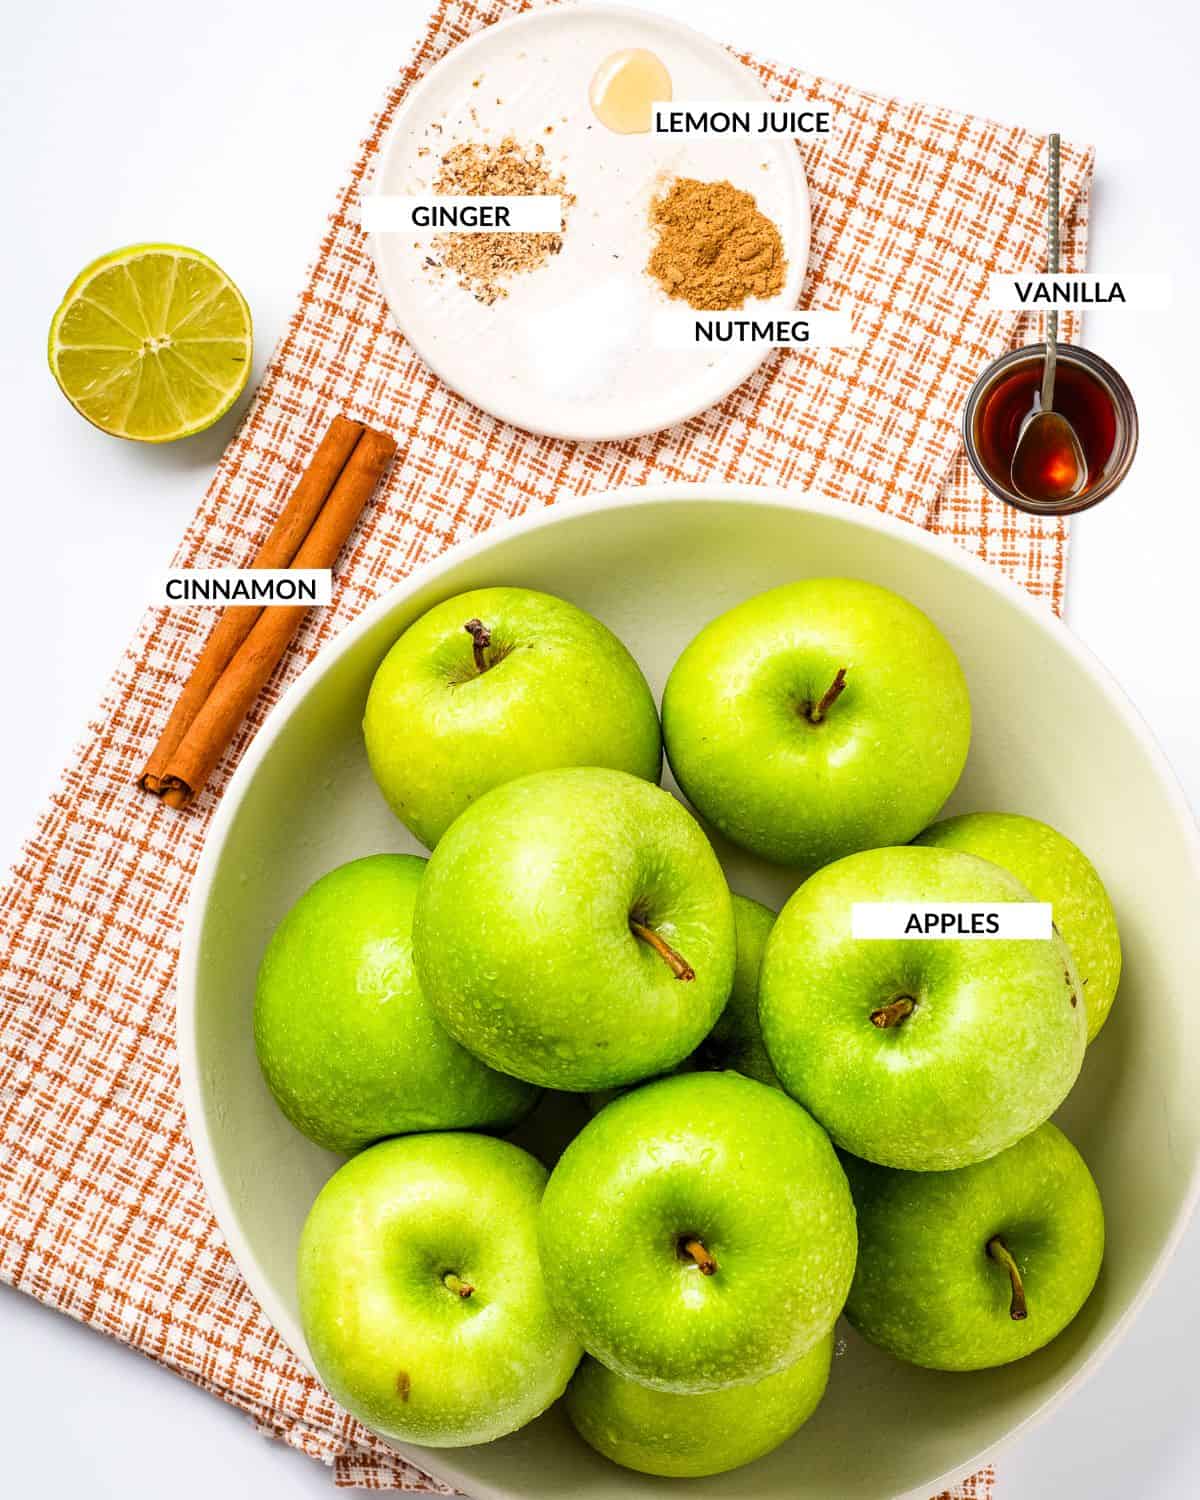
📋 Ingredients and notes
To make instant pot apple butter, you’ll need: at least 3 pounds of apples, water, lemon juice, cinnamon, nutmeg, ground ginger, salt, vanilla extract, sweetener.
⚙️ Equipment Needed
You’ll only NEED an Instant Pot to make this recipe – I use a 6 Quart!
- I like to use an apple corer (makes slicing apples an easy task!)
- If you decide to peel the apples, this peeler is fantastic and an all-round great tool to have.
- Finally, you’ll need an immersion blender if you want to achieve a really smooth texture with your apple butter (this one is an inexpensive workhorse, or you can invest in this Vitamix one if you want something that’ll last forever!)
Notes and Variations
- Adjusting sweetness of recipe: The level of sweetness depends on the type and natural sweetness of apples you decide to use. If you use a more tart variety, you can add brown sugar, coconut sugar or maple syrup to the Instant Pot as you’re cooking down your apples (but this is not necessary!)
- Peeling vs. not peeling apples: This comes down to a matter of preference! Since we end up using a blender at the end, the apple peels get blended in perfectly. That said, peeling your apples helps create a smooth apple butter. I mostly tend to leave them in because it’s easier!
- Type of apple: I used Granny Smith apples because I like my apple butter to be tart. The best apples are the ones that have the flavor you like, but you can use a blend of apples for a balanced flavor (Granny Smith, Fiji and Honeycrisp work really great together). The main difference is the level of sweetness.
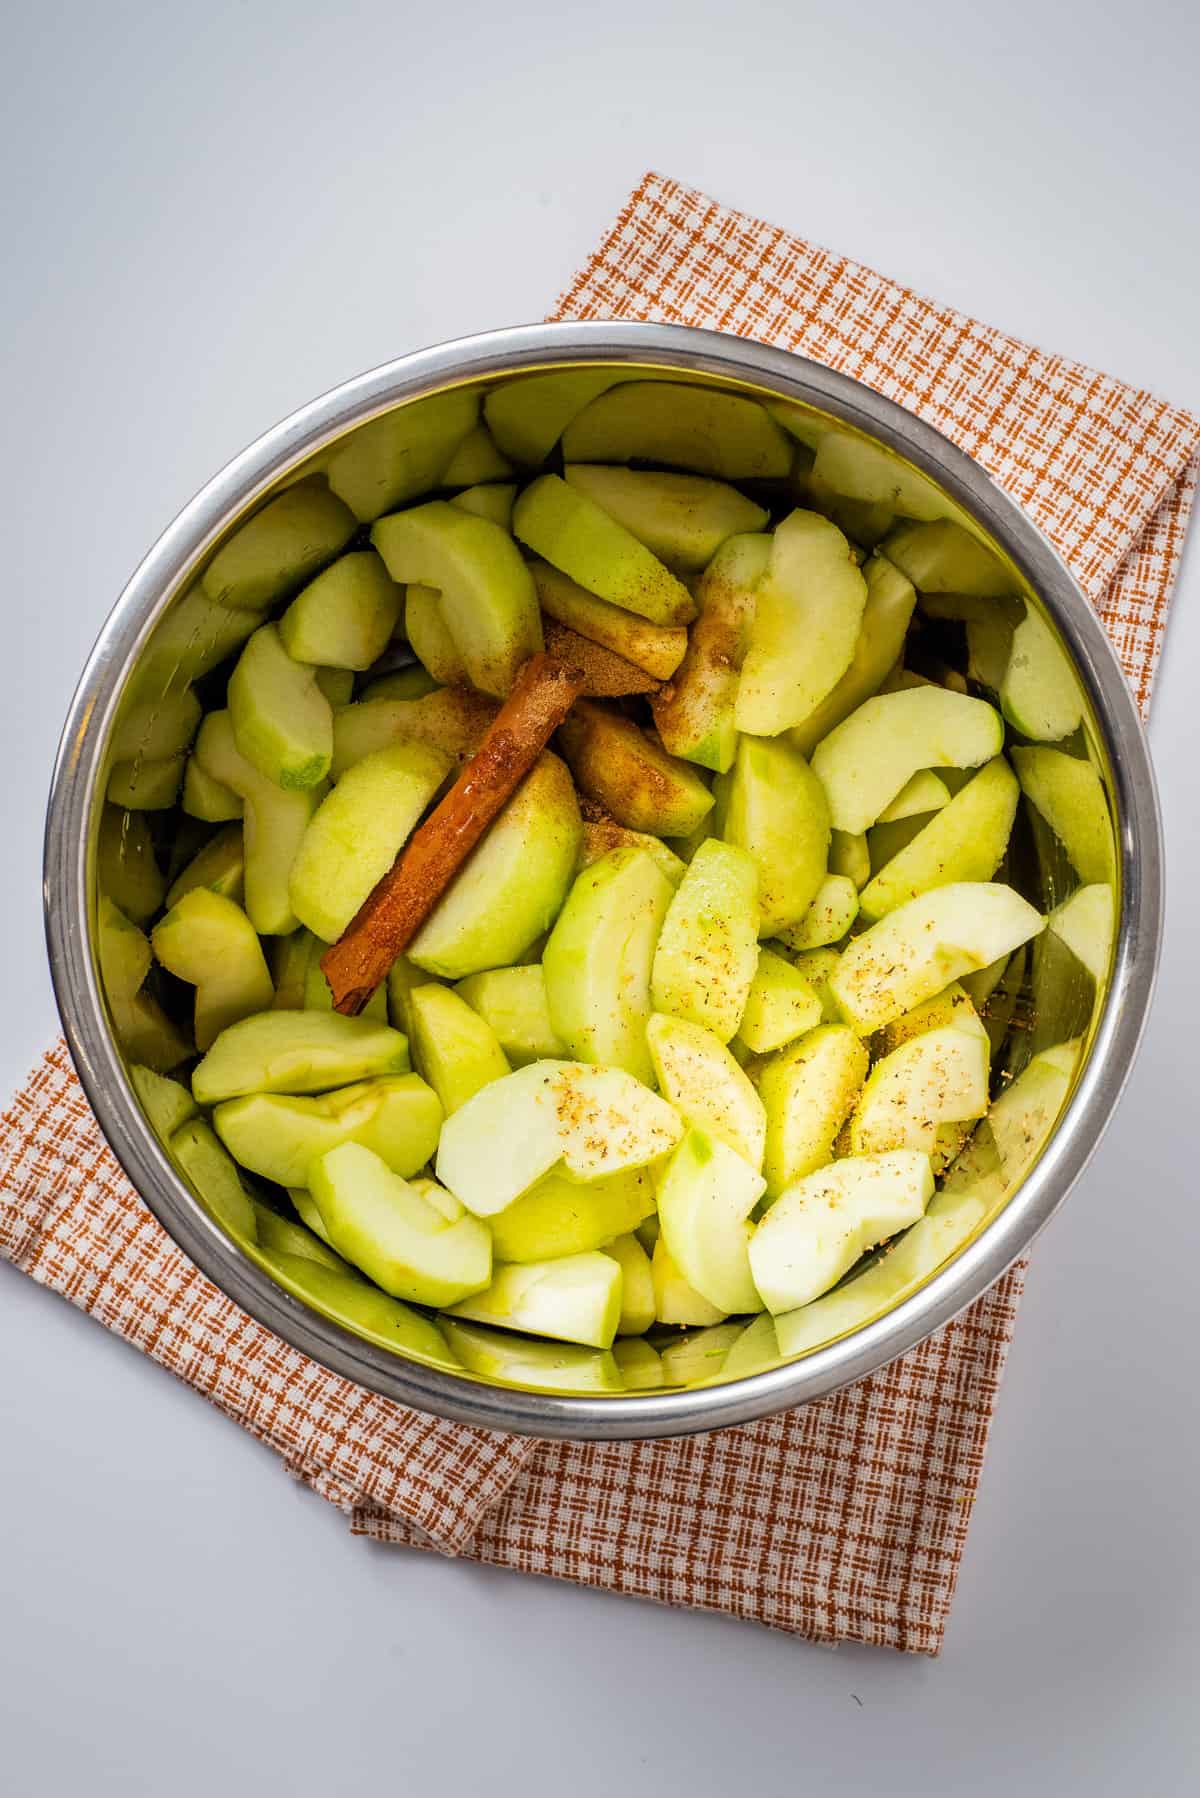
📖 How to Make the Instant Pot Apple Butter
Set the Instant Pot to High-Pressure mode for 6 minutes.
Add the apple pieces along with the remaining ingredients to the Instant Pot, close the lid and cook for 5 minutes. Then allow a natural release of 20 minutes.
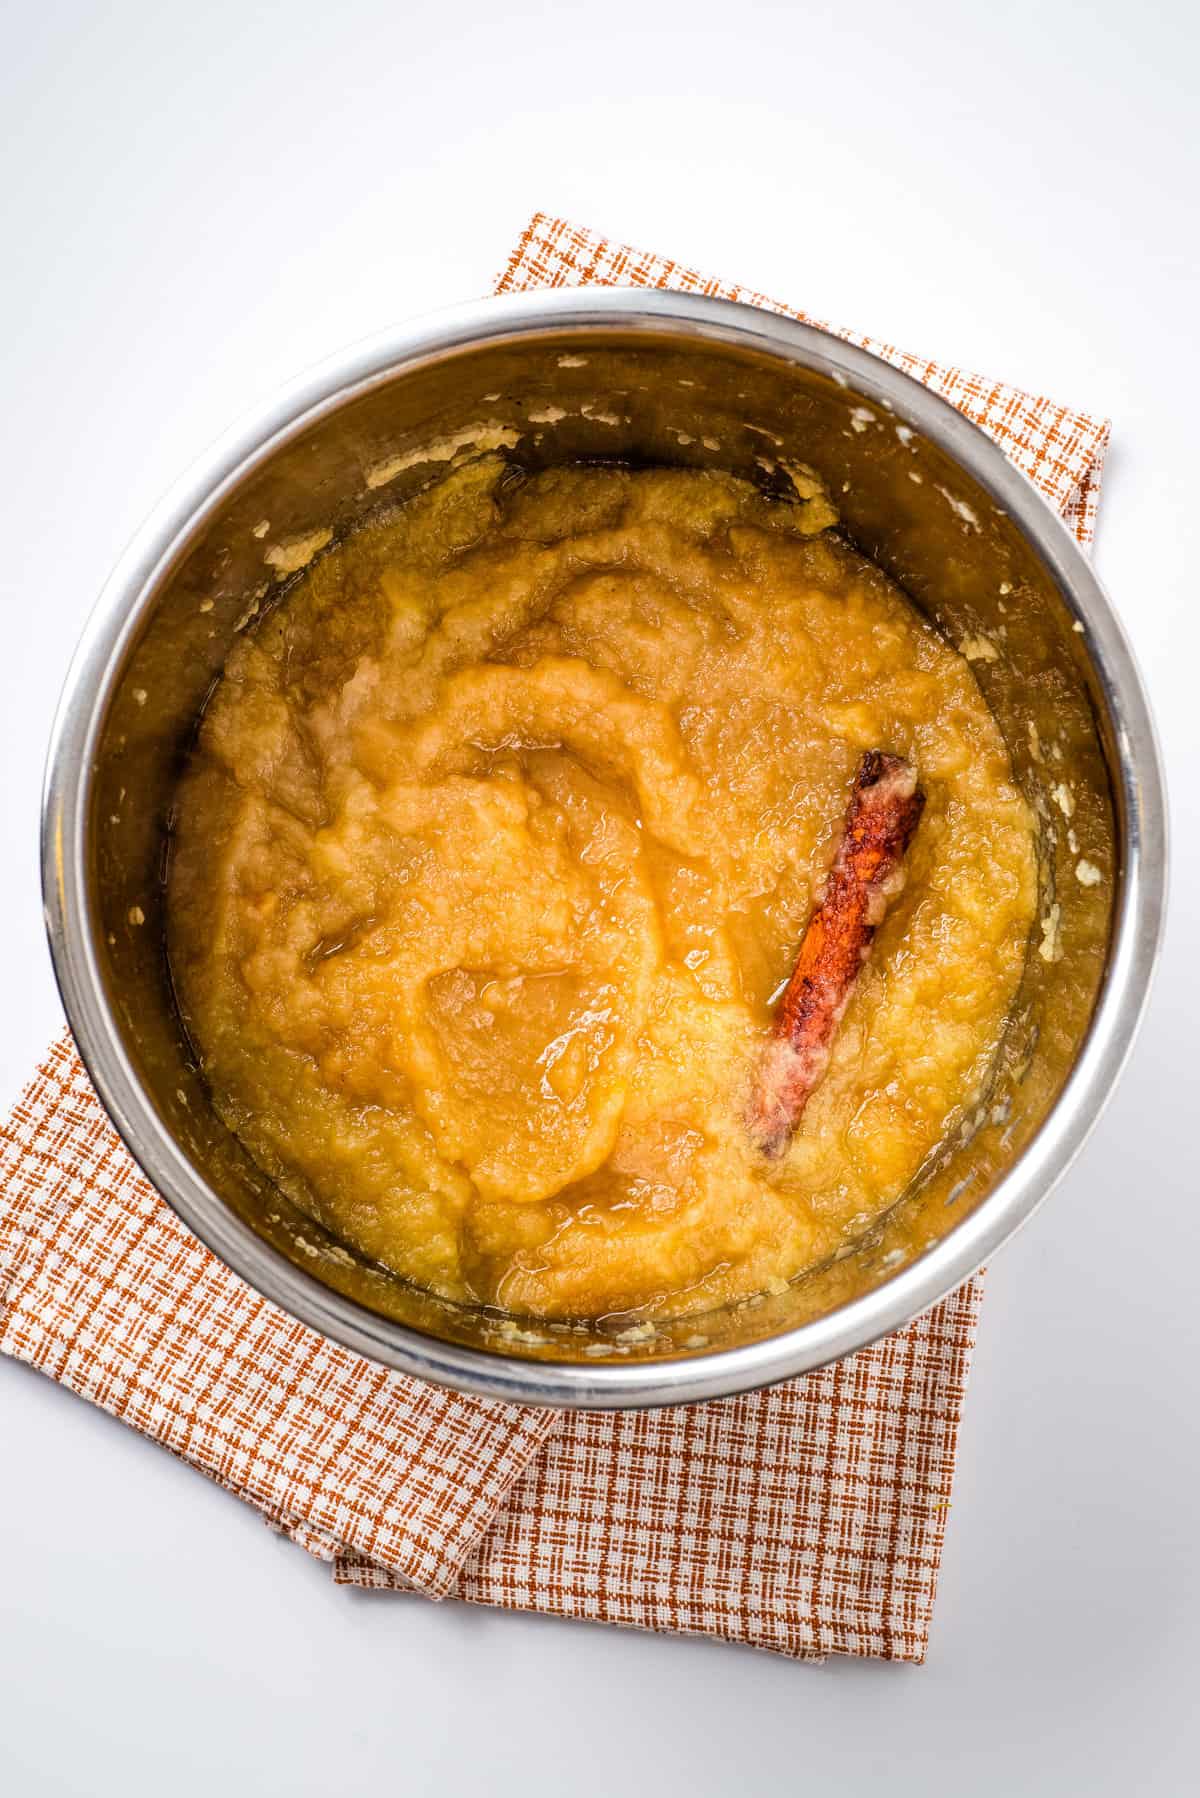
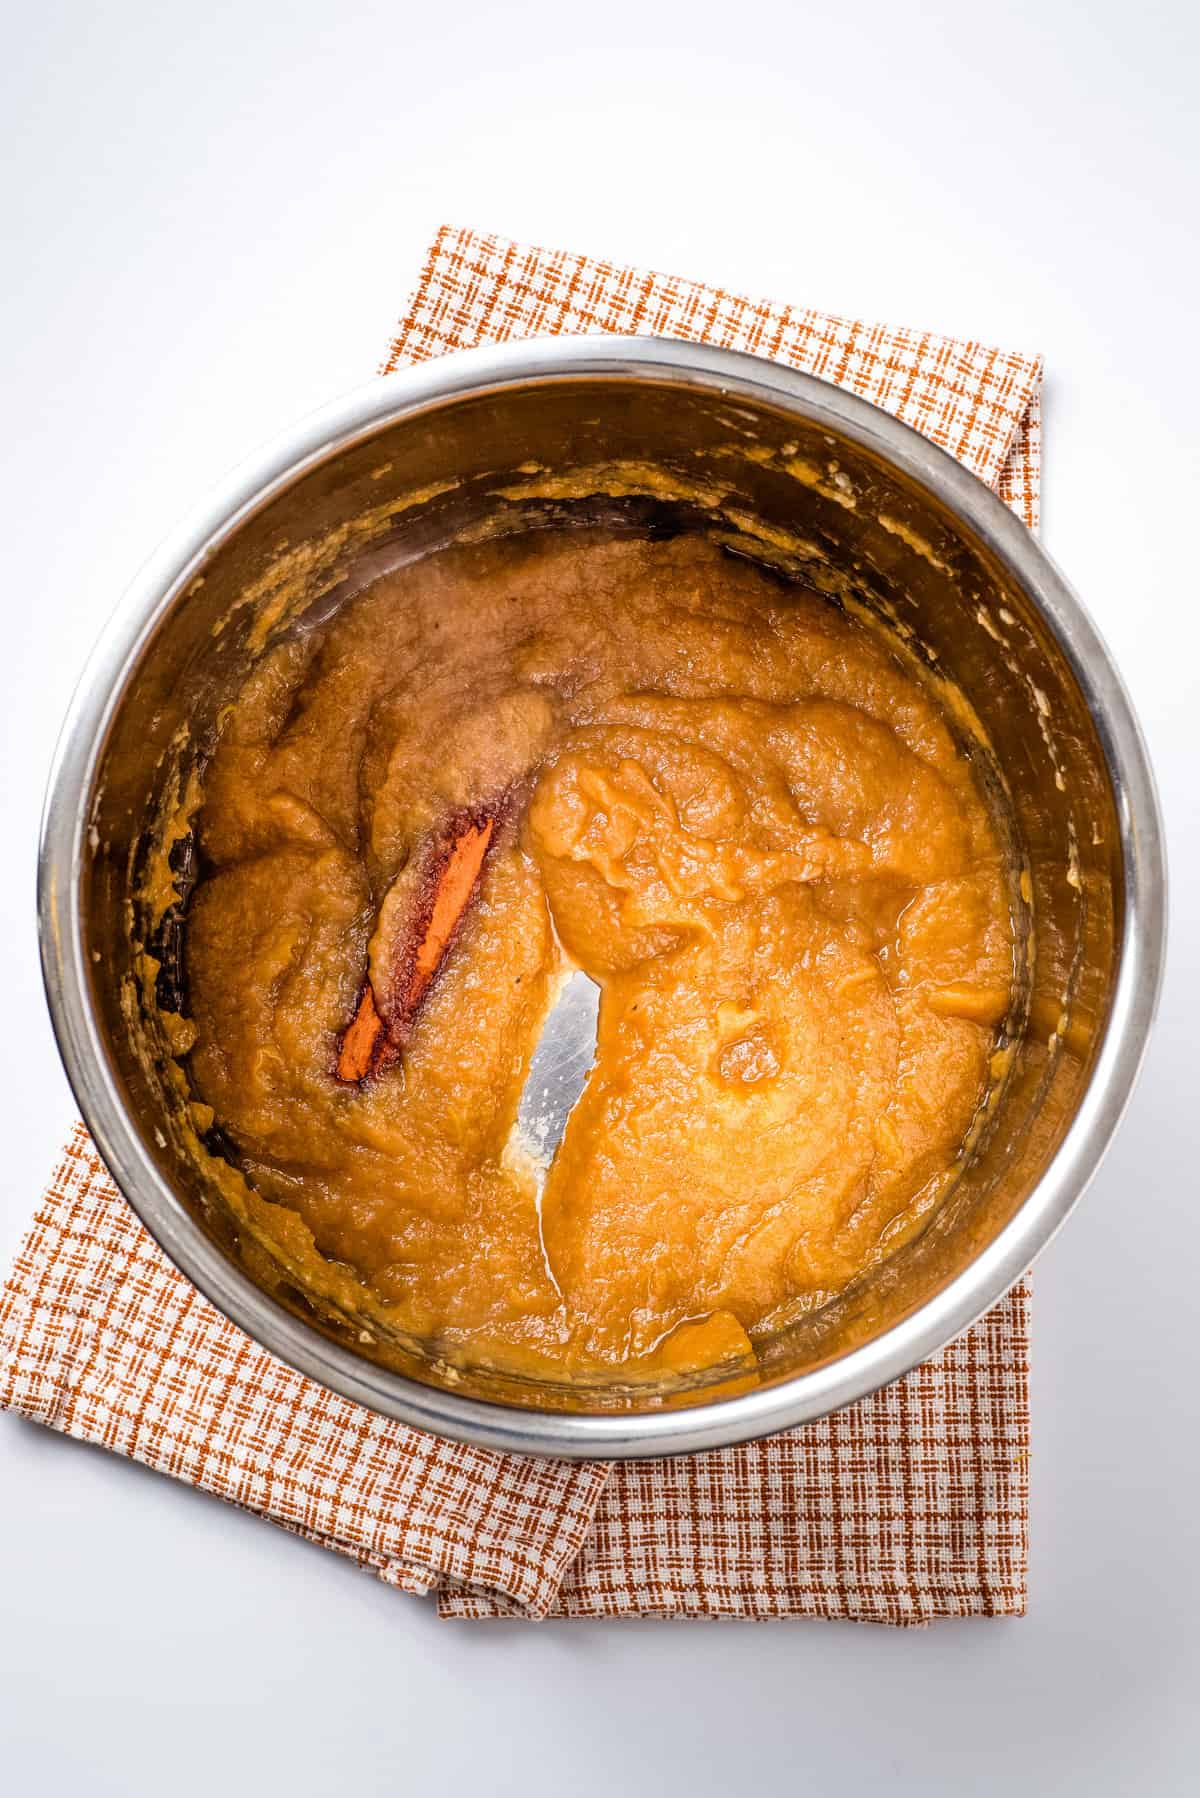
Once completed, open the lid carefully and check the consistency of the cooked apples. Make sure to scrape the bottom of the pot.
Turn it into apple butter by blending it with an immersion blender. You can also transfer the apple butter to a regular blender.
❗Safety Tip: If transferring while the apple butter is still hot, make sure to use a heat-safe blender container. Make sure the lid is slightly opened to avoid heat pressure building up inside the blender. You may like to add sugar or sweetener at this point.
For slow cooking, turn the Instant Pot to “Slow Cook” and cook on high for about 2 hours, stirring occasionally, with the lid propped on but not latched so the steam discharges. Alternatively, use a splatter guard! You can cook more, even up to 4 hours. The longer it cooks, the darker, thicker, and sweeter it gets!
Once done, allow the apple butter to cool, remove the cinnamon stick, and place it in an airtight jar with a lid and store it in the fridge for up to 3 weeks.

👩🏽🍳Tips for the Best Instant Pot Apple Butter
Making apple butter from scratch can seem daunting, but with a few simple ingredients and a little help from your Instant Pot, you’ll have a delicious batch ready in no time. Here are five tips to make sure your apple butter is perfect!
- Use a mix of apples. This will give your apple butter a complex flavor that is sure to please everyone’s taste buds. For apple butter, you want to use apples that are tart and acidic, like Granny Smith apples. Stay away from sweet apples like Red Delicious, or your apple butter will be too sweet. Check out the differences between Fuji and Gala apples too!
- Don’t forget the spices. A little cinnamon and nutmeg go a long way in making your apple butter taste great. But feel free to experiment and add other warming spices (e.g., even spices like ginger or cloves can be used in moderation!)
- Cook it longer than you think you need to. Allow your apple butter to cook slowly for a long time. The longer you cook apple butter, the thicker and more flavorful it will be.
- Let it cool completely before storing it in jars. This will help prevent any spoilage that could occur if it’s not stored properly.
- Use a food processor or immersion blender. To smooth out the consistency of your apple butter before serving or storing it. This will give it a nice, smooth texture that is perfect for spreading on toast or stirring into oatmeal.
👩🏽🍳 FAQs
No, it’s not actual butter! It’s basically a fruit spread made with apples. it’s called apple butter because of the thick, smooth, buttery texture.
I think a blend of apples can provide more balanced flavors. This way, you get the benefits of multiple apple types in each batch. My favorite apples are Granny Smith, Golden Delicious and Fuji apples (or a mix of all three!) If you decide to go with a single apple, it amplifies the unique flavor of that apple. But it comes down to preference!
This thick, sweet spread is a versatile pantry staple that can be used in both sweet and savory dishes. Slather it on toast or homemade biscuits for a quick and easy breakfast, or pair it with baked brie for a decadent appetizer. It also makes an excellent grilled cheese sandwich filling.
Apple butter does not include gluten, dairy, or any other animal products, thus it is suitable for vegans and those with gluten intolerance!
Yes, apple butter will thicken as it cools. This is because the cooking process breaks down the pectin in the apples, which helps to thicken the mixture. As the apple butter cools, the pectin will continue to thicken the mixture, making it the perfect consistency for spreading on toast or eaten with a spoon!
Apple butter is basically concentrated applesauce! Apple butter is usually cooked for a longer period of time, so you get more of the water out, and the apples start to caramelize, resulting in that sweet, smooth texture.

🍴 Serving and storage suggestions
Storing the apple butter in an airtight container (like these ones!) in your fridge will keep it fresh for 2-3 weeks.
You can freeze it to make it last up to 3 months, as long as you store in a freezer-safe container. This is a great alternative to canning apple butter (which I’ll admit, I don’t really can stuff, but I have a massive freezer in my garage that I store a ton of food in) Make sure to leave a decent amount of space at the top of the jar; otherwise, it may break once the apple butter freezes.
If you want to can your apple butter, check out this recipe for canning apple butter from my friend Sarah!
Apple butter is great on toast, of course, but it’s also delicious in oatmeal, on pancakes, or even stirred into yogurt.
Here are three recipes slather with this delicious apple butter:
More Apple / Fall Classic Recipes:
If you tried this recipe, don’t forget to comment and rate! ⭐⭐⭐⭐⭐

Instant Pot Apple Butter
Equipment
Ingredients
- 3 lbs apples, cored and quartered, I used Granny Smith here!
- ¼ cup water
- 2 teaspoons lemon juice
- 1 teaspoon ground cinnamon, 1 cinnamon stick
- ½ teaspoon freshly grated nutmeg
- ¼ teaspoon ground ginger
- ¼ teaspoon salt
- 1 tablespoon vanilla extract
Instructions
- Set the Instant Pot to High-Pressure mode for 6 minutes.
- Add apple pieces along with the remaining ingredients to the Instant Pot, close the lid and cook for 5 minutes. Then allow a natural release of 20 minutes.
- Once completed, open the lid carefully and check the consistency.
- Turn it into apple butter by blending it with an immersion blender or popping the mixture into a normal jug blender until smooth with the lid slightly opened to avoid heat pressure inside the jug. You may like to add sugar or sweetener at this point.
- For slow cooking, turn the Instant Pot to “Slow Cook” and cook on high for about 2 hours, stirring occasionally, with the lid propped on but not latched so the steam discharges. Alternatively, use a splatter guard. You can cook even more, up to 4 hours. The longer it cooks, the darker, thicker and sweeter it gets.
- Once done allow it to cool in the pot, remove the cinnamon stick, and place it in a jar with a lid and store it in the fridge for up to 3 weeks.
Notes
- Type of Apples: Any apple can work for this recipe, but it will vary in taste and texture. Softer apples are best (e.g., Fuji, Honeycrisp, MacIntosh, Golden Grimes). Using a mix can result in a really balanced flavor profile!
- Quick cooking: Set the Instant Pot to sauté mode and continue cooking the apple butter to reduce for 30 minutes to 1 hour, depending on the desired consistency.
- Thickness of the apple butter: No artificial thickening is required because the apple butter can thicken, become richer, and become velvety as it cools down!
- Safety tip: The apple butter splatters a lot, use a splatter guard if available and wear mittens while stirring it. Stir frequently to avoid burning!
- Burn notice: Different models of the Instant Pot can sometimes behave a bit differently! If you get a burn notice, add half a cup of apple cider or water.
Nutrition
Nutrition information is automatically calculated, so should only be used as an approximation.


made a large batch of this to enjoy this fall on our english muffins and its such a nice treat. i love the ground ginger and nutmeg-just like my grandma used to make it!
I’m ready for all things fall, so I had to make some of this apple butter today. Wow, so delicious! The spices were just perfect, and the Instant Pot made the process so simple.